Care and Cleaning
Cleaning—Outside
The water and ice dispenser spill shelf should be wiped dry immediately to prevent spotting. Water lefi on shelf may leave deposits you can remove by soaking with undiluted vinegar. You can also use paste of
The door handles and trim can be cleaned with a cloth dampened with a solution of mild liquid dishwashing detergent and water. Dry with a soft cloth. Don’t use wax on the door handles or trim.
Keep the finish clean. Wipe with a clean cloth lightly dampened with kitchen appliance wax or mild liquid dishwashing detergent. Dry and polish with a clean, soft cloth. Do not wipe the refrigerator with a soiled dishwashing cloth or wet towel. These may leave a residue that can damage the paint. Do
not use scouring pads, powdered cleaners, bleach or cleaners containing bleach because these products can scratch and weaken the paint finish.
Protect the paint finish. The finish on the outside of the refrigerator is
ahigh quality,
Appliance Polish Wax & Cleaner (Cat. No. WRWX0216) is available from Hotpoint Appliance Parts Marts.
Cleaning—Inside
Inside the fresh food and freezer compartments should be cleaned at least once a year. Unplug the refrigerator before cleaning. If this is not practical, wring excess moisture out of sponge or cloth when cleaning around switches, lights or controls.
Use warm water and baking soda
Other parts of the refrigerator— including door gaskets, meat and vegetable drawers, ice storage bin and all plastic
To help prevent odors, leave
an open box of baking soda in the rear of the refrigerator, on the top shelf. Change the box every three months. An open box of baking soda in the freezer will absorb stale freezer odors.
W not wash any plastic parts from your refrigerator in your automatic dishwasher.
Drain opening in freezer compartment. During yearly cleaning, remove bottom freezer basket and flush a solution of baking soda (one teaspoon) and two cups of hot (not boiling) water through the drain line with the help of a meat baster. This will help eliminate odor and reduce the likelihood
of a clogged drain line.
If drain becomes |
| ! | ||
clogged, use a |
| .1.=2%.’; | ||
meat baster and |
| |||
| ‘ & | |||
| ||||
water | solution | to ~ | ||
force | the |
| ||
clog | ||||
through the |
| |||
l..— ). | ||||
drain line. | ||||
| L | |||
Continue flushing until line is clear, then empty and replace the defrost water pan immediately.
Behind Refrigerator
Care should be taken in moving your refrigerator away from the wall. All types of floor coverings can be damaged, particularly cushioned coverings and those with embossed surfaces. Pull the refrigerator straight out and return it to position by pushing it straight in. Moving your refrigerator in a side direction may result in damage to your floor covering or refrigerator.
Condenser
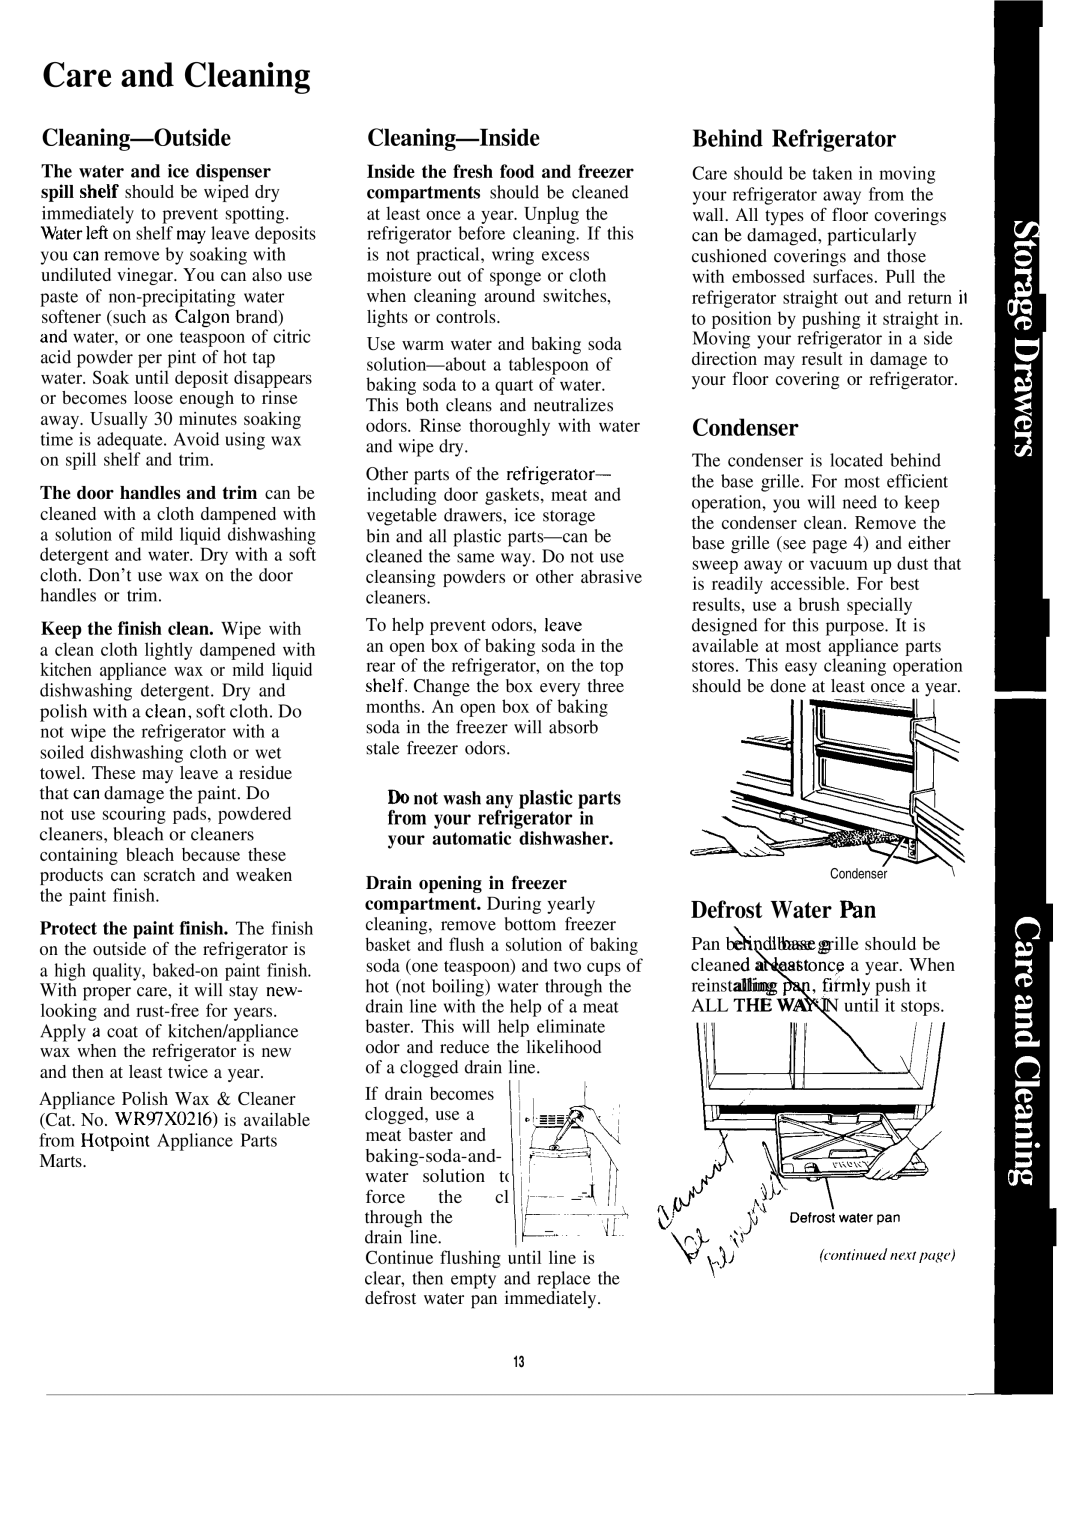
The condenser is located behind the base grille. For most efficient operation, you will need to keep the condenser clean. Remove the base grille (see page 4) and either sweep away or vacuum up dust that is readily accessible. For best results, use a brush specially designed for this purpose. It is available at most appliance parts stores. This easy cleaning operation should be done at least once a year.
Condenser\
Defrost Water Wn
Pan bek“nd base grille should be cleaned a east onc,p a year. When
reinstalling prmly push it ALL THE WA ‘ N until it stops.
13