I~~llatiOn Requirement@
Use of Adapter Plug
Because of potential safety hazards under certain conditions, we strongly recommend against use of an adapter plug. However, if you still elect to use an adapter, where local codes permit, a TEMPORARY CONNE~ION maybe made to a properly grounded
TEMPORARY METHOD
The larger slot in the adapter must be aligned with the larger slot in the wall outlet to provide proper polarity in the connection of the power cord.
CAUTION: Attaching an adapter ground terminal to wall outlet cover screw does not ground an appliance unless cover screw is metal, and not insulated, and wall outlet is grounded through house wiring. You should have circuit checked by a qualified electrician to make sure the outlet is properly grounded.
When disconnecting the power cord from the adapter, always hold the adapter with one hand. If this is not done, the adapter ground terminal is very likely to break with repeated use.
Should the adapter ground terminal break, DO NOT USE the appliance until a proper ground has again been eshblished.
Use of Etiension Cords
Because of potential safety hazards under certain conditions, we strongly recommend against the use of an extension cord. However, if you still elect to use an extension cord, it is absolutely necessary that it be a UL listed
a grounding type plug and outlet and that the electrical rating of the cord be 15 amperes (minimum) and 120 volts.
The refrigerator should always be plugged into its own individual electrical outlet—
(115 volt, 60 Hertz, or 100 volt, 50 Hertz, single phase AC). This is recommended for best performance and to prevent overloading house wiring circuits, which could cause a fire hazard from overheating wires.
Refrigerator bcation
Do not install refrigerator where temperature will go below 60°F. because it will not run often enough to maintain proper temperatures.
Do install it on a floor strong enough to support it fully loaded.
Also see
Clearances
Allow the following clearances for ease of installation, proper air circulation, and plumbing and electrical connections:
Sides . . . . . . . . . . . . . . . 5/8” Top . . . . . . . . . . . . . . . . . . 1“ Back . . . . . . . . . . . . . . . . . 1“
Allow the following door clearance: Sides . . . . . . . . . . . . . . . . 3/4”
Water Supply to Icemaker
You will need to connect your icemaker to a cold water line. A water supply kit containing copper tubing, shutoff valve, fittings and instructions is available at extra cost from your dealer. There should be sufficient tubing for the icemaker from the cold water supply to allow moving the refrigerator out from the wall several feet (approximately 8 feet of 1/4” copper tubing in three
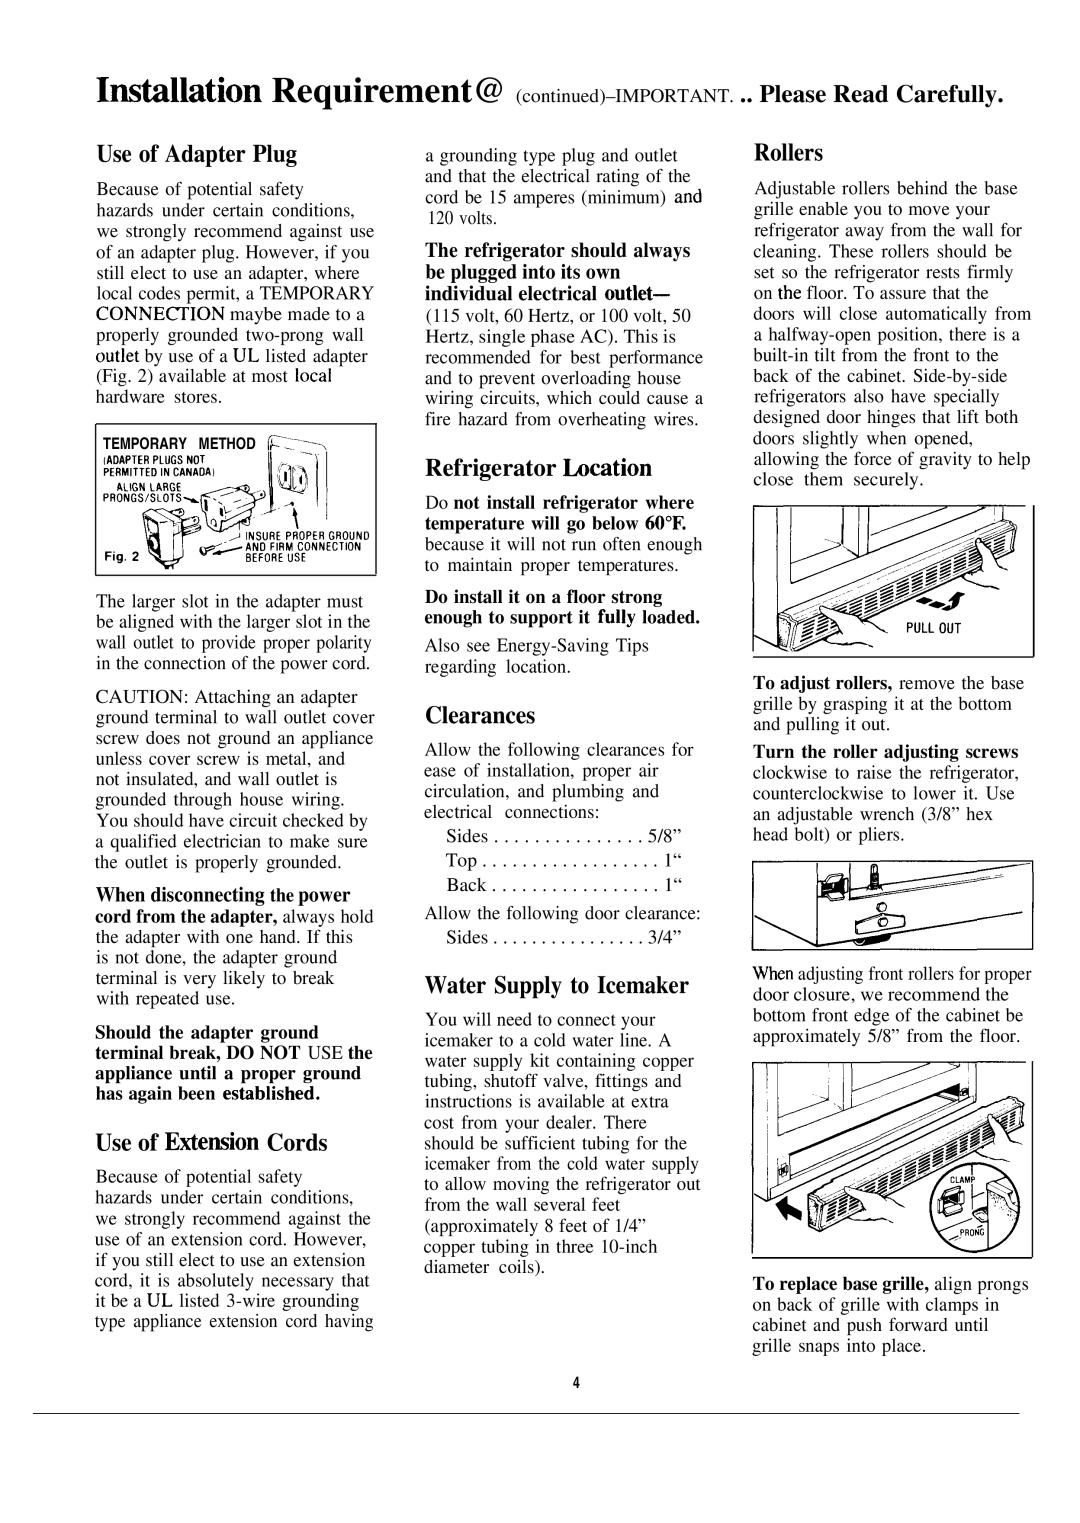
Rollers
Adjustable rollers behind the base grille enable you to move your refrigerator away from the wall for cleaning. These rollers should be set so the refrigerator rests firmly on the floor. To assure that the doors will close automatically from
a
To adjust rollers, remove the base grille by grasping it at the bottom and pulling it out.
Turn the roller adjusting screws clockwise to raise the refrigerator, counterclockwise to lower it. Use an adjustable wrench (3/8” hex head bolt) or pliers.
Wen adjusting front rollers for proper door closure, we recommend the bottom front edge of the cabinet be approximately 5/8” from the floor.
To replace base grille, align prongs on back of grille with clamps in cabinet and push forward until grille snaps into place.
4