USING YOUR OVEN
(continued)
—
Oven Light
Use the switch on the control panel to turn the light on and off.
Oven Moisture
As your oven heats up, the temperature change of the air in the oven may cause water droplets to form on the door glass. These droplets are harmless and will evaporate as the oven continues to heat up.
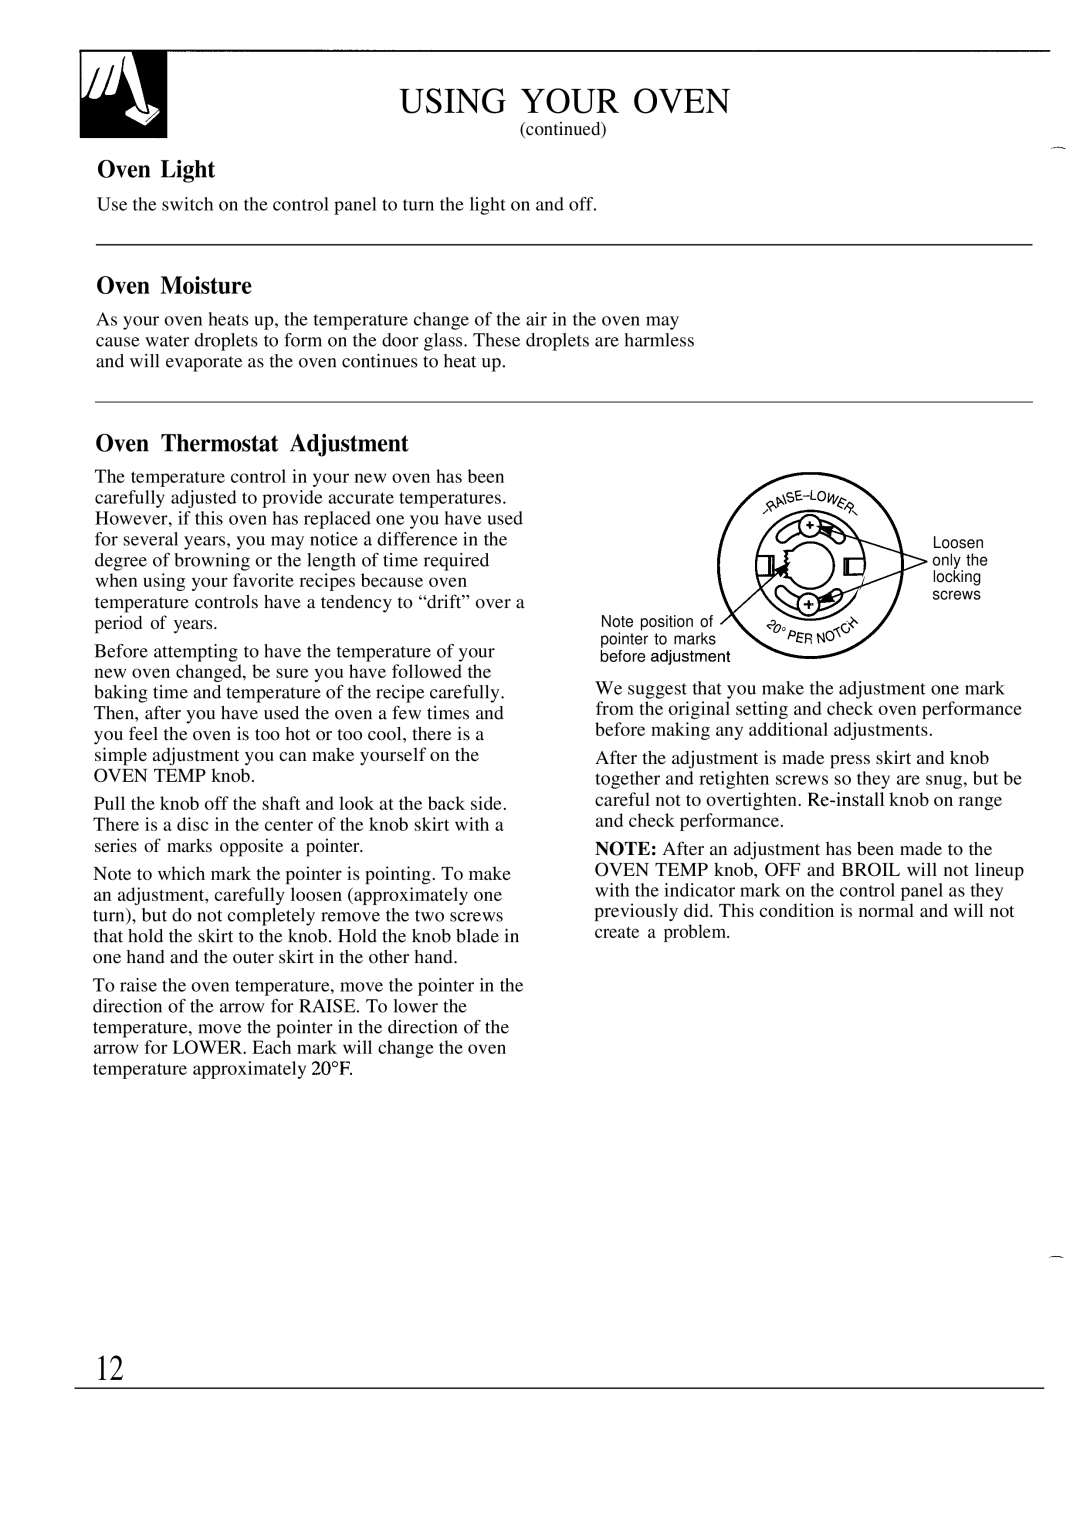
Oven Thermostat Adjustment
The temperature control in your new oven has been carefully adjusted to provide accurate temperatures. However, if this oven has replaced one you have used for several years, you may notice a difference in the degree of browning or the length of time required when using your favorite recipes because oven temperature controls have a tendency to “drift” over a period of years.
Before attempting to have the temperature of your new oven changed, be sure you have followed the baking time and temperature of the recipe carefully. Then, after you have used the oven a few times and you feel the oven is too hot or too cool, there is a simple adjustment you can make yourself on the OVEN TEMP knob.
Pull the knob off the shaft and look at the back side. There is a disc in the center of the knob skirt with a series of marks opposite a pointer.
Note to which mark the pointer is pointing. To make an adjustment, carefully loosen (approximately one turn), but do not completely remove the two screws that hold the skirt to the knob. Hold the knob blade in one hand and the outer skirt in the other hand.
To raise the oven temperature, move the pointer in the direction of the arrow for RAISE. To lower the temperature, move the pointer in the direction of the arrow for LOWER. Each mark will change the oven temperature approximately 20”F.
Loosen only the locking screws
Note position of pointer to marks before adjustme
We suggest that you make the adjustment one mark from the original setting and check oven performance before making any additional adjustments.
After the adjustment is made press skirt and knob together and retighten screws so they are snug, but be careful not to overtighten.
NOTE: After an adjustment has been made to the OVEN TEMP knob, OFF and BROIL will not lineup with the indicator mark on the control panel as they previously did. This condition is normal and will not create a problem.
—
12