CARE AND CLEANING
(continued) | — |
|
Broiler Pan and Rack
After broiling, remove the broiler pan and rack from the broiler compartment. Carefully pour out grease in the pan into a proper container. Wash and rinse the broiler pan and rack in hot, soapy water.
If food has burned on, sprinkle the rack with detergent while hot and cover with wet paper towels or a dishcloth. That way,
Do not store a soiled broiler pan and rack in the oven or broiler compartment.
The broiler pan and rack can also be cleaned in the dishwasher.
Broiler Drawer
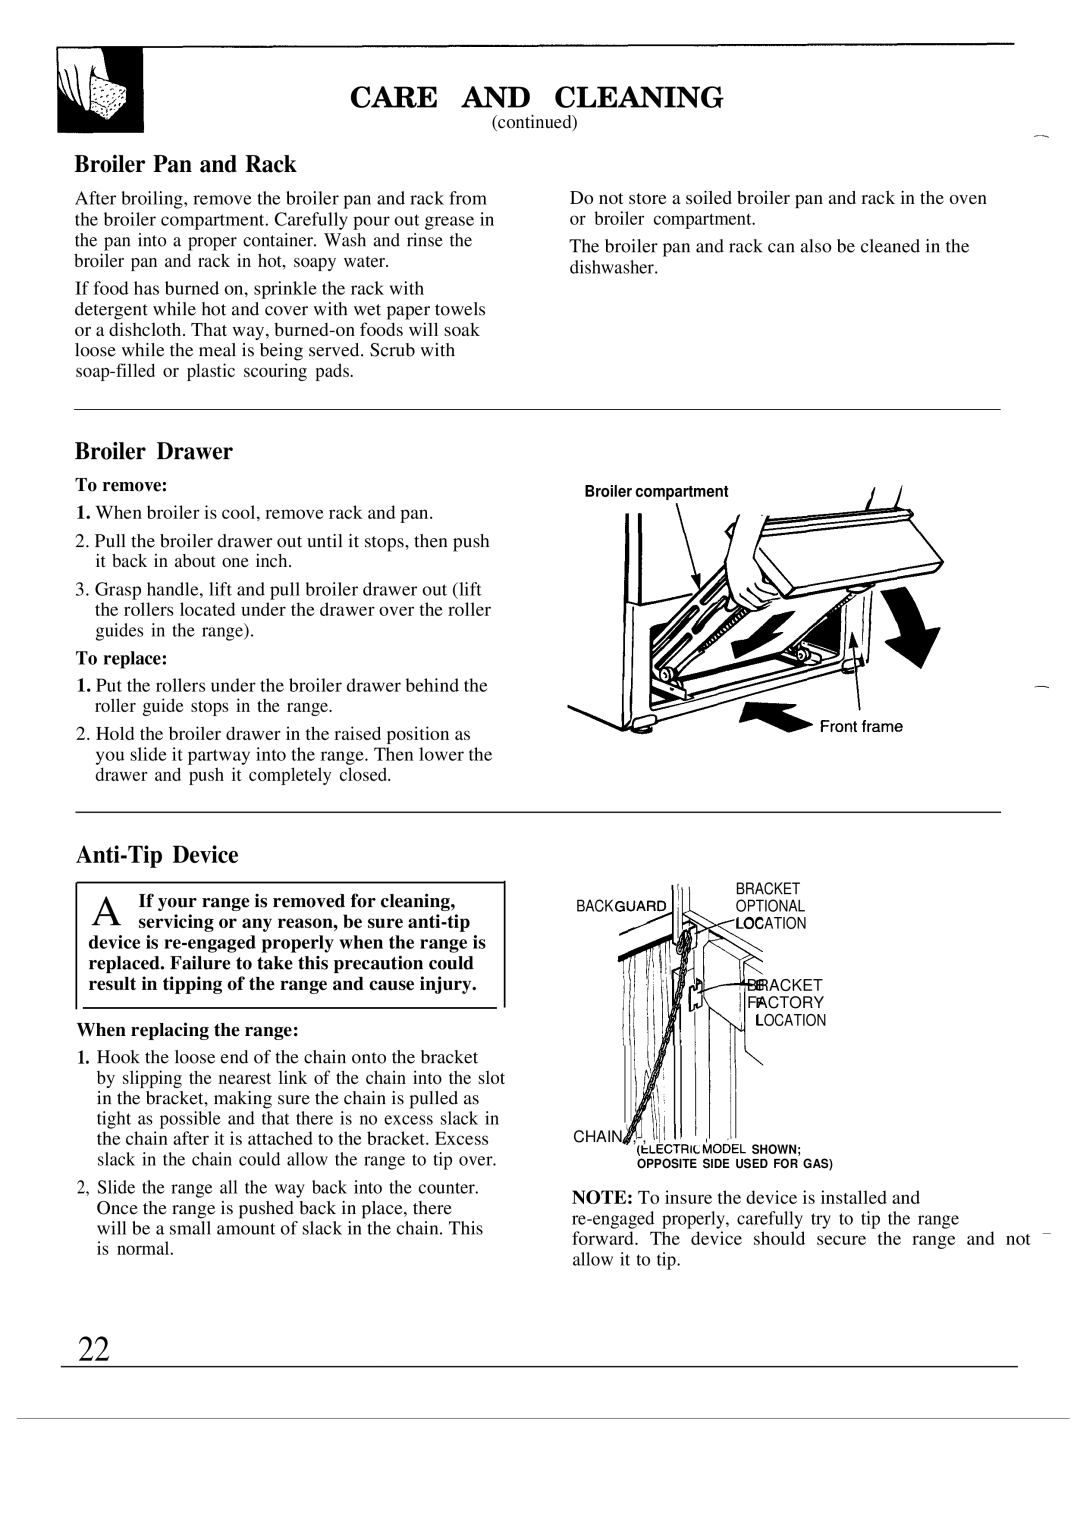
To remove: | Broiler compartment | 11 |
|
1.When broiler is cool, remove rack and pan.
2.Pull the broiler drawer out until it stops, then push it back in about one inch.
3.Grasp handle, lift and pull broiler drawer out (lift the rollers located under the drawer over the roller guides in the range).
To replace: |
|
1. Put the rollers under the broiler drawer behind the | — |
roller guide stops in the range. |
|
2.Hold the broiler drawer in the raised position as you slide it partway into the range. Then lower the drawer and push it completely closed.
Anti-Tip Device
If your range is removed for cleaning, A servicing or any reason, be sure
BRACKET
BACKOPTIONAL LOCATION
?
: BRACKET ~ FACTORY
When replacing the range:
1. Hook the loose end of the chain onto the bracket |
by slipping the nearest link of the chain into the slot |
in the bracket, making sure the chain is pulled as |
tight as possible and that there is no excess slack in |
Ill 11~~
~\l
p,,:
LOCATION
the chain after it is attached to the bracket. Excess |
slack in the chain could allow the range to tip over. |
2, Slide the range all the way back into the counter. Once the range is pushed back in place, there will be a small amount of slack in the chain. This is normal.
CHAIN
(tLtGIH1’- MODEL SHOWN; OPPOSITE SIDE USED FOR GAS)
NOTE: To insure the device is installed and
22