Preparing to install the refrigerator.
Read these instructions completely and carefully.
Water Supply to the Icemaker
If the refrigerator has an icemaker, it will have to be | A water supply kit (containing copper tubing, |
connected to a cold water line. | shutoff valve, fittings and instructions) is available |
| at extra cost from your dealer or from Parts and |
| Accessories, 800.626.2002. |
Refrigerator Location
Do not install the refrigerator where the | Install it on a floor strong enough to support it |
temperature will go below 60°F (16°C) | fully loaded. |
because it will not run often enough to maintain |
|
proper temperatures. |
|
Clearances
Allow the following clearances for ease of | Sides | .3/16″ (4.8 mm) |
installation, proper air circulation and | Side (on hinge side | .21⁄8″ (54 mm) |
plumbing and electrical connections: | next to a wall) | |
| Top | .1″ (25 mm) |
| Back | .1″ (25 mm) |
Safety Instructions Operating Instructions Installation Instructions
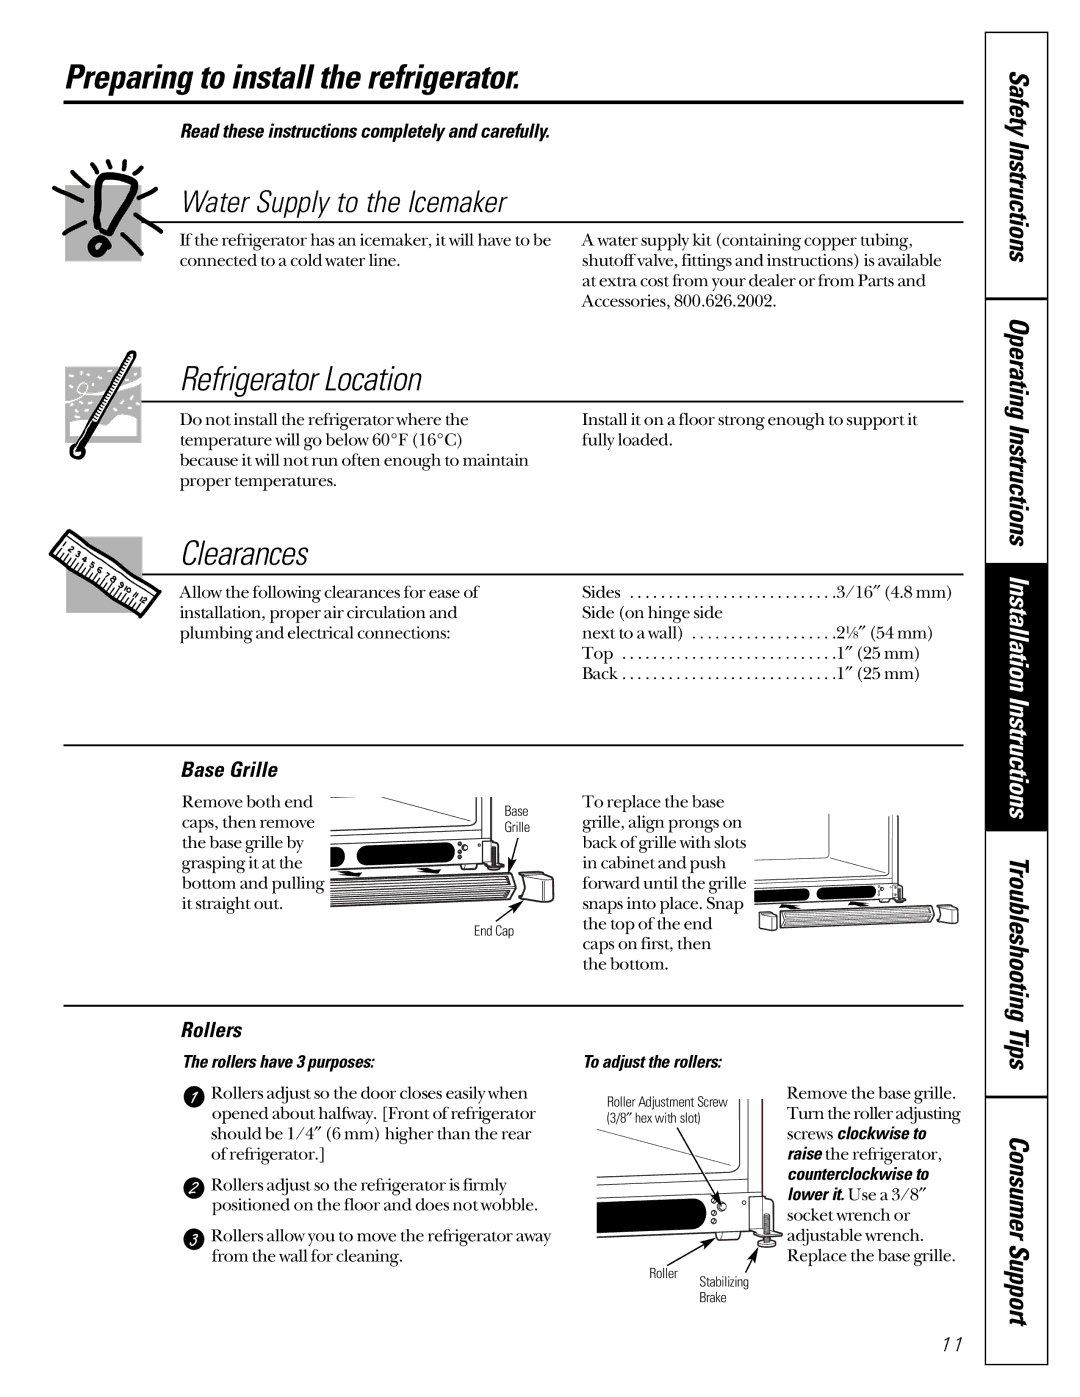
Base Grille
Remove both end caps, then remove
the base grille by grasping it at the bottom and pulling it straight out.
Base
Grille
End Cap
To replace the base grille, align prongs on back of grille with slots
in cabinet and push forward until the grille
snaps into place. Snap the top of the end caps on first, then
the bottom.
Troubleshooting
Rollers
The rollers have 3 purposes:
Rollers adjust so the door closes easily when opened about halfway. [Front of refrigerator should be 1/4″ (6 mm) higher than the rear of refrigerator.]
Rollers adjust so the refrigerator is firmly positioned on the floor and does not wobble.
Rollers allow you to move the refrigerator away from the wall for cleaning.
To adjust the rollers:
Roller Adjustment Screw (3/8″ hex with slot)
Roller
Stabilizing
Brake
Remove the base grille. Turn the roller adjusting screws clockwise to raise the refrigerator, counterclockwise to lower it. Use a 3/8″ socket wrench or adjustable wrench. Replace the base grille.
Tips Consumer Support
11