Installation Instructions

PREPARE HOT WATER LINE

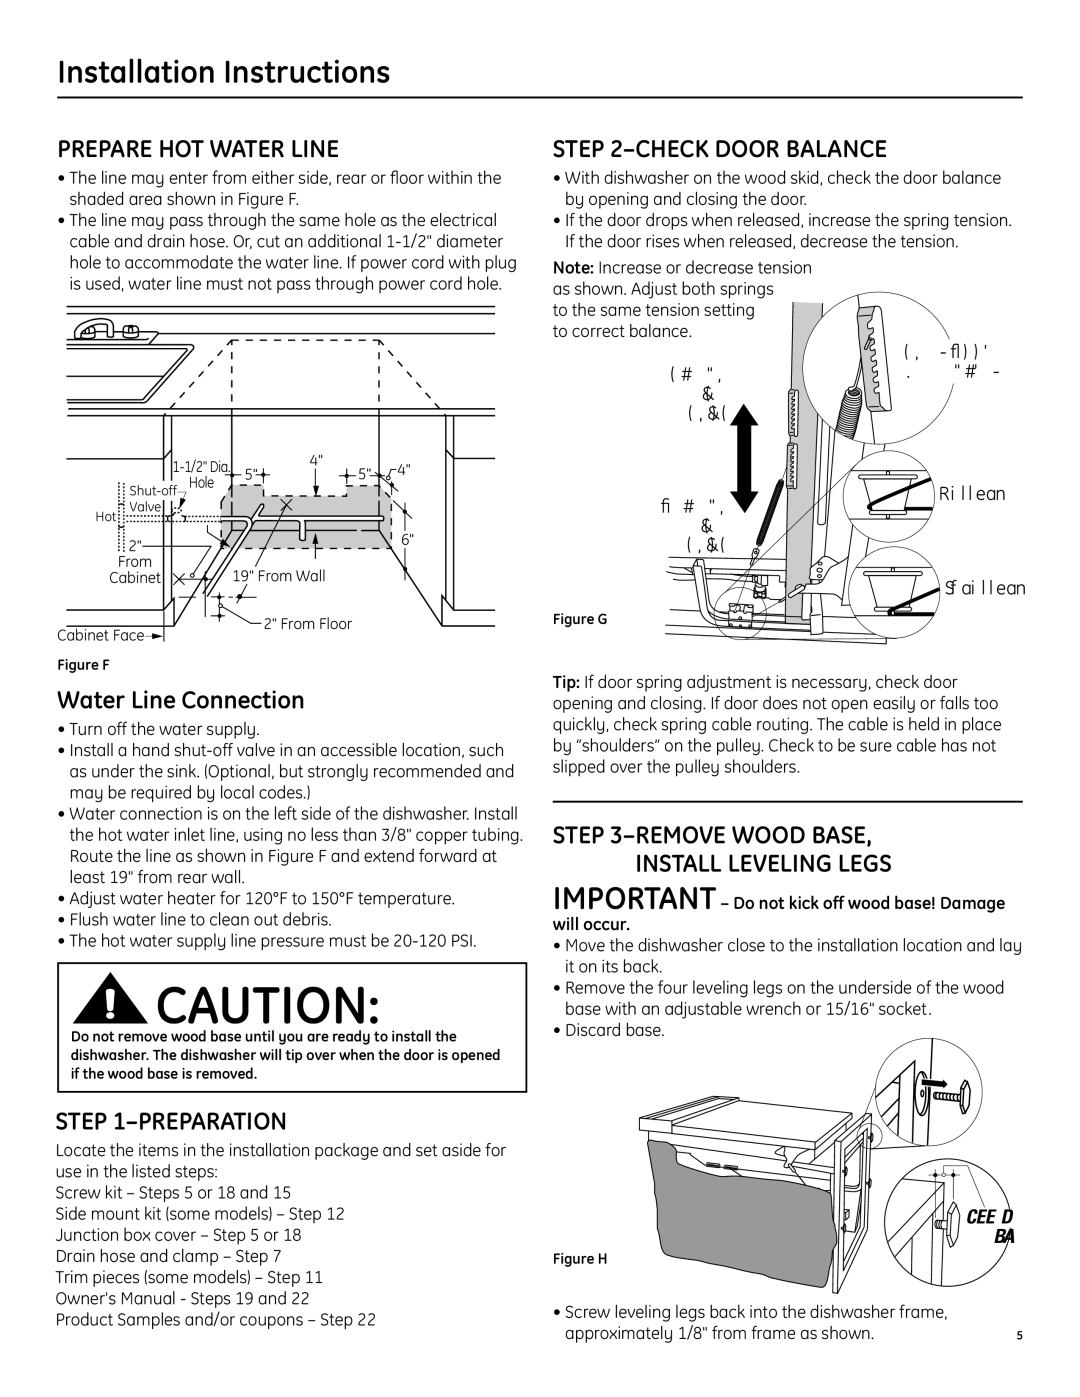
• The line may enter from either side, rear or floor within the

shaded area shown in Figure F.

• The line may pass through the same hole as the electrical

cable and drain hose. Or, cut an additional 1-1/2" diameter

STEP 2–CHECK DOOR BALANCE

With dishwasher on the wood skid, check the door balance by opening and closing the door.

If the door drops when released, increase the spring tension. If the door rises when released, decrease the tension.

hole to accommodate the water line. If power cord with plug

is used, water line must not pass through power cord hole.


1-1/2" Dia.

4"

5" 4"


5"


Shut-off Hole


Hot

Valve


2"


6"


From

19" From Wall


Cabinet


Note: Increase or decrease tension as shown. Adjust both springs

to the same tension setting to correct balance.

Increase

Spring

Tension

Decreas

Spring

Tension

Insert Hook

Over Bracket

Correct

Incorrect

Cabinet Face

Figure F

2" From Floor

Figure G

Water Line Connection

Turn off the water supply.

Install a hand shut-off valve in an accessible location, such as under the sink. (Optional, but strongly recommended and may be required by local codes.)

Water connection is on the left side of the dishwasher. Install the hot water inlet line, using no less than 3/8" copper tubing. Route the line as shown in Figure F and extend forward at least 19" from rear wall.

Adjust water heater for 120°F to 150°F temperature.

Flush water line to clean out debris.

The hot water supply line pressure must be 20-120 PSI.

CAUTION:

Do not remove wood base until you are ready to install the dishwasher. The dishwasher will tip over when the door is opened if the wood base is removed.

STEP 1–PREPARATION

Locate the items in the installation package and set aside for use in the listed steps:

Screw kit – Steps 5 or 18 and 15

Side mount kit (some models) – Step 12

Junction box cover – Step 5 or 18

Drain hose and clamp – Step 7

Trim pieces (some models) – Step 11

Owner's Manual - Steps 19 and 22

Product Samples and/or coupons – Step 22

Tip: If door spring adjustment is necessary, check door opening and closing. If door does not open easily or falls too quickly, check spring cable routing. The cable is held in place by “shoulders” on the pulley. Check to be sure cable has not slipped over the pulley shoulders.

STEP 3–REMOVE WOOD BASE,

INSTALL LEVELING LEGS

IMPORTANT – Do not kick off wood base! Damage will occur.

Move the dishwasher close to the installation location and lay it on its back.

Remove the four leveling legs on the underside of the wood base with an adjustable wrench or 15/16" socket.

Discard base.

Approx.

1/8"

Figure H

• Screw leveling legs back into the dishwasher frame,


approximately 1/8" from frame as shown.

5

Page 5
Image 5
GE GSD6000, PDW7000 manual Prepare HOT Water Line, Check Door Balance, Preparation, Remove Wood Base Install Leveling Legs

GSD6000, PDW7000 specifications

The GE PDW7000 and GSD6000 are two prominent models in General Electric's lineup of dishwashers, combining advanced technology and practical features to enhance the dishwashing experience. Both models are designed for efficiency, performance, and user satisfaction, catering to various household needs.

The GE PDW7000 is marked by its sleek design and numerous high-end features. One of the key highlights is its advanced wash system, which uses rotating wash arms and a high-efficiency motor to deliver powerful cleaning performance. This model is also equipped with a SmartDispense technology that automatically dispenses the right amount of detergent based on the soil level of the dishes, ensuring an optimal wash every time. Additionally, the unit boasts a noise level rating of around 42 dBA, making it one of the quietest dishwashers on the market, perfect for open-concept living spaces.

In terms of flexibility, the PDW7000 features an adjustable upper rack and a third rack for utensils, providing extra loading capacity and versatility for large families or entertaining. Its multiple wash cycles, including Heavy, Normal, and Speed cycles, cater to different cleaning needs, while the sanitize cycle ensures that harmful bacteria and germs are eliminated. The dishwasher also includes Wi-Fi connectivity, allowing users to manage cycles and receive notifications through a smartphone app.

Conversely, the GE GSD6000 serves as a reliable, budget-friendly alternative without sacrificing essential features. This model focuses on simplicity and practicality, making it ideal for consumers seeking a straightforward appliance. The GSD6000 offers a robust wash system similar to the PDW7000 but is equipped with fewer high-tech features.

With a noise level of around 55 dBA, the GSD6000 is slightly louder than the PDW7000 but still quiet enough for most homes. It provides efficient cleaning thanks to its multiple wash cycles and a heavy-duty upper rack that accommodates various dish sizes.

In summary, both the GE PDW7000 and GSD6000 dishwashers reflect General Electric's commitment to innovation and user-centric design. While the PDW7000 shines with advanced features and noise reduction technology, the GSD6000 offers essential functionalities at an economical price point, appealing to a wide range of consumers. Whether opting for the premium or more basic model, users can expect reliable performance and outstanding cleaning results from GE's dishwasher offerings.