Installation Instructions
WATER LINE INSTALLATION INSTRUCTIONS
5CONNECT WATER SUPPLY TUBING TO REFRIGERATOR
Before making connection to the refrigerator, be sure refrigerator power cord is not plugged into wall outlet.
•Turn water on and flush out the tubing, making certain that all foreign matter is removed from the line.
•Shut the water off after about 1 quart of water has been flushed through the tubing.
NOTE: Some localities may have sand or other foreign matter present in the water supply in such quantities that they may, in time, collect in the screen of the water valve attached to the back of the refrigerator and tend to reduce the water flow to the icemaker. Where such conditions exist, we recommend that an additional filter or strainer be installed in the line near the refrigerator. If a screen type strainer is used, it should be 80 mesh or finer.
•Remove the plastic cap from the water valve and plastic tube assembly.
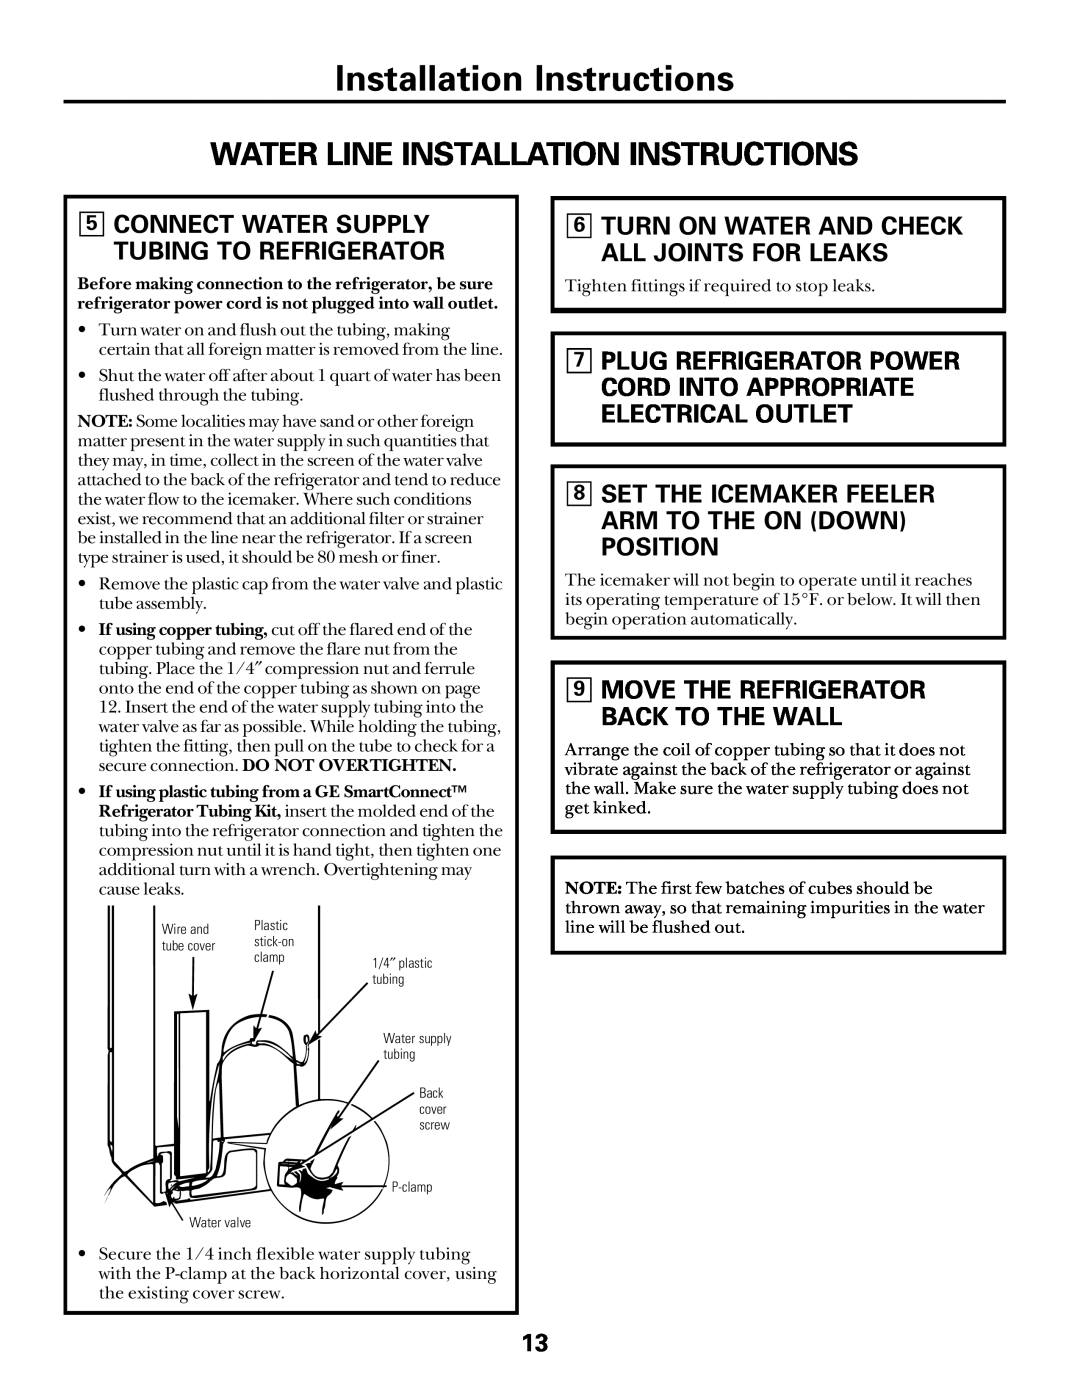
•If using copper tubing, cut off the flared end of the copper tubing and remove the flare nut from the tubing. Place the 1/4″ compression nut and ferrule onto the end of the copper tubing as shown on page 12. Insert the end of the water supply tubing into the water valve as far as possible. While holding the tubing, tighten the fitting, then pull on the tube to check for a secure connection. DO NOT OVERTIGHTEN.
•If using plastic tubing from a GE SmartConnect™ Refrigerator Tubing Kit, insert the molded end of the tubing into the refrigerator connection and tighten the compression nut until it is hand tight, then tighten one additional turn with a wrench. Overtightening may cause leaks.
Wire and |
| Plastic |
|
|
|
|
|
|
|
|
tube cover |
|
|
|
|
|
|
|
|
| |
| clamp |
|
|
|
|
|
|
|
| |
|
|
|
|
|
|
|
|
|
| |
|
|
| 1/4″ plastic |
|
|
| ||||
|
|
|
|
| ||||||
|
|
|
|
|
|
| ||||
|
|
|
| tubing |
|
|
| |||
|
|
|
|
|
| |||||
|
|
|
|
|
|
|
|
|
|
|
|
|
|
|
|
|
|
|
|
|
|
|
|
|
|
| Water supply |
|
|
| ||
|
|
|
|
| tubing |
|
|
| ||
|
|
|
|
|
|
|
|
|
|
|
|
|
|
|
|
|
|
|
|
|
|
|
|
|
|
|
|
| Back |
|
|
|
|
|
|
|
|
|
| cover |
|
|
|
|
|
|
|
|
|
| screw |
|
|
|
|
|
|
|
|
|
|
|
|
|
|
|
|
|
|
|
|
|
|
|
|
|
|
|
|
|
|
|
|
|
| ||
|
|
|
|
|
|
|
|
|
|
|
Water valve
•Secure the 1/4 inch flexible water supply tubing with the
6TURN ON WATER AND CHECK ALL JOINTS FOR LEAKS
Tighten fittings if required to stop leaks.
7PLUG REFRIGERATOR POWER CORD INTO APPROPRIATE ELECTRICAL OUTLET
8SET THE ICEMAKER FEELER ARM TO THE ON (DOWN) POSITION
The icemaker will not begin to operate until it reaches its operating temperature of 15°F. or below. It will then begin operation automatically.
9MOVE THE REFRIGERATOR BACK TO THE WALL
Arrange the coil of copper tubing so that it does not vibrate against the back of the refrigerator or against the wall. Make sure the water supply tubing does not get kinked.
NOTE: The first few batches of cubes should be thrown away, so that remaining impurities in the water line will be flushed out.
13