The Rotisserie System
Stainless Steel Outdoor Cooking Center
Rotisserie system
(on some models)
The rotisserie system is designed to cook items from the back of the grill using infrared heat.
The rotisserie burner is an infrared type which provides intense searing radiant heat. This intense heat is magnificent for searing in the natural juices and nutrients found in quality cuts of meat.
Once lit, the rotisserie burner will reach cooking temperatures in about 1 minute. The orange/red glow will even out in about 5 minutes.
If an extension cord is required to operate the rotisserie motor, use only a grounded cord approved for outdoor use. Use as short as possible cord and avoid wet areas.
The rotisserie motor is equipped with metal gears and is capable of turning up to a 15 or 20 lb. cut of meat or poultry. The actual capacity is limited by clearance and motor torque.
Maximum 27 ″ model | 15 lb. turkey |
Maximum 36 ″, 48 ″ models . . . . . . . . . 20 lb. turkey
WARNING: Electrical Grounding Instructions
Assembly
This appliance rotisserie motor is equipped | The rotisserie motor must be electrically |
with a | grounded in accordance with local codes or, in |
protection against shock hazard and should be | the absence of local codes, with the National |
plugged directly into a properly grounded | Electrical Code, ANSI/NFPA |
| |
the grounding prong from the plug. |
|
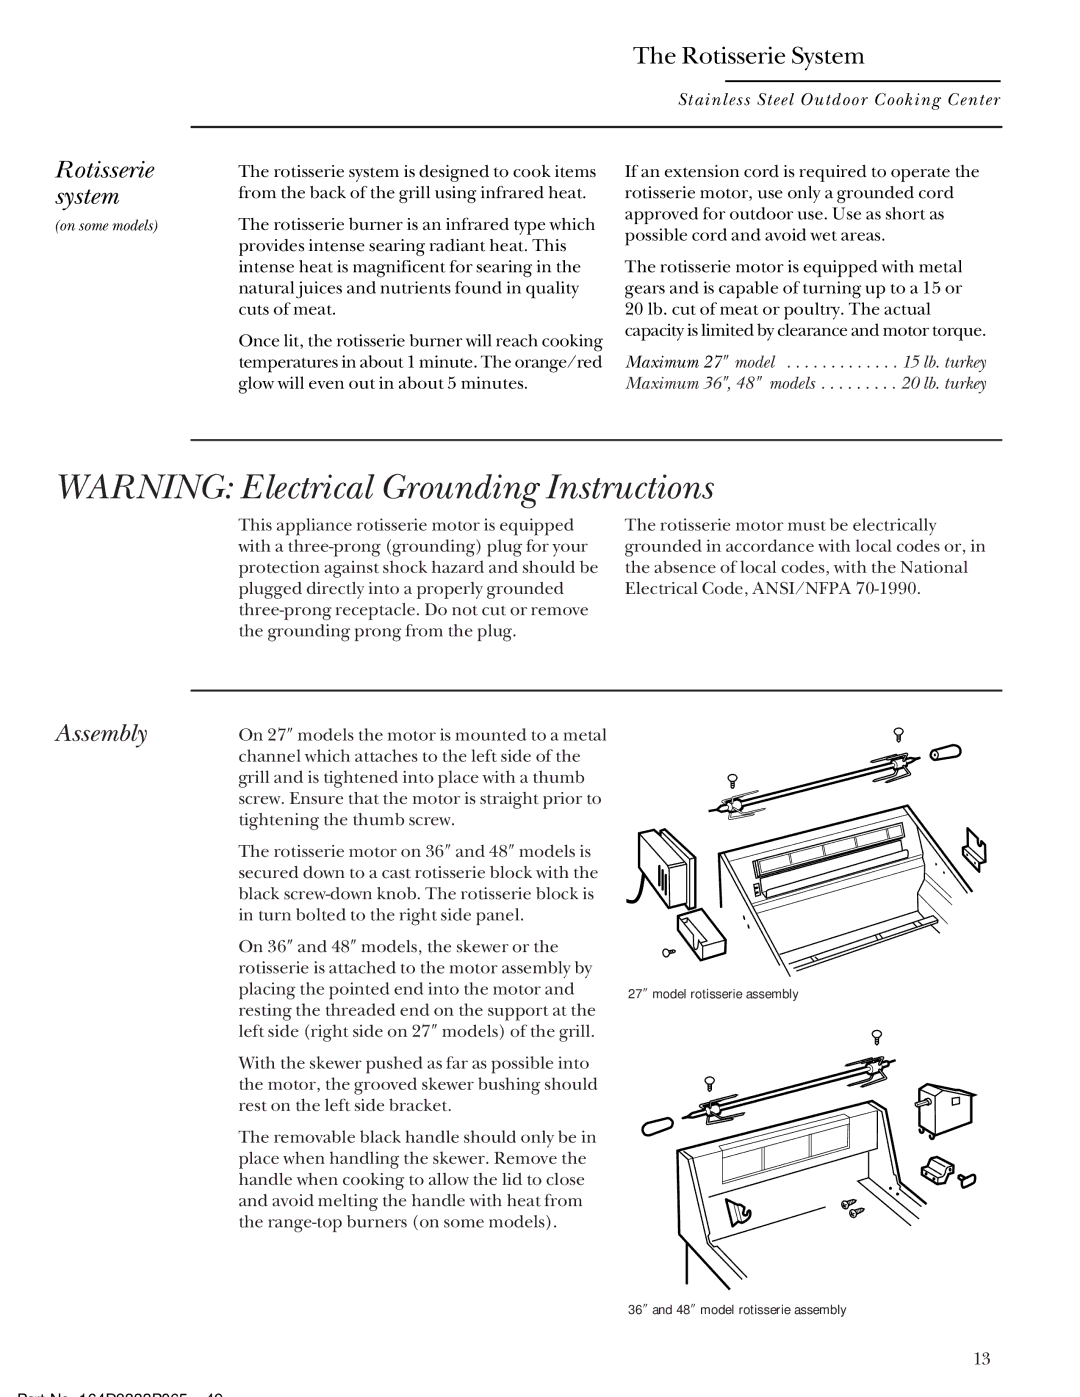
On 27″ models the motor is mounted to a metal channel which attaches to the left side of the grill and is tightened into place with a thumb screw. Ensure that the motor is straight prior to tightening the thumb screw.
The rotisserie motor on 36″ and 48″ models is secured down to a cast rotisserie block with the black
On 36″ and 48″ models, the skewer or the rotisserie is attached to the motor assembly by
placing the pointed end into the motor and 27″ model rotisserie assembly resting the threaded end on the support at the
left side (right side on 27″ models) of the grill.
With the skewer pushed as far as possible into the motor, the grooved skewer bushing should rest on the left side bracket.
The removable black handle should only be in place when handling the skewer. Remove the handle when cooking to allow the lid to close and avoid melting the handle with heat from the
36″ and 48″ model rotisserie assembly
13
Part No 164D3333P065 49
