STEP 4

PROVIDE ADEQUATE GAS SUPPLY

This cooktop is designed to operate on natural gas at 4″ of water column pressure or on LP gas at 10″ of water column pressure. It is shipped from the factory set for natural gas. If you decide to use this cooktop with LP gas, conversion adjustments must be made by a service technician or other qualified person.

A pressure regulator is to be connected in series with the manifold of the cooktop and must remain in series with the supply line regardless of whether natural or LP gas is being used.

For proper operation, the maximum inlet pressure to the regulator must be no more than 10water column pressure for natural gas, or 14water column pressure for LP gas. For checking the regulator, the inlet pressure must be at least 1″ greater than the regulator output setting. If the regulator is set for 4″ of water column pressure, the inlet pressure must be at least 5″. If the regulator is set for 10″, the inlet pressure must be at least 11″.

For ease of installation, and if local codes permit, the gas supply line into the cooktop should be 1/2″ or 3/4″ I.D. flexible metal appliance connector three to five feet in length.

STEP 5

INSTALLING THE COOKTOP

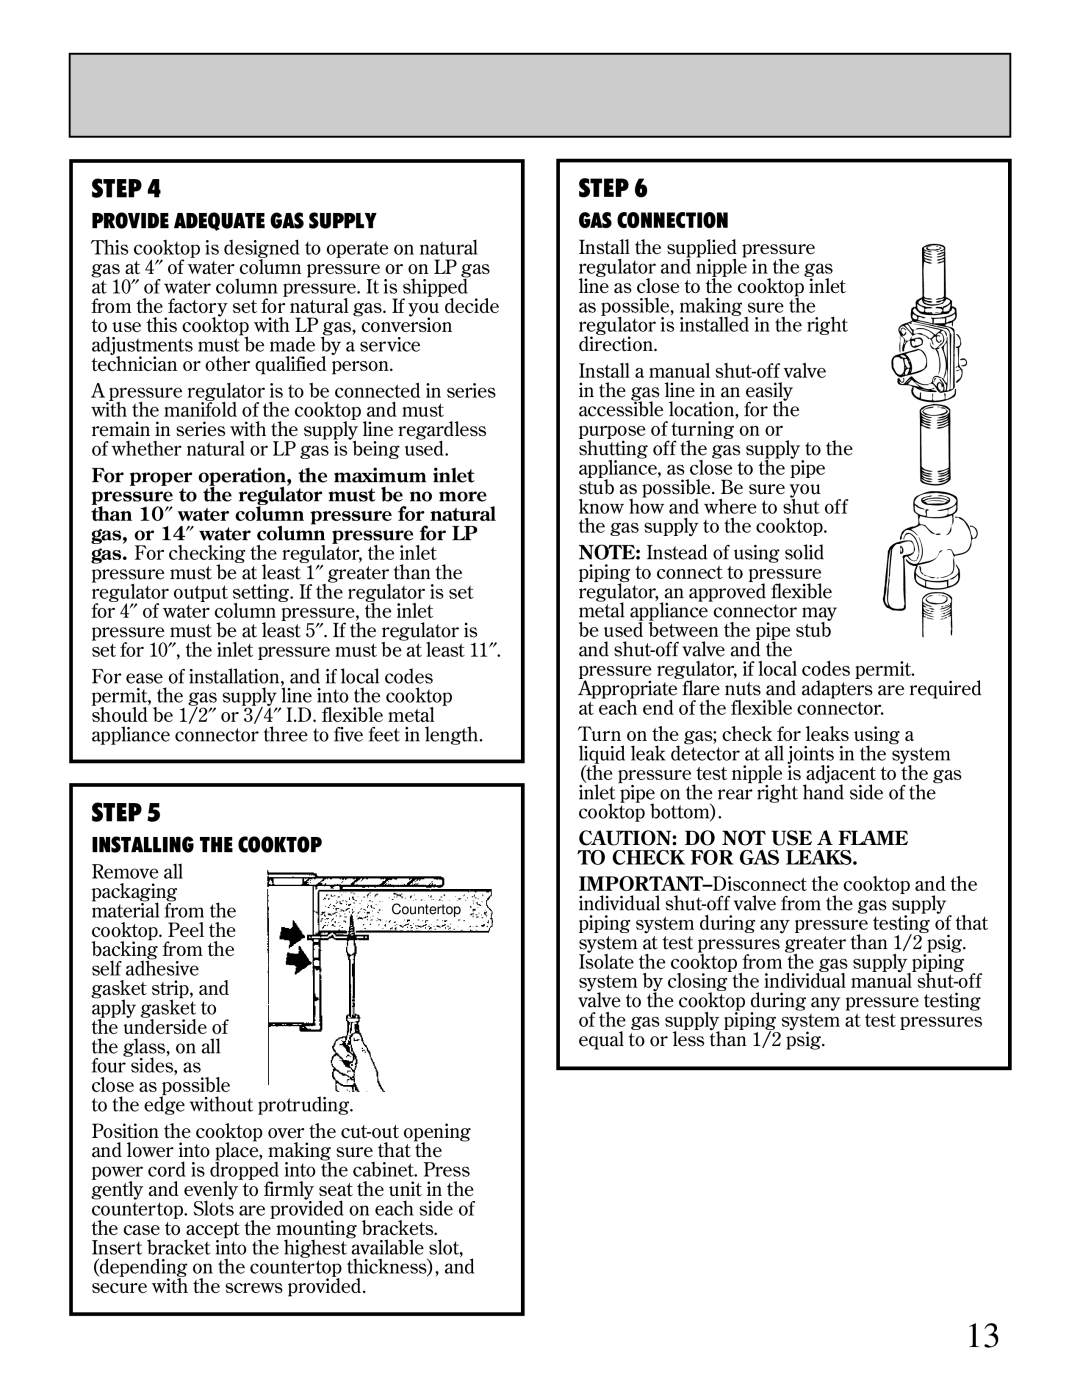
Remove all packaging

material from theCountertop cooktop. Peel the

backing from the self adhesive gasket strip, and apply gasket to the underside of the glass, on all four sides, as close as possible

to the edge without protruding.

Position the cooktop over the cut-out opening and lower into place, making sure that the power cord is dropped into the cabinet. Press gently and evenly to firmly seat the unit in the countertop. Slots are provided on each side of the case to accept the mounting brackets. Insert bracket into the highest available slot, (depending on the countertop thickness), and secure with the screws provided.

STEP 6

GAS CONNECTION

Install the supplied pressure regulator and nipple in the gas

line as close to the cooktop inlet

as possible, making sure the regulator is installed in the right direction.

Install a manual shut-off valve

in the gas line in an easily accessible location, for the purpose of turning on or

shutting off the gas supply to the appliance, as close to the pipe stub as possible. Be sure you

know how and where to shut off the gas supply to the cooktop.

NOTE: Instead of using solid piping to connect to pressure regulator, an approved flexible metal appliance connector may be used between the pipe stub

and shut-off valve and the

pressure regulator, if local codes permit. Appropriate flare nuts and adapters are required at each end of the flexible connector.

Turn on the gas; check for leaks using a liquid leak detector at all joints in the system (the pressure test nipple is adjacent to the gas inlet pipe on the rear right hand side of the cooktop bottom).

CAUTION: DO NOT USE A FLAME TO CHECK FOR GAS LEAKS.

IMPORTANT–Disconnect the cooktop and the individual shut-off valve from the gas supply piping system during any pressure testing of that system at test pressures greater than 1/2 psig. Isolate the cooktop from the gas supply piping system by closing the individual manual shut-off valve to the cooktop during any pressure testing of the gas supply piping system at test pressures equal to or less than 1/2 psig.

13

Page 13
Image 13
GE Monogram ZGU651, ZGU650 manual Provide Adequate GAS Supply, Installing the Cooktop, GAS Connection

ZGU651, ZGU650 specifications

The GE Monogram ZGU650 and ZGU651 are premium gas cooktops that embody sophistication and performance, ideal for culinary enthusiasts and professional chefs alike. These models stand out with their sleek design, incorporating brushed stainless steel finishes that not only enhance the aesthetic of any modern kitchen but also ensure durability and ease of cleaning.

A key feature of both ZGU650 and ZGU651 models is their powerful cooking capabilities, equipped with four high-performance burners that deliver intense heat and precise control. The front burners are capable of generating up to 20,000 BTUs, providing the flexibility to sear meats at high temperatures or simmer sauces delicately. Additionally, these cooktops feature a powerful 5,000 BTU simmer burner, perfect for melting chocolate or preparing delicate sauces without scorching.

The ZGU650 and ZGU651 are designed with versatility in mind, showcasing a variety of burner sizes to accommodate different cookware. The sealed burners help to contain spills, making cleanup straightforward after extensive cooking sessions. Both models also come with a continuous grates system, allowing for easy movement of pots and pans across burners without the need to lift them.

Safety is paramount in the design of these cooktops, featuring electronic ignition that ensures a reliable spark every time. Moreover, each burner includes a flame failure system, which automatically shuts off the gas supply if the flame goes out, providing peace of mind to the user.

In addition to their functional attributes, these cooktops incorporate advanced technology for added convenience. They come with a stylish and intuitive control panel, providing precise temperature control and ensuring a seamless cooking experience. The LED indicator lights are designed to enhance visibility, allowing chefs to easily monitor the status of their burners.

The ZGU650 and ZGU651 are designed for easy installation and integration into various kitchen layouts. They boast a compact design, ensuring they fit seamlessly into both large and small spaces without compromising performance.

In summary, the GE Monogram ZGU650 and ZGU651 gas cooktops are perfect for those who appreciate elegance combined with high-performance features. With their powerful burners, safety features, intuitive controls, and stylish design, these cooktops are sure to elevate the cooking experience in any home. Whether you are whipping up a gourmet meal or enjoying a casual dinner, these cooktops are engineered to meet the demands of every culinary endeavor.