Installation
Dual Burner Outdoor Cooktop
Step2A
Installation
Into An
Enclosure
(Skip this step
if burner is installed
on a grill cart)
•All
Clearances to Combustibles:
•Allow at least 6" clearance from the back and sides to any combustible material.
•Allow at least 1" clearance below the cooking surface on all sides.
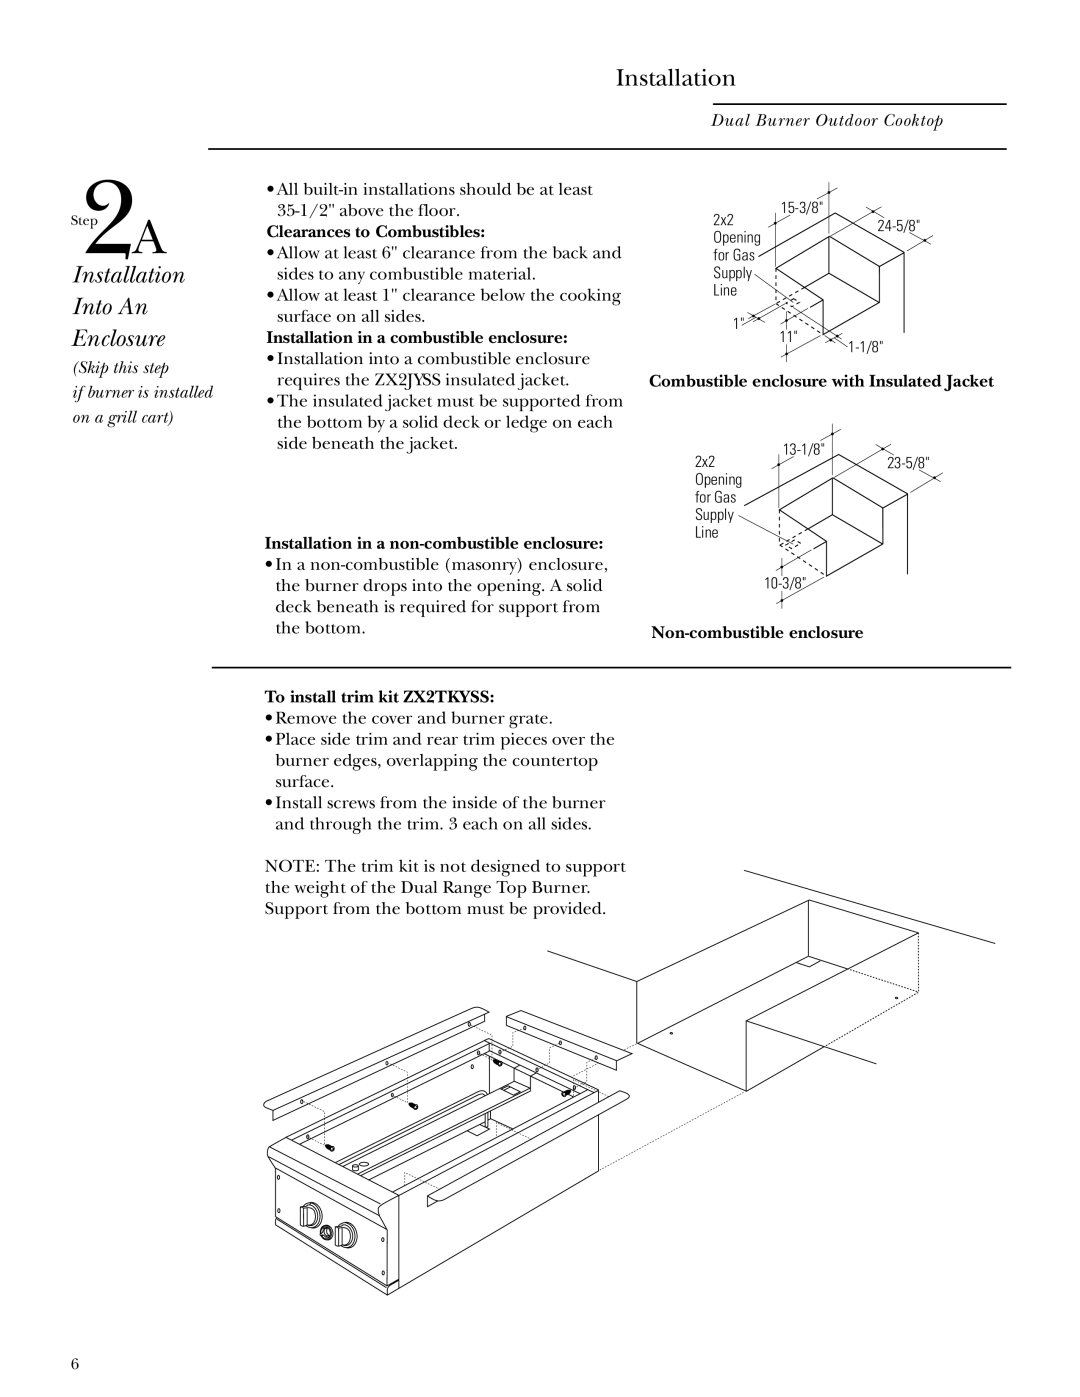
Installation in a combustible enclosure:
•Installation into a combustible enclosure requires the ZX2JYSS insulated jacket.
•The insulated jacket must be supported from the bottom by a solid deck or ledge on each side beneath the jacket.
Installation in a non-combustible enclosure:
•In a
2x2 | ||
Opening | ||
| ||
for Gas |
| |
Supply |
| |
Line |
|
1" ![]()
![]() 11"
11"
Combustible enclosure with Insulated Jacket
2x2 | |
Opening |
|
for Gas |
|
Supply |
|
Line |
|
Non-combustible enclosure
To install trim kit ZX2TKYSS:
•Remove the cover and burner grate.
•Place side trim and rear trim pieces over the burner edges, overlapping the countertop surface.
•Install screws from the inside of the burner and through the trim. 3 each on all sides.
NOTE: The trim kit is not designed to support the weight of the Dual Range Top Burner. Support from the bottom must be provided.
6
