
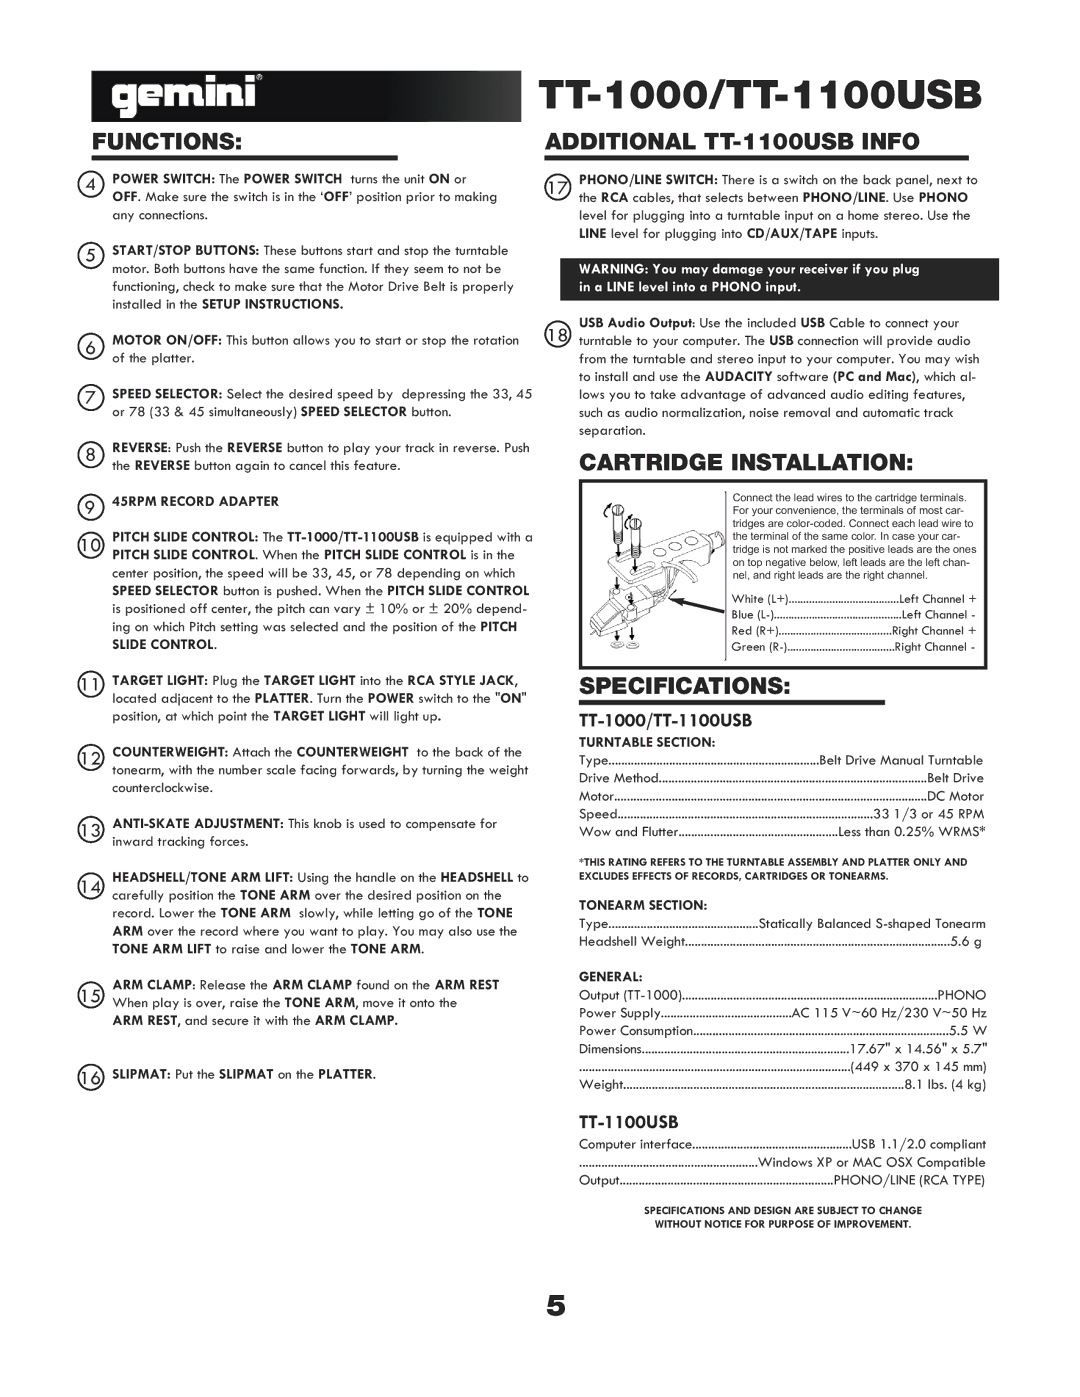
TT-1000, TT-1100 USB specifications
The Gemini TT-1100 USB and TT-1000 are two exceptional turntables designed to meet the needs of both novice and professional DJs. These models combine modern technology with high-quality craftsmanship, making them ideal for a variety of audio applications, from live performances to home listening.The Gemini TT-1100 USB is particularly notable for its USB connectivity, allowing users to easily digitize their vinyl records. This feature enables DJs and audiophiles to preserve their vinyl collections in digital formats, making it easier to share and access music across various devices. The USB output offers a simple plug-and-play setup, ensuring a hassle-free recording process.
In terms of performance, the TT-1100 USB boasts a direct drive motor, which delivers consistent speed and exceptional torque tailored for professional-grade mixing. This high-torque motor minimizes the startup time for tracks, allowing DJs to beat-match effortlessly and maintain smooth transitions during live sets. With a pitch control range spanning ±8% and ±16%, DJs can adjust the tempo to perfectly align tracks, enhancing their mixes' creativity.
The Gemini TT-1000, on the other hand, also features a reliable direct drive motor that ensures accuracy and stability necessary for professional use. It showcases a sturdy build that contributes to reduced vibrations and improved sound quality, making it an excellent choice for both club environments and home setups.
Both turntables come equipped with a high-quality S-shaped tonearm that facilitates precise tracking of vinyl grooves. The tonearm’s adjustable counterweight allows users to fine-tune tracking force, ensuring optimal performance while minimizing record wear. The anti-skate feature enhances playback stability, enabling DJs to perform with confidence while manipulating the turntable.
The Gemini TT-1100 USB and TT-1000 are designed with durable construction and aesthetically appealing designs. Their user-friendly interface makes them accessible to newcomers while still catering to the requirements of experienced DJs. Each model features a removable dust cover, protecting the turntable while not in use, and a standard RCA output that easily connects to mixers and amplifiers.
Overall, the Gemini TT-1100 USB and TT-1000 are versatile turntables that showcase the perfect blend of technology and design. Whether it's digitizing cherished vinyl or live mixing at events, these models provide the reliability and quality that modern DJs expect. With exceptional features, robust construction, and innovative technologies, they are vital tools for anyone serious about their craft.