4.Slide the tool rest to within a maximum of 1/16"(1.5 mm) from the wheel. Rotate the wheel one full revolution by hand to ensure the wheel does not contact the tool rest.
5.Tighten the locking knob firmly to retain the assembly.
6.Repeat the assembly operation for the RIGHT tool rest.
Mounting Bench Grinder
If during operation of the bench grinder there is any tendency for the grinder to slide or "walk" or to tip over, then the grinder must be secured to a work bench or other supporting surface using fasteners (not supplied) through the two holes in the grinder base.
Before mounting the grinder to a work bench or similar surface, determine the ideal mounting position by performing a series of
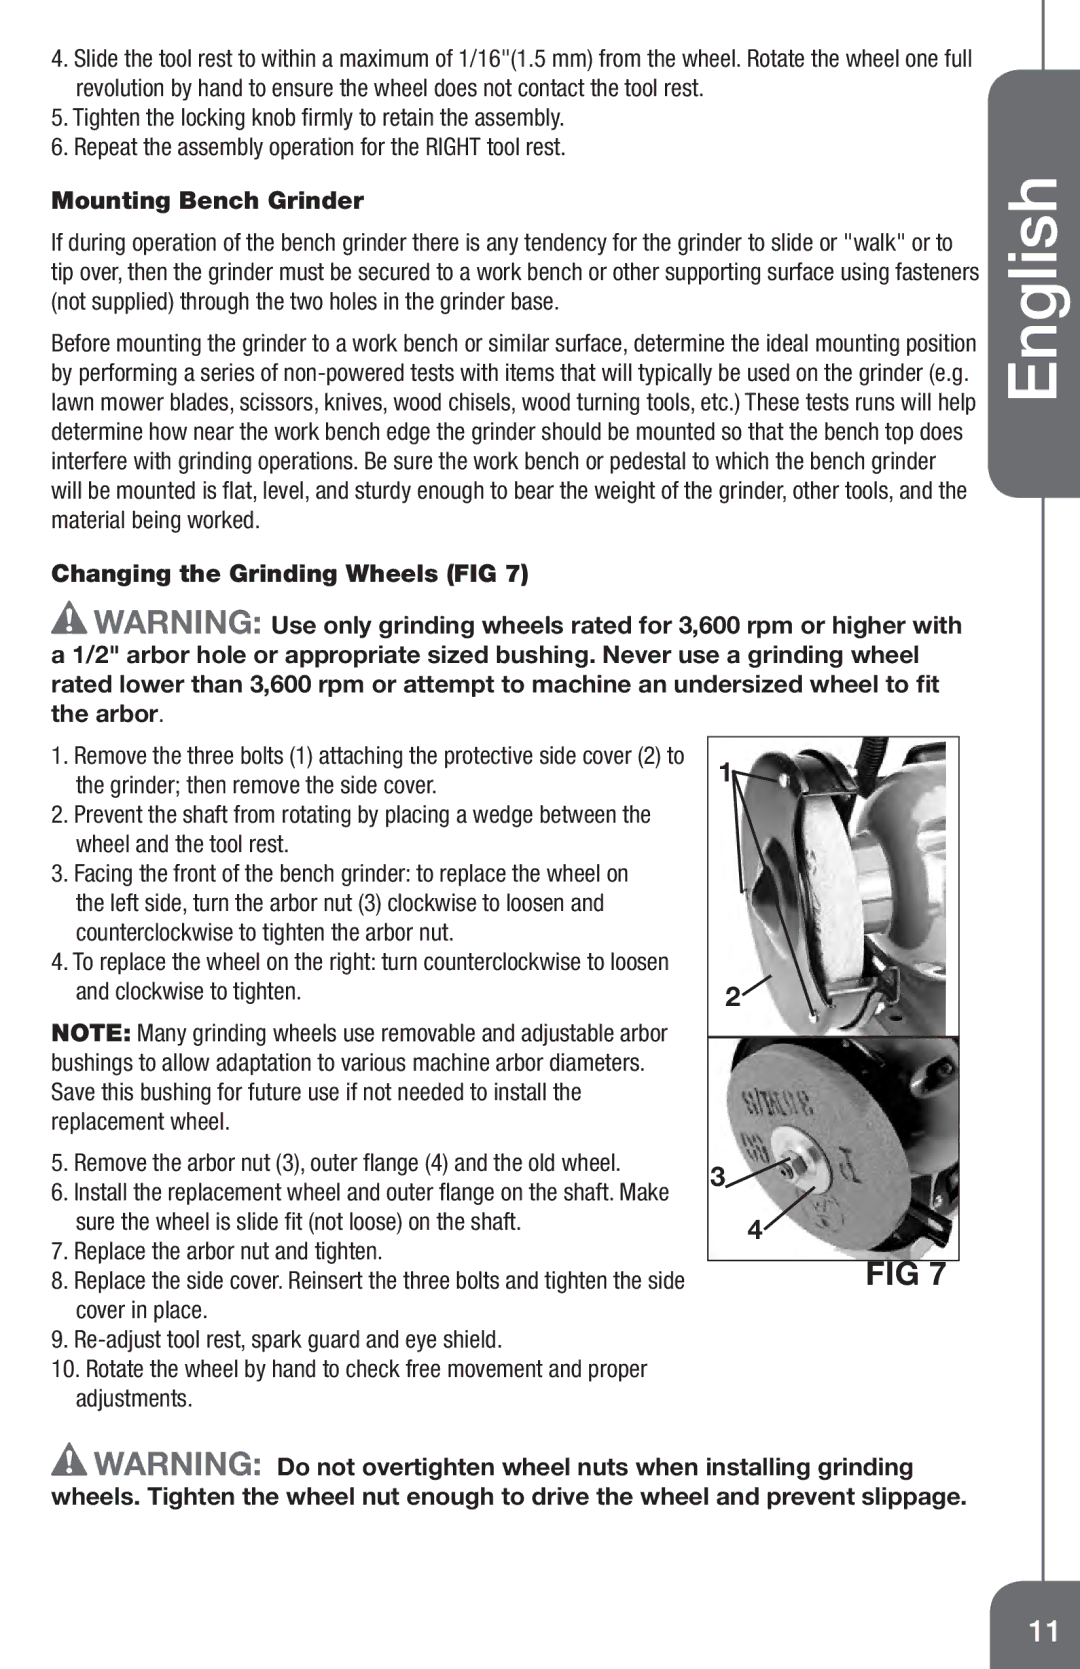
Changing the Grinding Wheels (FIG 7)
![]() WARNING: Use only grinding wheels rated for 3,600 rpm or higher with a 1/2" arbor hole or appropriate sized bushing. Never use a grinding wheel rated lower than 3,600 rpm or attempt to machine an undersized wheel to fit the arbor.
WARNING: Use only grinding wheels rated for 3,600 rpm or higher with a 1/2" arbor hole or appropriate sized bushing. Never use a grinding wheel rated lower than 3,600 rpm or attempt to machine an undersized wheel to fit the arbor.
English
1.Remove the three bolts (1) attaching the protective side cover (2) to the grinder; then remove the side cover.
2.Prevent the shaft from rotating by placing a wedge between the wheel and the tool rest.
3.Facing the front of the bench grinder: to replace the wheel on the left side, turn the arbor nut (3) clockwise to loosen and counterclockwise to tighten the arbor nut.
4.To replace the wheel on the right: turn counterclockwise to loosen and clockwise to tighten.
NOTE: Many grinding wheels use removable and adjustable arbor bushings to allow adaptation to various machine arbor diameters. Save this bushing for future use if not needed to install the replacement wheel.
5.Remove the arbor nut (3), outer flange (4) and the old wheel.
6.Install the replacement wheel and outer flange on the shaft. Make sure the wheel is slide fit (not loose) on the shaft.
7.Replace the arbor nut and tighten.
8.Replace the side cover. Reinsert the three bolts and tighten the side cover in place.
9.
10.Rotate the wheel by hand to check free movement and proper adjustments.
1![]()
2![]()
3![]()
4
FIG 7
![]() WARNING: Do not overtighten wheel nuts when installing grinding wheels. Tighten the wheel nut enough to drive the wheel and prevent slippage.
WARNING: Do not overtighten wheel nuts when installing grinding wheels. Tighten the wheel nut enough to drive the wheel and prevent slippage.
11