Set-up and Safety Information
Now that you have your new amplifier, we realize that you can't wait to hook it up and start playing! However, please read this
Unpacking and Setting Up
The amplifier is likely to come in parts – the amplifier module, an acoustic suspension, and a power transformer (an auxiliary power supply upgrade called the Maximum Dynamic Headroom Reservoir is also available) unless your dealer has assembled it for you. So, some assembly may be needed before you can start playing. It is important that this product is never used near water or sources of water. Avoid bathrooms, washbowls, kitchen sinks, swimming pools, etc.
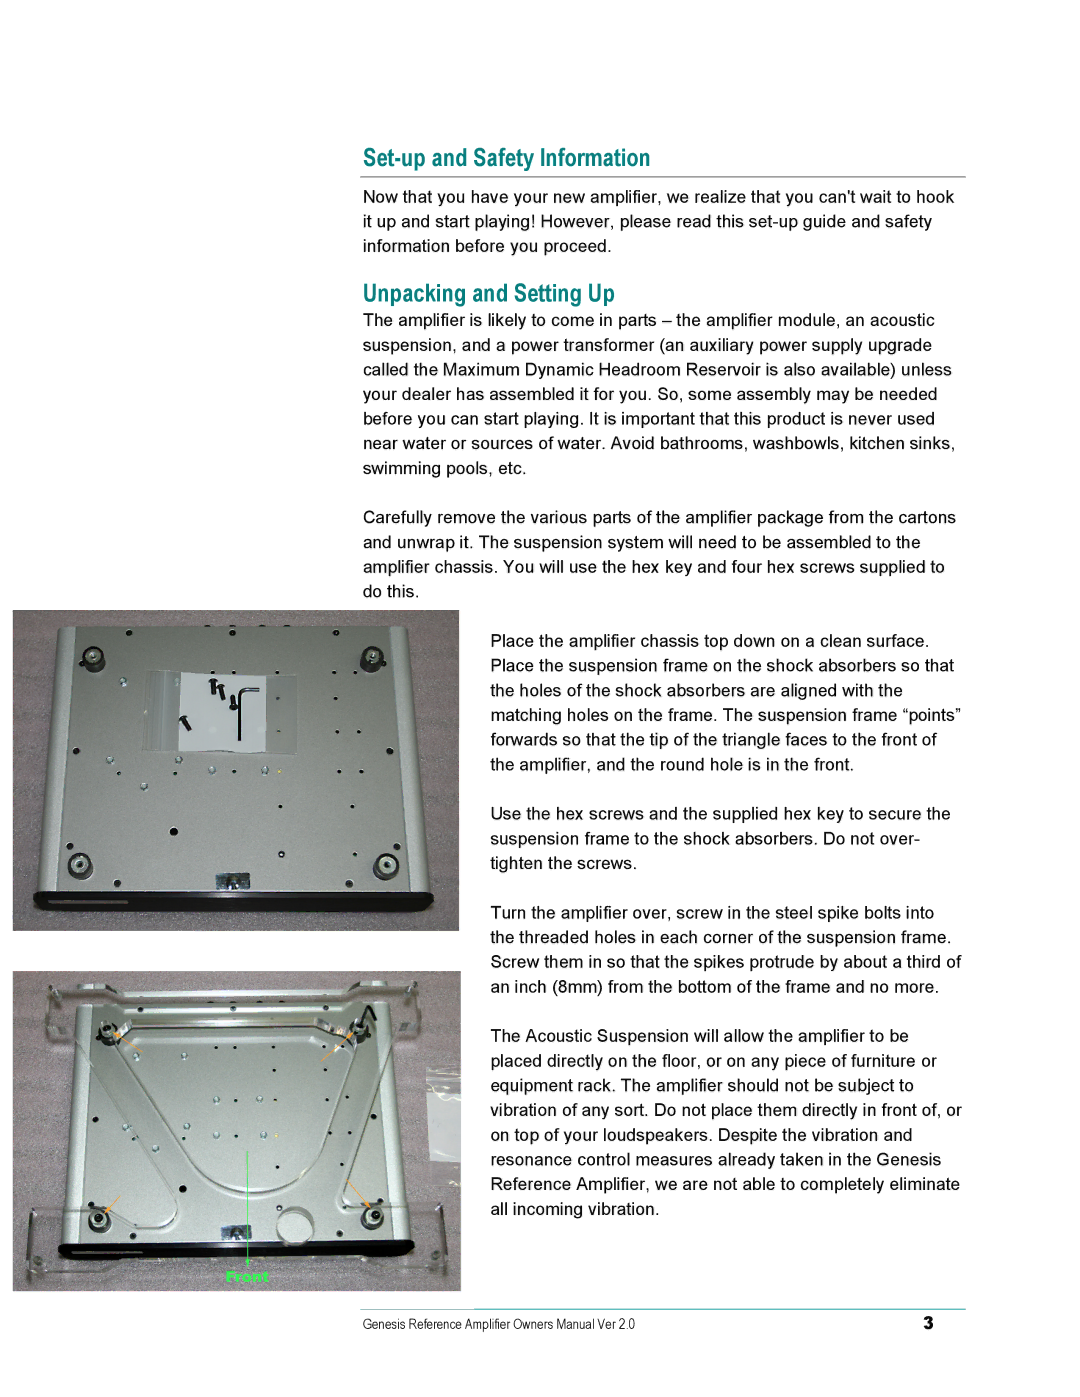
Carefully remove the various parts of the amplifier package from the cartons and unwrap it. The suspension system will need to be assembled to the amplifier chassis. You will use the hex key and four hex screws supplied to do this.
Place the amplifier chassis top down on a clean surface. Place the suspension frame on the shock absorbers so that the holes of the shock absorbers are aligned with the matching holes on the frame. The suspension frame “points” forwards so that the tip of the triangle faces to the front of the amplifier, and the round hole is in the front.
Use the hex screws and the supplied hex key to secure the suspension frame to the shock absorbers. Do not over- tighten the screws.
Turn the amplifier over, screw in the steel spike bolts into the threaded holes in each corner of the suspension frame. Screw them in so that the spikes protrude by about a third of an inch (8mm) from the bottom of the frame and no more.
The Acoustic Suspension will allow the amplifier to be placed directly on the floor, or on any piece of furniture or equipment rack. The amplifier should not be subject to vibration of any sort. Do not place them directly in front of, or on top of your loudspeakers. Despite the vibration and resonance control measures already taken in the Genesis Reference Amplifier, we are not able to completely eliminate all incoming vibration.
Genesis Reference Amplifier Owners Manual Ver 2.0 | 3 |
