GP8045/GP8048 PUMP REPAIR INSTRUCTIONS
Valve Inspection and Repair
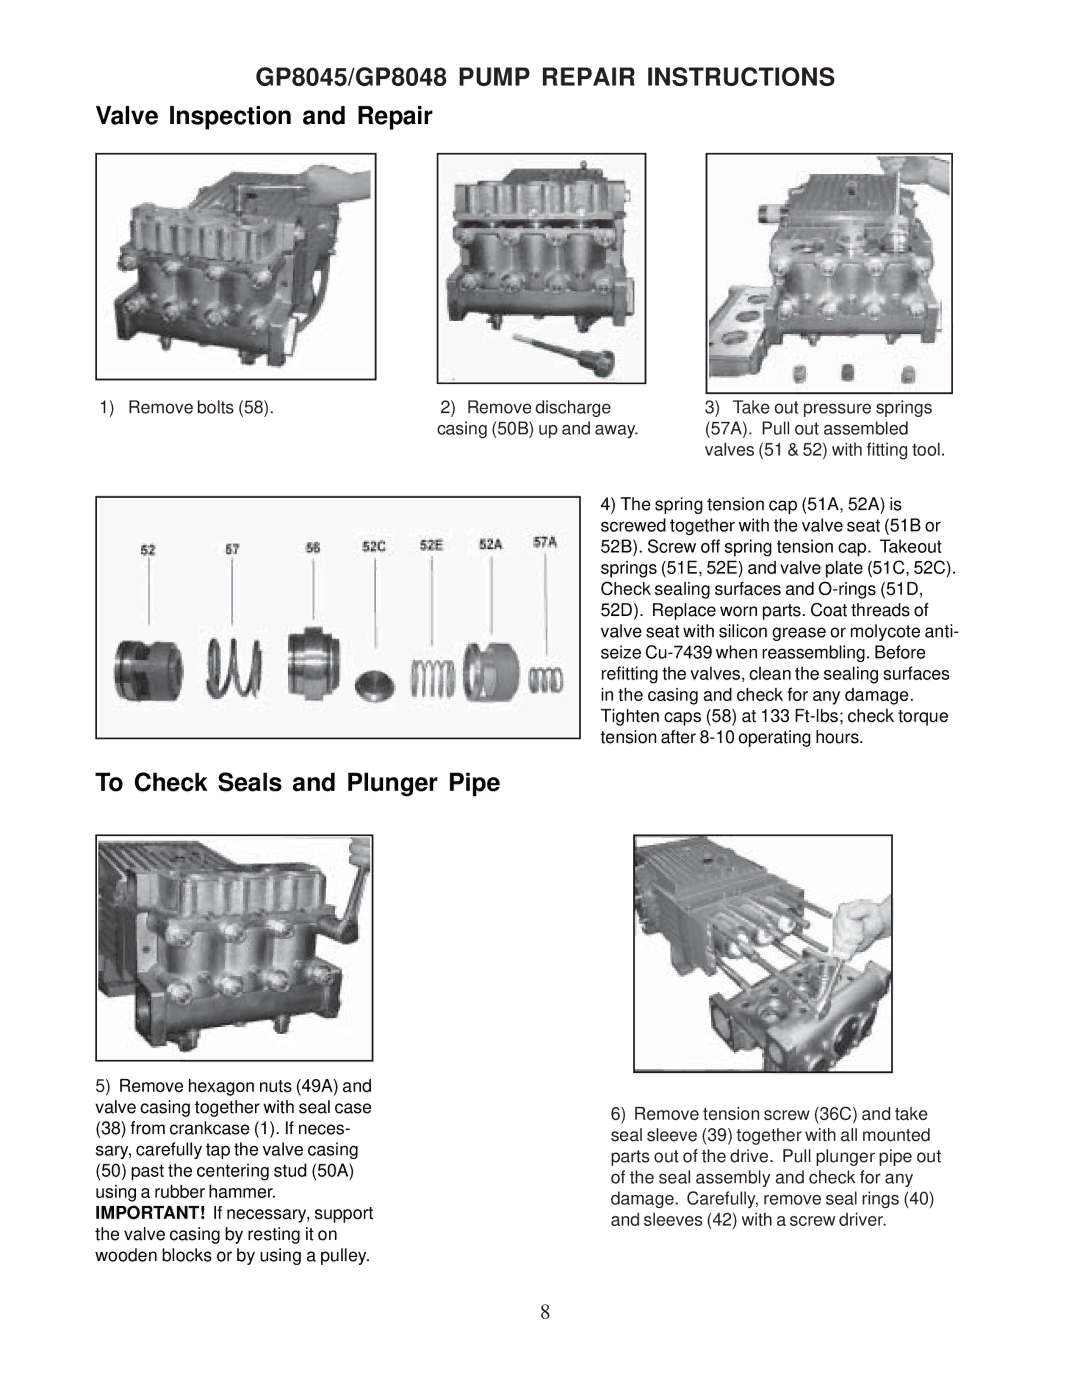
1) Remove bolts (58). | 2) Remove discharge | 3) Take out pressure springs |
| casing (50B) up and away. | (57A). Pull out assembled |
|
| valves (51 & 52) with fitting tool. |
To Check Seals and Plunger Pipe
5)Remove hexagon nuts (49A) and valve casing together with seal case (38) from crankcase (1). If neces- sary, carefully tap the valve casing (50) past the centering stud (50A) using a rubber hammer. IMPORTANT! If necessary, support the valve casing by resting it on wooden blocks or by using a pulley.
4)The spring tension cap (51A, 52A) is screwed together with the valve seat (51B or 52B). Screw off spring tension cap. Takeout springs (51E, 52E) and valve plate (51C, 52C). Check sealing surfaces and
6)Remove tension screw (36C) and take seal sleeve (39) together with all mounted parts out of the drive. Pull plunger pipe out of the seal assembly and check for any damage. Carefully, remove seal rings (40) and sleeves (42) with a screw driver.
8