7.For LP122A &
8.The
9.The front oil seal (31A) can now be removed by inserting a screwdriver through the rear of the retainer and tapping the seal out through the front of the retainer. Remove any ex- cess old
TO REASSEMBLE PROCEED AS FOLLOWS:
|
|
|
|
|
|
|
|
|
|
|
|
|
|
|
|
|
|
|
|
|
|
|
|
|
|
|
|
|
|
|
|
|
|
|
|
|
|
|
|
|
|
|
|
|
|
|
|
|
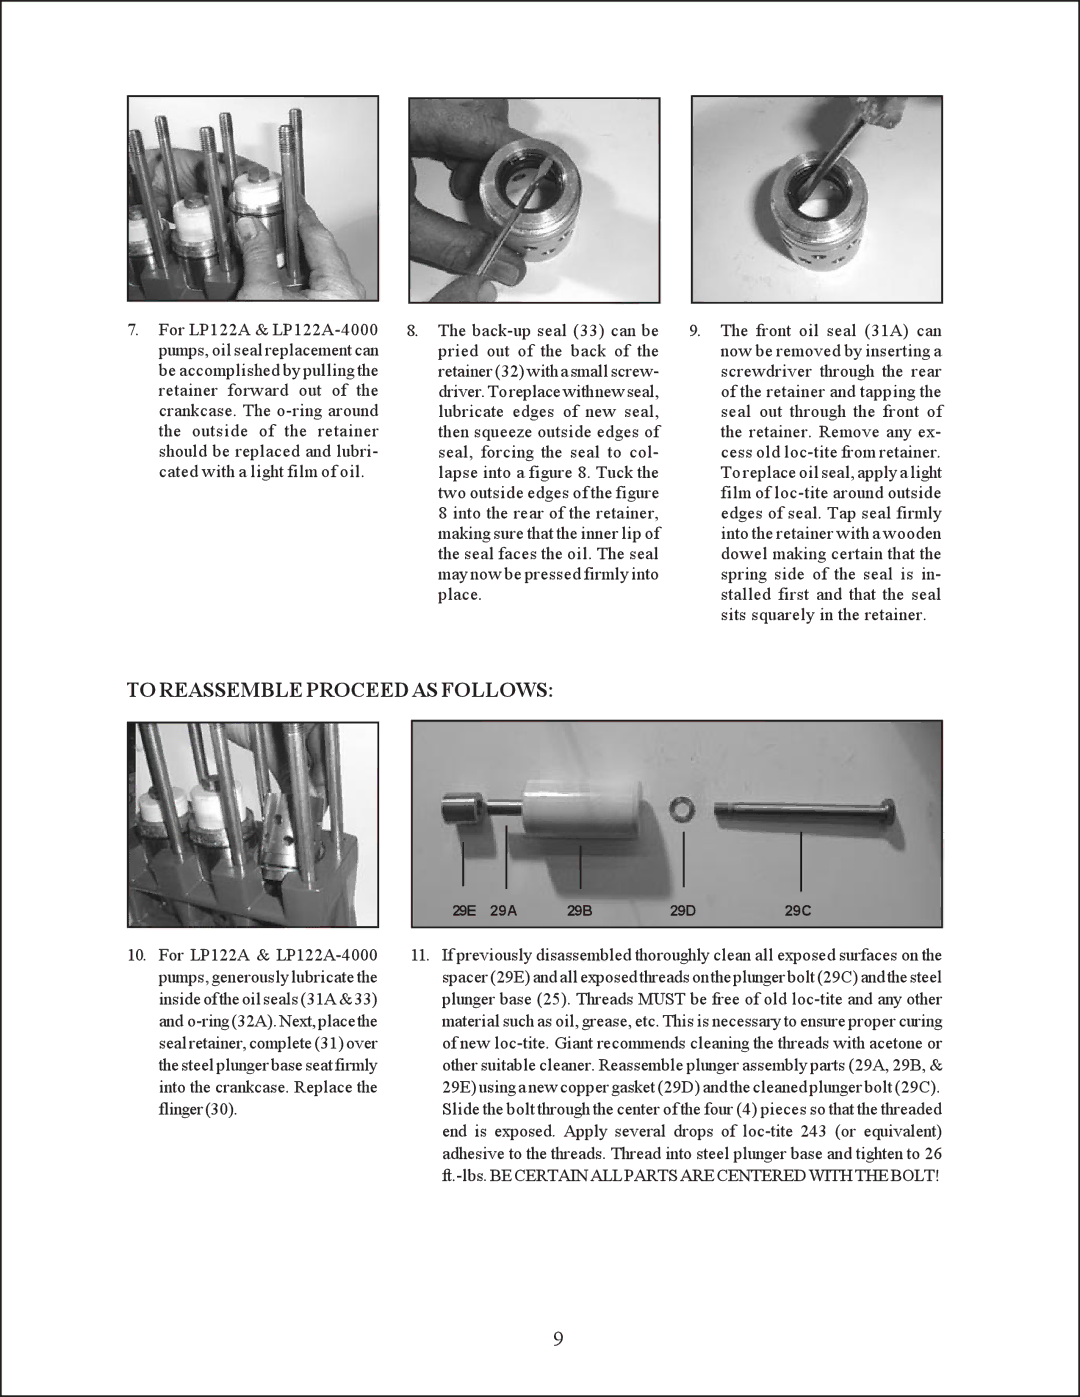
| 29E | 29A | 29B | 29D | 29C | |||||
|
|
|
|
|
|
|
| ||||
10. For LP122A & | 11. If previously disassembled thoroughly clean all exposed surfaces on the | ||||||||||
pumps, generously lubricate the |
| spacer (29E) and all exposed threads on the plunger bolt (29C) and the steel | |||||||||
inside of the oil seals (31A & 33) |
| plunger base (25). Threads MUST be free of old | |||||||||
and |
| material such as oil, grease, etc. This is necessary to ensure proper curing | |||||||||
seal retainer, complete (31) over |
| of new | |||||||||
the steel plunger base seat firmly |
| other suitable cleaner. Reassemble plunger assembly parts (29A, 29B, & | |||||||||
into the crankcase. Replace the |
| 29E) using a new copper gasket (29D) and the cleaned plunger bolt (29C). | |||||||||
flinger(30). |
| Slide the bolt through the center of the four (4) pieces so that the threaded | |||||||||
|
| end is exposed. Apply several drops of | |||||||||
|
| adhesive to the threads. Thread into steel plunger base and tighten to 26 | |||||||||
|
|
| |||||||||
9