Assembly
The GMC BFPCF Planer is packed, fully assembled except for the dust extraction adaptor and combined parallel and bevel fence guide.
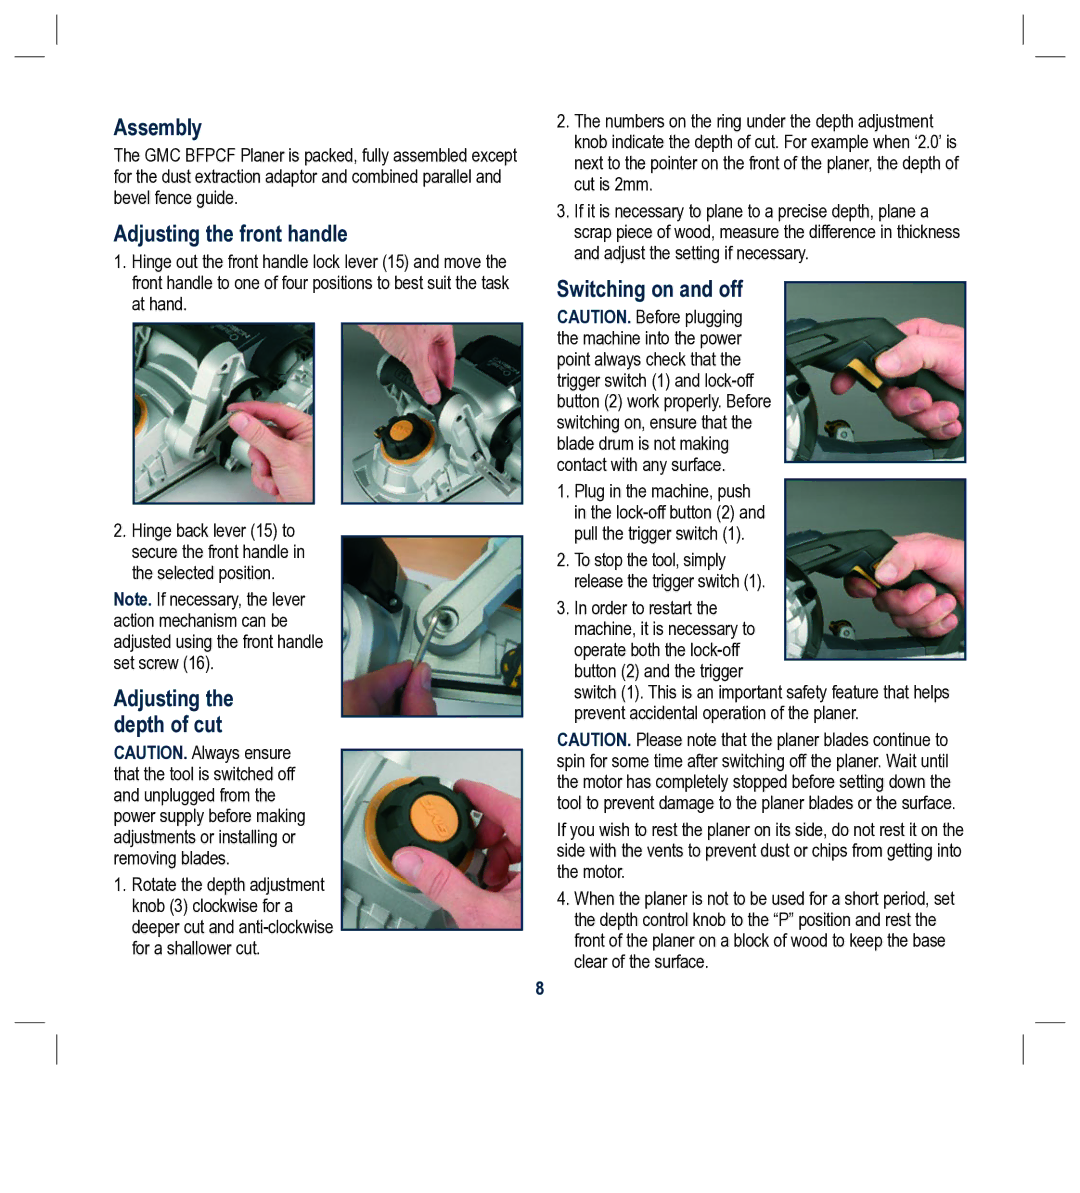
Adjusting the front handle
1.Hinge out the front handle lock lever (15) and move the front handle to one of four positions to best suit the task at hand.
2.Hinge back lever (15) to secure the front handle in the selected position.
Note. If necessary, the lever action mechanism can be adjusted using the front handle set screw (16).
Adjusting the depth of cut
CAUTION. Always ensure that the tool is switched off and unplugged from the power supply before making adjustments or installing or removing blades.
1.Rotate the depth adjustment knob (3) clockwise for a deeper cut and
2.The numbers on the ring under the depth adjustment knob indicate the depth of cut. For example when ‘2.0’ is next to the pointer on the front of the planer, the depth of cut is 2mm.
3.If it is necessary to plane to a precise depth, plane a scrap piece of wood, measure the difference in thickness and adjust the setting if necessary.
Switching on and off
CAUTION. Before plugging the machine into the power point always check that the trigger switch (1) and
1.Plug in the machine, push in the
2.To stop the tool, simply release the trigger switch (1).
3.In order to restart the machine, it is necessary to operate both the
switch (1). This is an important safety feature that helps prevent accidental operation of the planer.
CAUTION. Please note that the planer blades continue to spin for some time after switching off the planer. Wait until the motor has completely stopped before setting down the tool to prevent damage to the planer blades or the surface.
If you wish to rest the planer on its side, do not rest it on the side with the vents to prevent dust or chips from getting into the motor.
4.When the planer is not to be used for a short period, set the depth control knob to the “P” position and rest the front of the planer on a block of wood to keep the base clear of the surface.
8