5. | Switch on the biscuit joiner and plunge the blade forward |
| to make the cut. |
6. Allow the return spring to retract the blade from the slot | |
| and then switch off. |
7. | To cut a slot in the edge of the matching workpiece, |
| place this piece on a flat surface and place the biscuit |
| joiner against the edge. |
8. Again line up the centre point of each slot and make | |
| the cuts. |
9. | Once all the slots are cut insert a biscuit into each joint |
| and dry assemble the workpieces to ensure everything |
| lines up and fits. |
4.Switch on the biscuit joiner and plunge the blade forward to make the cut.
5.Allow the return spring to retract the blade from the slot and then switch off.
6.Once all the slots are cut insert a biscuit into each joint and dry assemble the workpieces to ensure everything lines up and fits.
7.Insert a
8.Place the biscuits in position and clamp the joint until the biscuits swell and the glue sets.
Making a corner joint
10. Insert a |
11. Place the biscuits in position and clamp the joint until |
the biscuits swell and the glue sets. |
NOTE: It is possible that thick pieces of timber may require two biscuits at each location, one at a height
1.Set the 2 pieces together and draw the joint centres on the outside face and end.
2.Cut the slots into the end piece.
Centreline mark(s)
slot Biscuit
of about 1/3rd the thickness of the wood, and the other at about 2/3rd the thickness.
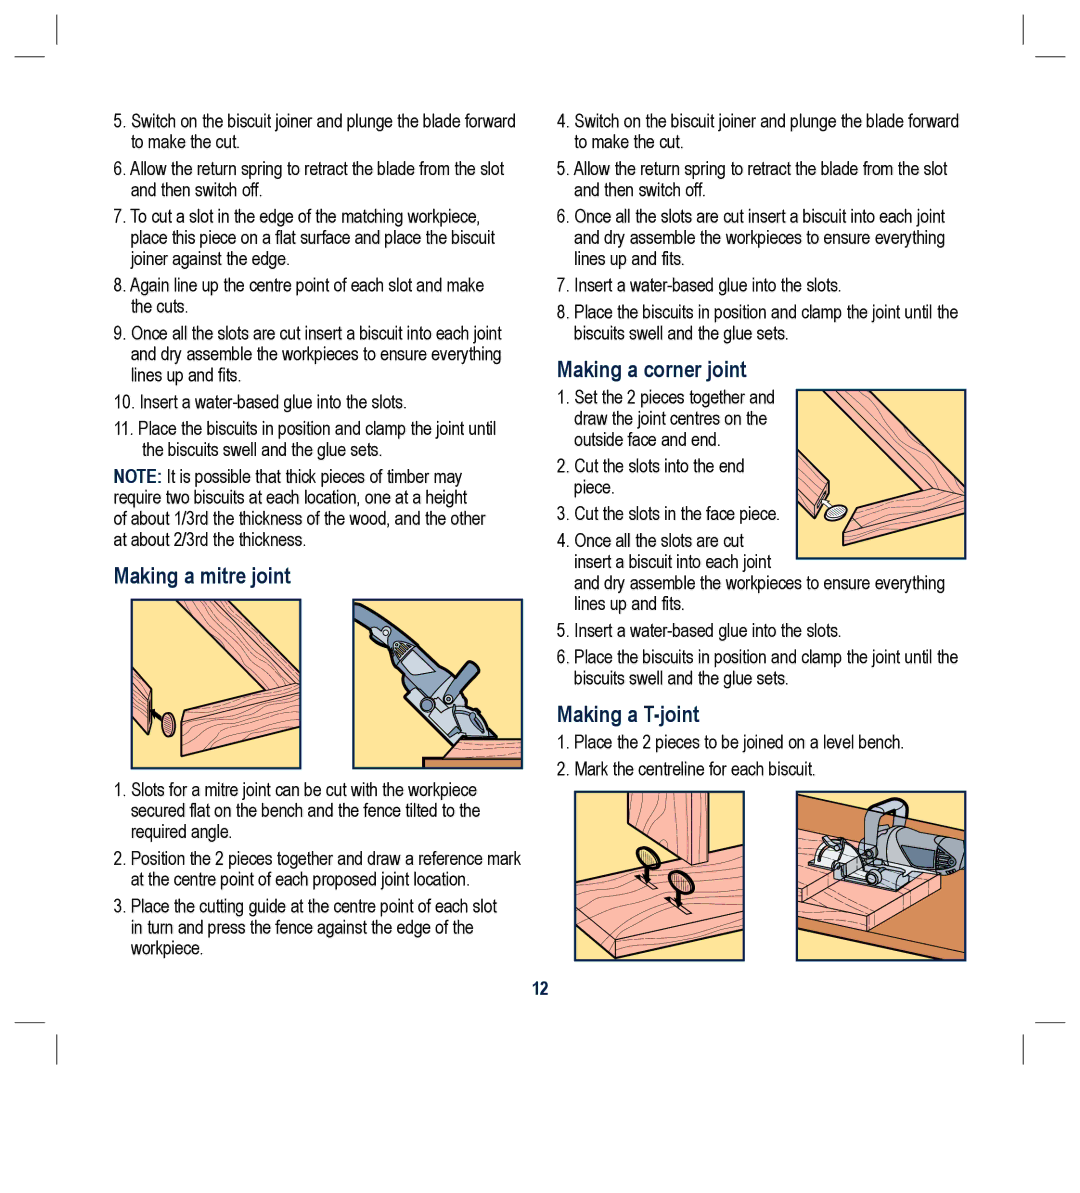
Making a mitre joint
1.Slots for a mitre joint can be cut with the workpiece secured flat on the bench and the fence tilted to the required angle.
2.Position the 2 pieces together and draw a reference mark at the centre point of each proposed joint location.
3.Place the cutting guide at the centre point of each slot in turn and press the fence against the edge of the workpiece.
3. Cut the slots in the face piece.
4.Once all the slots are cut insert a biscuit into each joint
and dry assemble the workpieces to ensure everything lines up and fits.
5.Insert a
6.Place the biscuits in position and clamp the joint until the biscuits swell and the glue sets.
Making a T-joint
1.Place the 2 pieces to be joined on a level bench.
2.Mark the centreline for each biscuit.
Clamp. |
To cut end slots in |
12