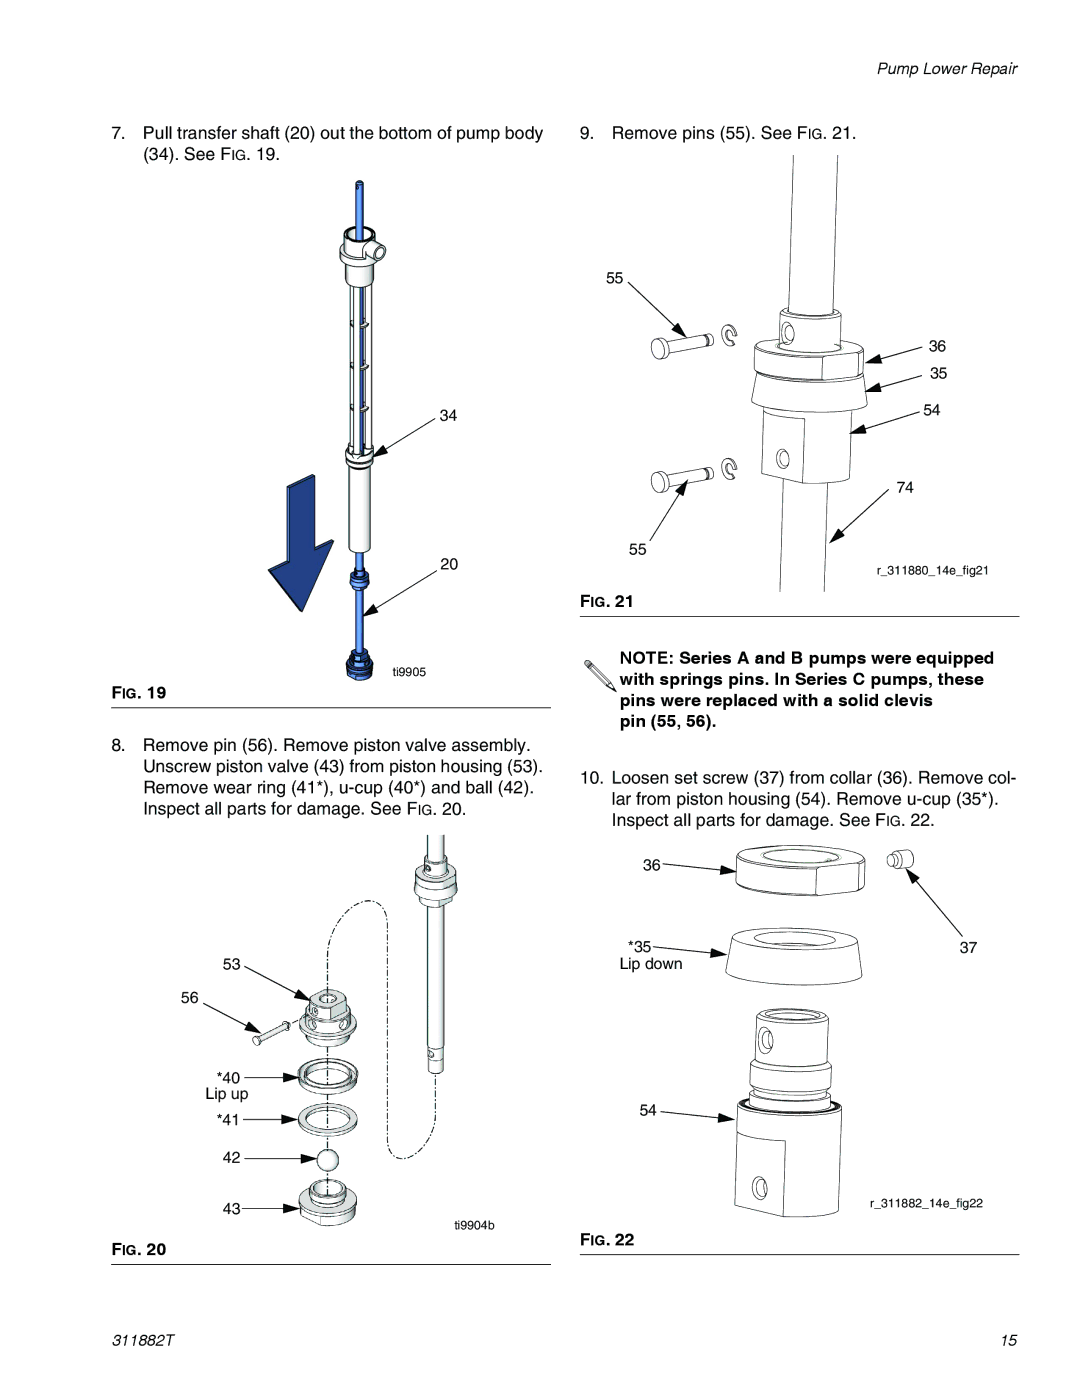
7.Pull transfer shaft (20) out the bottom of pump body (34). See FIG. 19.
34
20
ti9905
FIG. 19
8.Remove pin (56). Remove piston valve assembly. Unscrew piston valve (43) from piston housing (53). Remove wear ring (41*),
53
56
*40 ![]()
![]() Lip up
Lip up
*41
42
43
ti9904b
FIG. 20
Pump Lower Repair
9. Remove pins (55). See FIG. 21.
55
36
35
54
74
55
r_311880_14e_fig21
FIG. 21
NOTE: Series A and B pumps were equipped
![]() with springs pins. In Series C pumps, these
with springs pins. In Series C pumps, these ![]() pins were replaced with a solid clevis
pins were replaced with a solid clevis
pin (55, 56).
10.Loosen set screw (37) from collar (36). Remove col- lar from piston housing (54). Remove
36 ![]()
![]()
![]()
![]()
![]()
![]()
![]()
![]()
*35 |
| 37 |
| ||
Lip down |
|
|
54 ![]()
r_311882_14e_fig22
FIG. 22
311882T | 15 |
