Manuals
/
Graco
/
Kitchen Appliance
/
Food Saver
Graco
312348B Piston Kit Installation, U-Cup Orientation, Piston Head and Rod, Pump
Models:
312348B
1
5
8
8
Download
8 pages
19.42 Kb
1
2
3
4
5
6
7
8
Specifications
Warranty
Cylinder Assembly
Safety
Page 5
Image 5
Page 4
Page 6
Page 5
Image 5
Page 4
Page 6
Contents
Important Safety Instructions
Seal Kit Installation, see page
Old Seal Kits
Instructions - Parts
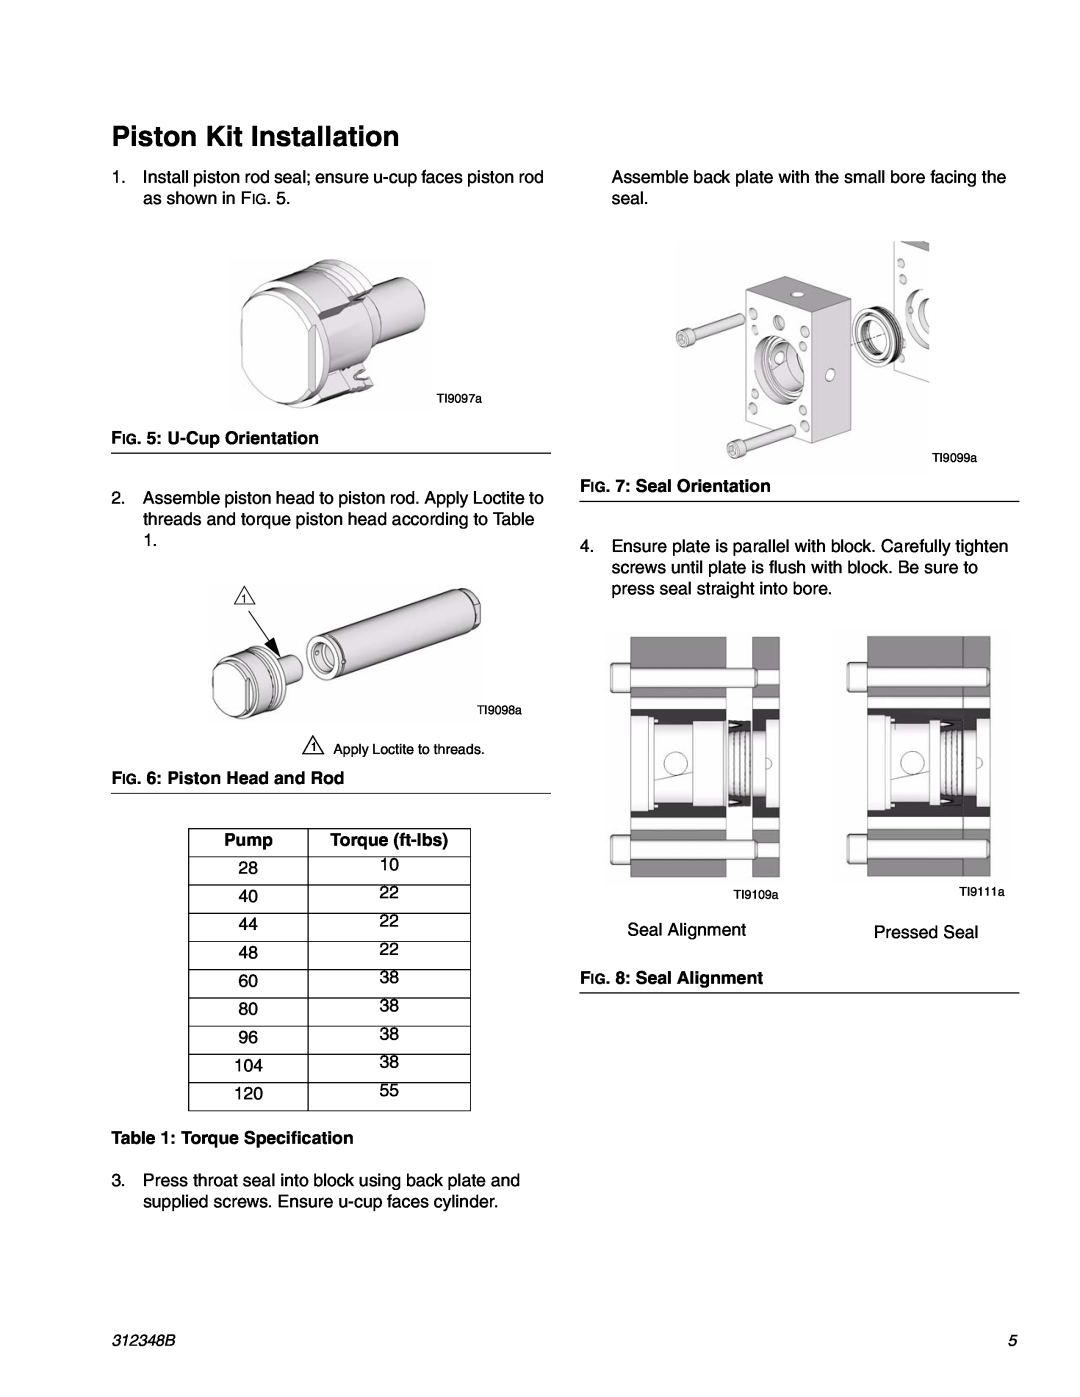
1 Apply Loctite to threads and
Piston Seal Kits for A-Side and B-Side Pumps
torque see Table 1 for correct
torque measurement
Not included in kit
Cylinder Seal Kits for A-Side Pumps
Cylinder Seal Kits for B-Side Pumps
Table 1 Torque Specification
Piston Kit Installation
FIG. 5 U-Cup Orientation
FIG. 6 Piston Head and Rod
FIG. 9 Tap Seal
FIG. 12 Throat Seal Installation Tool
FIG. 10 Insert Bushing
FIG. 11 Assemble Gasket and Back Plate
Seat Cylinder in Bore TI9108a FIG. 15 Tap Cylinder onto Piston Rod
Cylinder Assembly
FIG. 14 Tap Piston Rod
Graco Information
Graco Standard Warranty
Graco Headquarters Minneapolis
International Offices Belgium, China, Japan, Korea
Top
Page
Image
Contents