ard or portable crib. Read and follow the warnings and on the bottom of the Pack ’N Play. The short time you s will help you use your Pack ’N Play properly.
follow these warnings and the assembly s could result in serious injury or death.
Avoiding Suffocation Hazards
! Unlike cribs that have rigid sides, the Pack ’N Play has
| flexible sides. As a result, the Pack ’N Play mattress is | |
| specially designed to prevent suffocation. | |
| The Pack ’N Play mattress has a solid base, a certain | |
| length and width, and is less than one inch thick in order | |
he | to meet safety standards. Using a thicker or a different | |
sized mattress may allow a child’s head to get between | ||
N | ||
mattress and the side of the Pack ’N Play causing | ||
| ||
| suffocation. | |
| ! To help prevent suffocation from entrapment, | |
| USE ONLY THE MATTRESS PROVIDED BY GRACO. | |
| Never use additional mattress or padding. | |
| ! Never use plastic shipping bags or other plastic film as | |
| mattress covers not sold and intended for that purpose. | |
| They can cause suffocation. | |
| ! Do not use a water mattress with the Pack ’N Play. | |
p- | Avoiding Strangulation Hazards | |
|
e! Strings and cords can cause strangulation. Keep strings and cords away from child.
!Do not place the Pack ’N Play near a window where
ecords from blinds or drapes can strangle a child.
!Do not hang strings on or over the Pack ’N Play.
!Do not place items with a string around a child’s neck, such as hood strings, pacifier cords, etc.
!Do not attach strings to toys.
This product is not intended for commercial use.
ure to follow these warnings and
s could result in serious injury or death.
Setting up the Pack ’N Play® is easy, but only if you know how.
To Set Up Your Pack ’N Play®
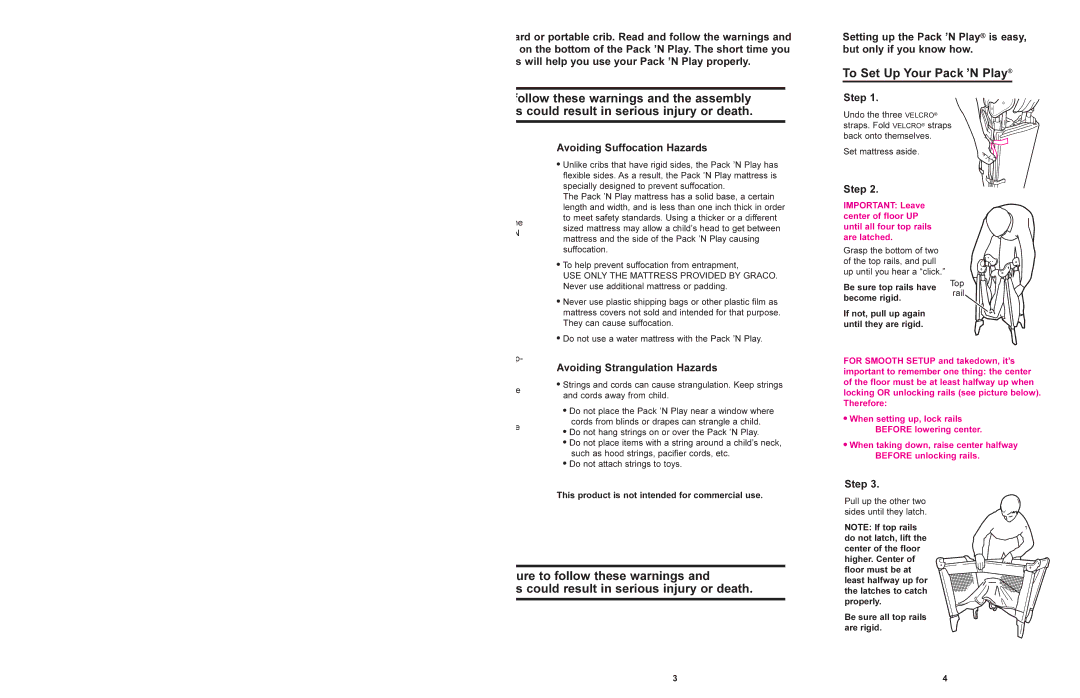
Step 1.
Undo the three VELCRO® straps. Fold VELCRO® straps back onto themselves.
Set mattress aside.
Step 2.
IMPORTANT: Leave center of floor UP until all four top rails are latched.
Grasp the bottom of two of the top rails, and pull up until you hear a “click.”
Be sure top rails have | Top | |
rail | ||
become rigid. | ||
| ||
If not, pull up again |
| |
until they are rigid. |
|
FOR SMOOTH SETUP and takedown, it’s important to remember one thing: the center of the floor must be at least halfway up when locking OR unlocking rails (see picture below). Therefore:
!When setting up, lock rails BEFORE lowering center.
!When taking down, raise center halfway BEFORE unlocking rails.
Step 3.
Pull up the other two sides until they latch.
NOTE: If top rails do not latch, lift the center of the floor higher. Center of floor must be at least halfway up for the latches to catch properly.
Be sure all top rails are rigid.
3 | 4 |