Canopy
oStep 1.
Unfold the tubing and slide the three sections together to form one long tube. The elastic cord in the tubing will hold the pieces together.
Step 2.
Slide the long tube into the tunnel in the canopy until both ends stick out of the
.tunnel 3 or 4 inches. The
tunnel is on the shiny side near the netting.
hStep 3.
Push the tube ends into the corner brackets on the Pack ’N Play. Tube end caps will snap into place in the
h brackets.
NOTE: The mesh side of the canopy goes on the same side of the unit as the brackets. The shiny side
goes on the inside of the unit.
To remove canopy, first grasp tube firmly so that it will not spring out. Then push in on end caps to release them from brackets and pull tube ends up.
Step 4.
Pull the back corners of the canopy over the back corners of the Pack ’N Play and fasten the VELCRO® squares located on the ends of the top rail and back corners of the canopy.
Tubing
Push in, then up
Step 5.
To help prevent
!Turn canopy mesh away from the sun. Keep entire mattress shaded from sunlight at all times.
!Keep play yard well ventilated:
!Always keep the front mesh panel and one side mesh panel of the play yard open.
!Never cover the canopy mesh.
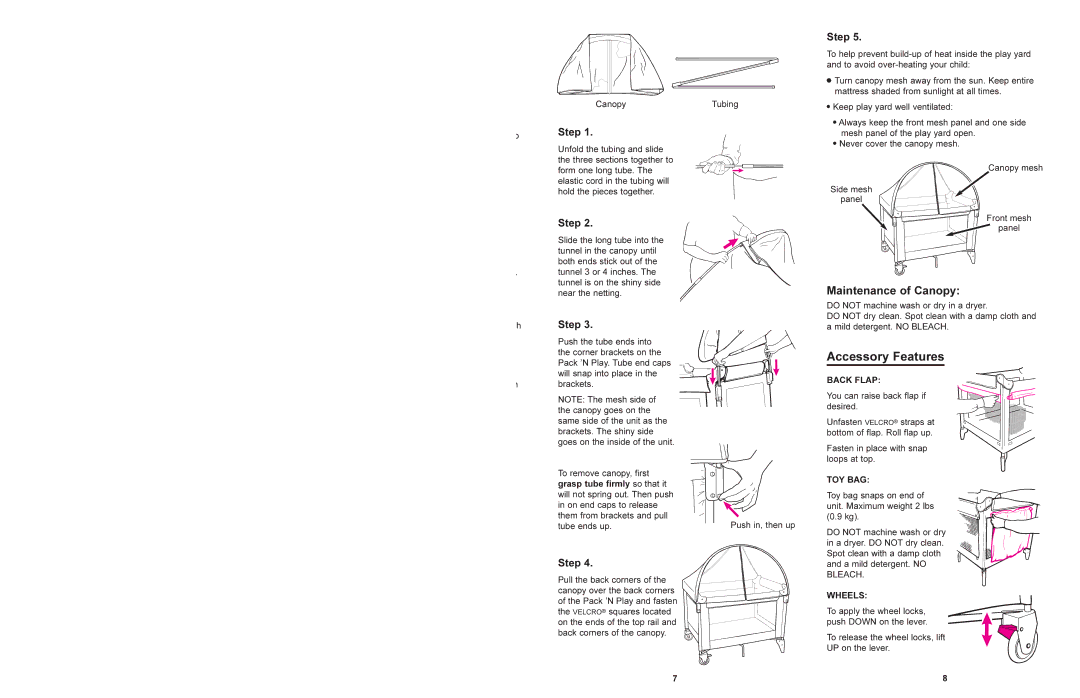
Canopy mesh
Side mesh |
panel |
Front mesh |
panel |
Maintenance of Canopy:
DO NOT machine wash or dry in a dryer.
DO NOT dry clean. Spot clean with a damp cloth and a mild detergent. NO BLEACH.
Accessory Features
BACK FLAP:
You can raise back flap if desired.
Unfasten VELCRO® straps at bottom of flap. Roll flap up.
Fasten in place with snap loops at top.
TOY BAG:
Toy bag snaps on end of unit. Maximum weight 2 lbs (0.9 kg).
DO NOT machine wash or dry in a dryer. DO NOT dry clean. Spot clean with a damp cloth and a mild detergent. NO BLEACH.
WHEELS:
To apply the wheel locks, push DOWN on the lever.
To release the wheel locks, lift UP on the lever.
7 | 8 |