Startup / Démarrage / Puesta en marcha / Avviamento / Colocação em serviço / Opstarten

ti2599a


ti2714a

ti2713a


WASTE

PAINT


WASTE


5

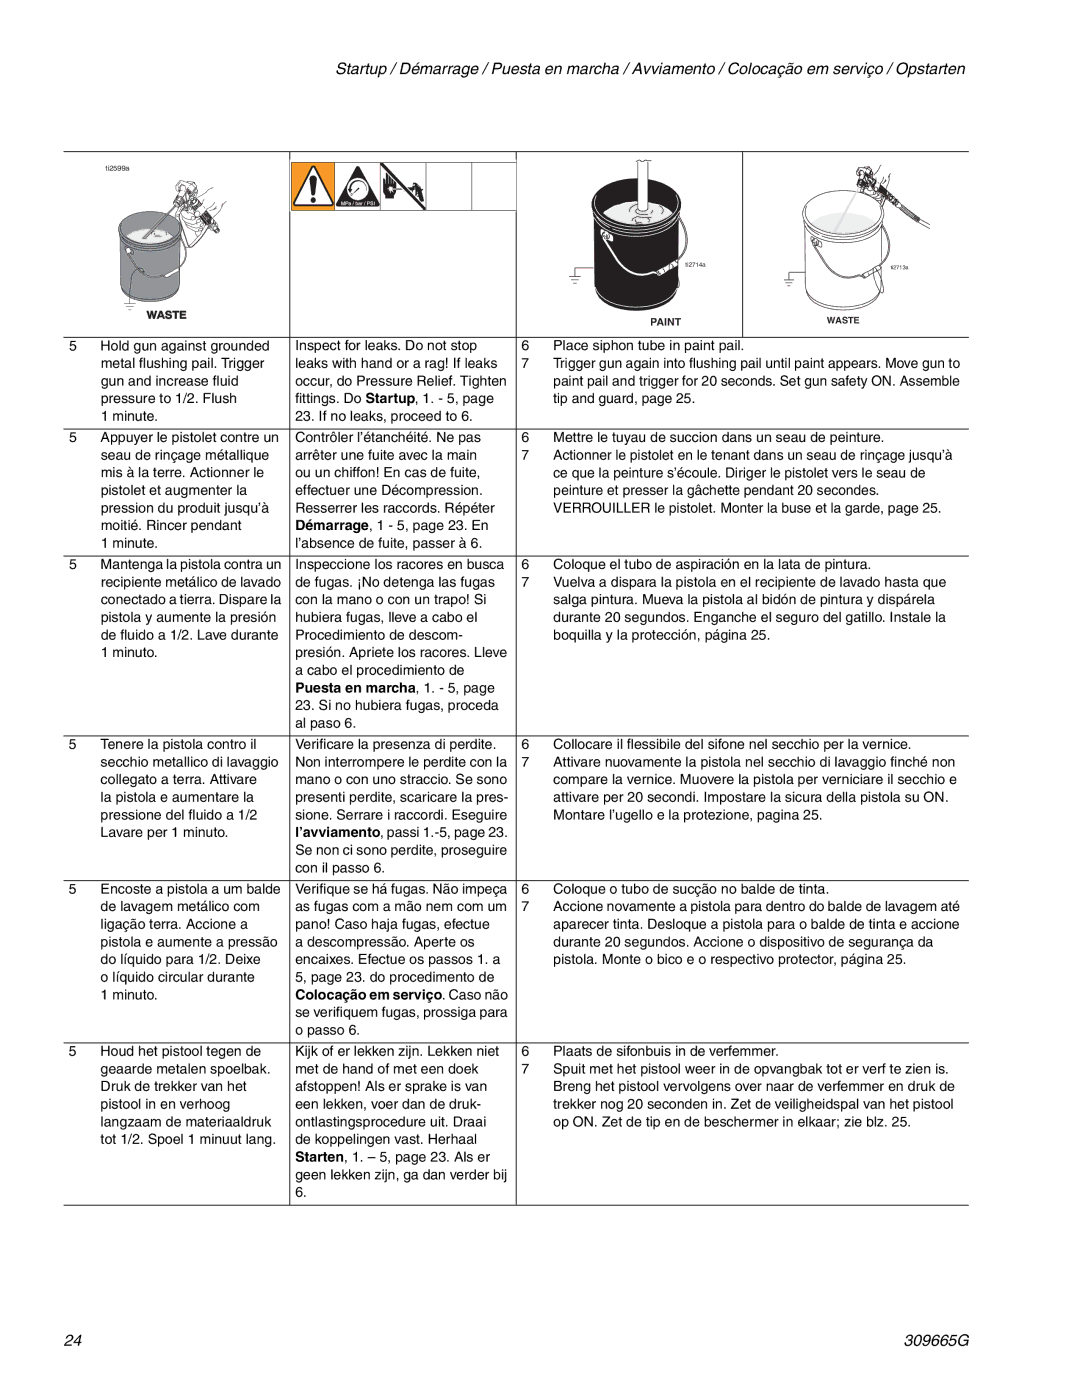
Hold gun against grounded

Inspect for leaks. Do not stop

6

Place siphon tube in paint pail.


metal flushing pail. Trigger

leaks with hand or a rag! If leaks

7

Trigger gun again into flushing pail until paint appears. Move gun to


gun and increase fluid

occur, do Pressure Relief. Tighten


paint pail and trigger for 20 seconds. Set gun safety ON. Assemble


pressure to 1/2. Flush

fittings. Do Startup, 1. - 5, page


tip and guard, page 25.


1 minute.

23. If no leaks, proceed to 6.


5

Appuyer le pistolet contre un

Contrôler l’étanchéité. Ne pas

6

Mettre le tuyau de succion dans un seau de peinture.


seau de rinçage métallique

arrêter une fuite avec la main

7

Actionner le pistolet en le tenant dans un seau de rinçage jusqu’à


mis à la terre. Actionner le

ou un chiffon! En cas de fuite,


ce que la peinture s’écoule. Diriger le pistolet vers le seau de


pistolet et augmenter la

effectuer une Décompression.


peinture et presser la gâchette pendant 20 secondes.


pression du produit jusqu’à

Resserrer les raccords. Répéter


VERROUILLER le pistolet. Monter la buse et la garde, page 25.


moitié. Rincer pendant

Démarrage, 1 - 5, page 23. En


1 minute.

l’absence de fuite, passer à 6.


5

Mantenga la pistola contra un

Inspeccione los racores en busca

6

Coloque el tubo de aspiración en la lata de pintura.


recipiente metálico de lavado

de fugas. ¡No detenga las fugas

7

Vuelva a dispara la pistola en el recipiente de lavado hasta que


conectado a tierra. Dispare la

con la mano o con un trapo! Si


salga pintura. Mueva la pistola al bidón de pintura y dispárela


pistola y aumente la presión

hubiera fugas, lleve a cabo el


durante 20 segundos. Enganche el seguro del gatillo. Instale la


de fluido a 1/2. Lave durante

Procedimiento de descom-


boquilla y la protección, página 25.


1 minuto.

presión. Apriete los racores. Lleve


a cabo el procedimiento de


Puesta en marcha, 1. - 5, page


23.Si no hubiera fugas, proceda al paso 6.

5

Tenere la pistola contro il

Verificare la presenza di perdite.

6

Collocare il flessibile del sifone nel secchio per la vernice.


secchio metallico di lavaggio

Non interrompere le perdite con la

7

Attivare nuovamente la pistola nel secchio di lavaggio finché non


collegato a terra. Attivare

mano o con uno straccio. Se sono


compare la vernice. Muovere la pistola per verniciare il secchio e


la pistola e aumentare la

presenti perdite, scaricare la pres-


attivare per 20 secondi. Impostare la sicura della pistola su ON.


pressione del fluido a 1/2

sione. Serrare i raccordi. Eseguire


Montare l’ugello e la protezione, pagina 25.


Lavare per 1 minuto.

l’avviamento, passi 1.-5, page 23.


Se non ci sono perdite, proseguire


con il passo 6.


5

Encoste a pistola a um balde

Verifique se há fugas. Não impeça

6

Coloque o tubo de sucção no balde de tinta.


de lavagem metálico com

as fugas com a mão nem com um

7

Accione novamente a pistola para dentro do balde de lavagem até


ligação terra. Accione a

pano! Caso haja fugas, efectue


aparecer tinta. Desloque a pistola para o balde de tinta e accione


pistola e aumente a pressão

a descompressão. Aperte os


durante 20 segundos. Accione o dispositivo de segurança da


do líquido para 1/2. Deixe

encaixes. Efectue os passos 1. a


pistola. Monte o bico e o respectivo protector, página 25.


o líquido circular durante

5, page 23. do procedimento de


1 minuto.

Colocação em serviço. Caso não


se verifiquem fugas, prossiga para


o passo 6.


5

Houd het pistool tegen de

Kijk of er lekken zijn. Lekken niet

6

Plaats de sifonbuis in de verfemmer.


geaarde metalen spoelbak.

met de hand of met een doek

7

Spuit met het pistool weer in de opvangbak tot er verf te zien is.


Druk de trekker van het

afstoppen! Als er sprake is van


Breng het pistool vervolgens over naar de verfemmer en druk de


pistool in en verhoog

een lekken, voer dan de druk-


trekker nog 20 seconden in. Zet de veiligheidspal van het pistool


langzaam de materiaaldruk

ontlastingsprocedure uit. Draai


op ON. Zet de tip en de beschermer in elkaar; zie blz. 25.


tot 1/2. Spoel 1 minuut lang.

de koppelingen vast. Herhaal


Starten, 1. – 5, page 23. Als er


geen lekken zijn, ga dan verder bij


6.


24

309665G

Page 24
Image 24
Graco Inc 309665G, 253015, 253104, 253107, 253105, 253013, 253014, 253106, 595, 826046, 826017, 825045, 825028 Puesta en marcha, 1. 5

233960, 249936, 825036, 826046, 253013 specifications

Graco Inc. is a renowned leader in fluid handling systems and equipment, widely recognized for its innovative products designed for various applications, particularly in industrial and commercial markets. Among the company’s diverse portfolio, five products stand out: 253106, 825037, 249937, 249929, and 249915. Each of these models boasts unique features, advanced technologies, and exceptional characteristics that cater to the needs of professionals in the painting, coating, and lubrication industries.

The Graco model 253106 is engineered for high performance, featuring a robust construction that ensures durability and longevity. This model is specifically designed for easy maintenance and replacement of parts, minimizing downtime. Its lightweight design allows for enhanced portability, making it ideal for contractors who require mobility on job sites.

For professionals looking for precision in fluid application, the Graco model 825037 offers advanced technology that provides excellent control over spray patterns and fluid flow. This model incorporates Graco's proprietary pump technology, which ensures consistent performance and reliability. Additionally, the ergonomic design of the model enhances comfort during operation, reducing operator fatigue during prolonged use.

The 249937 model is particularly recognized for its efficiency and versatility. It comes equipped with adjustable pressure settings, enabling users to precisely match the flow rate and pressure to the requirements of different applications. This flexibility makes it suitable for a variety of tasks, from small touch-ups to large-scale projects.

Similarly, the 249929 model brings forth an array of features tailored for professional use. It incorporates advanced filtration systems that prevent clogging and maintain a smooth flow of materials, which is essential for achieving top-quality finishes in coatings and paints. The model also emphasizes user safety, featuring a built-in safety lock mechanism that prevents accidental operation.

Lastly, the Graco 249915 is notable for its cutting-edge automation capabilities. This model can be seamlessly integrated into automated systems, enhancing productivity and precision in fluid management applications. Its advanced monitoring technology provides real-time data on consumption and performance, facilitating better decision-making for resource management.

In summary, Graco Inc.'s models 253106, 825037, 249937, 249929, and 249915 provide an impressive array of features and technologies that cater to the diverse needs of professionals in fluid handling. Each model showcases Graco's commitment to quality, innovation, and user-centric design, reinforcing its position as a leader in the industry.