
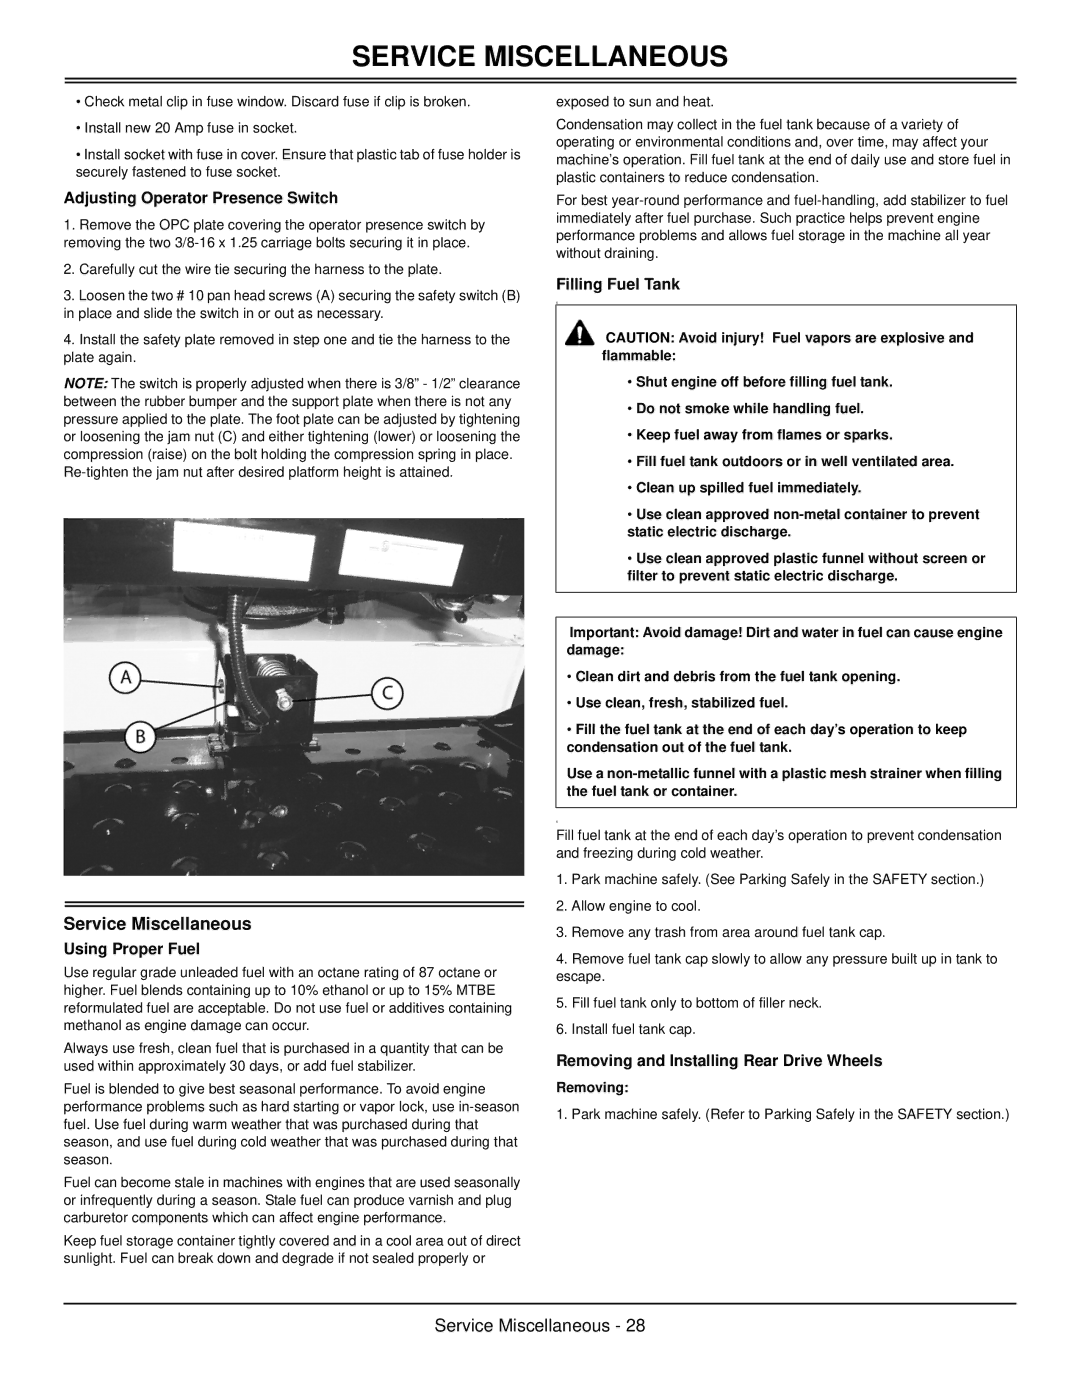
GSRKW2352S, GSRKA1952S specifications
The Great Dane GSRKA1952S and GSRKW2352S are robust, state-of-the-art vehicles engineered for efficiency and performance in the demanding environment of the transportation industry. Renowned for their cutting-edge design and advanced technologies, these models are poised to meet the needs of modern logistics operations.Both the GSRKA1952S and GSRKW2352S are equipped with powerful engines that deliver exceptional horsepower and torque, ensuring they can handle heavy loads with ease. The GSRKA1952S features a diesel engine that emphasizes fuel efficiency while maintaining optimal performance levels. In contrast, the GSRKW2352S comes with an advanced hybrid powertrain that combines the benefits of electric and diesel power, significantly reducing emissions and fuel consumption without compromising power.
The chassis design of both models incorporates high-strength materials that enhance durability while reducing overall weight, contributing to improved fuel efficiency and handling. The suspension systems are finely tuned, offering superior ride quality and stability, which is particularly beneficial when navigating uneven road surfaces common in freight transport.
Safety is a paramount concern with the Great Dane GSRKA1952S and GSRKW2352S. Both models come with an array of safety features, including advanced braking systems, collision avoidance technology, and enhanced visibility through strategically placed lighting and mirrors. The driver’s cabin is ergonomically designed, offering comfort and convenience, with intuitive controls and a spacious layout that reduces fatigue during long hauls.
Payload capacity is another highlight of these models. With well-engineered features that maximize space and load distribution, both the GSRKA1952S and GSRKW2352S are ideal for transporting a wide variety of goods efficiently. They also incorporate technology that allows for easy tracking and monitoring of cargo, ensuring that deliveries are timely and secure.
The exterior design reflects a commitment to aerodynamics, significantly reducing drag and enhancing fuel efficiency at highway speeds. The innovative use of materials and engineering in these vehicles ensures they are not only efficient but also resilient against the rigors of daily use.
In summary, the Great Dane GSRKA1952S and GSRKW2352S stand out in the competitive world of transportation vehicles. With their blend of power, efficiency, safety features, and advanced technology, these models are perfect for businesses looking to optimize their logistics operations while minimizing their environmental impact. They exemplify the evolution of commercial vehicles, marrying tradition with innovation for a sustainable future in transportation.