Operation
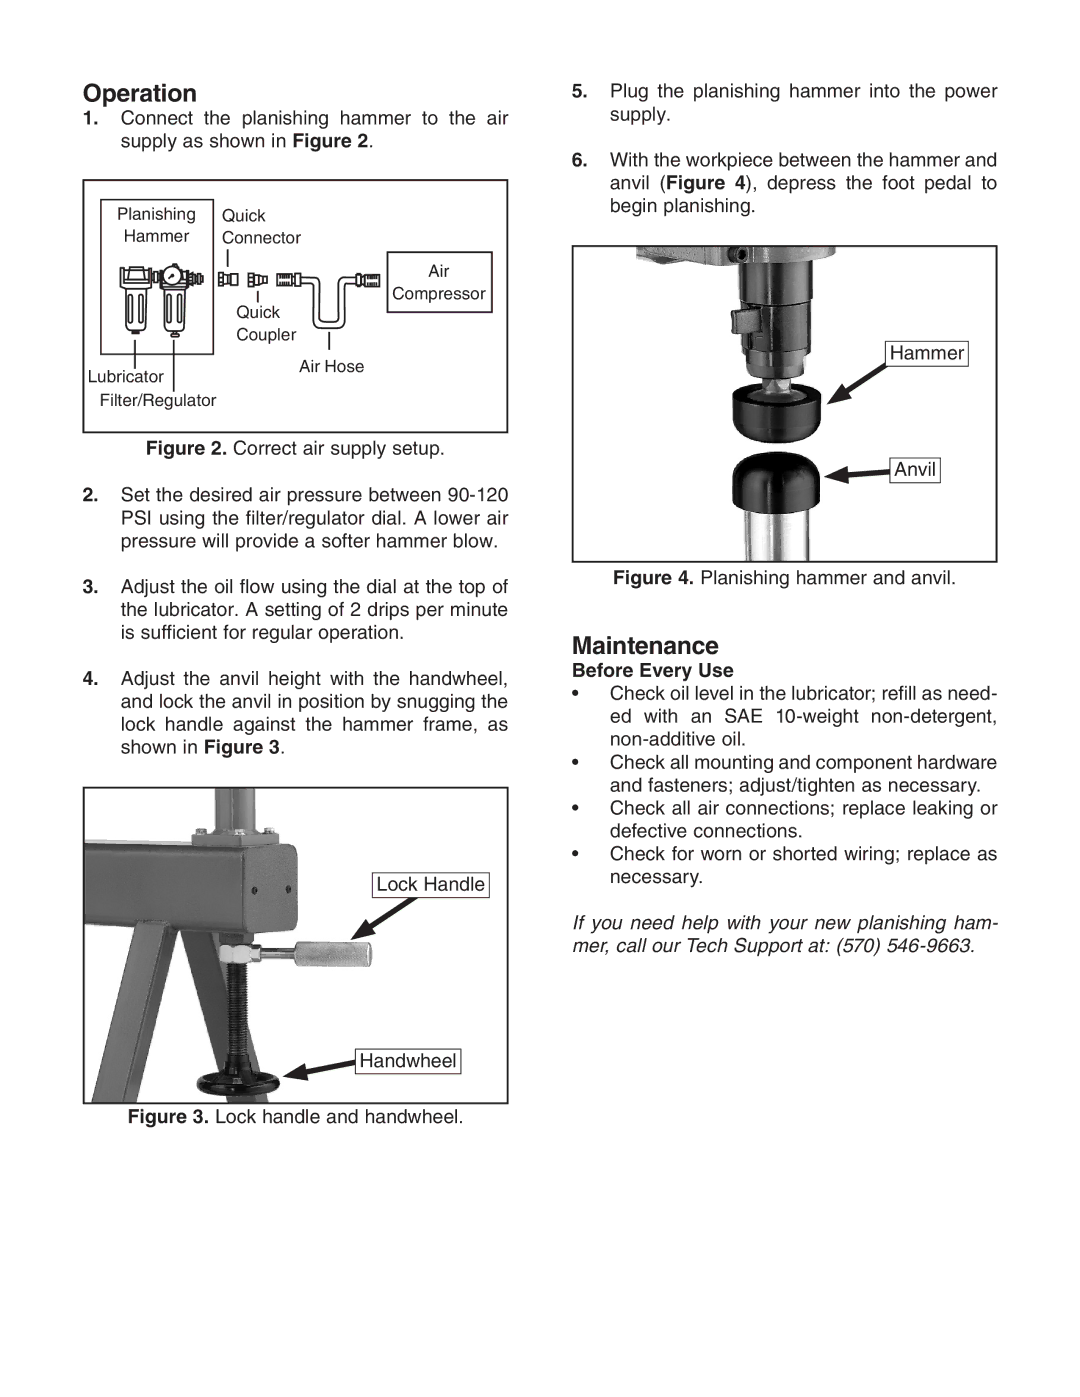
1.Connect the planishing hammer to the air supply as shown in Figure 2.
���������� ������
������ ���������
����
�����������
������
�������
������������������
����������������
Figure 2. Correct air supply setup.
2.Set the desired air pressure between 90-120 PSI using the filter/regulator dial. A lower air pressure will provide a softer hammer blow.
3.Adjust the oil flow using the dial at the top of the lubricator. A setting of 2 drips per minute is sufficient for regular operation.
4.Adjust the anvil height with the handwheel, and lock the anvil in position by snugging the lock handle against the hammer frame, as shown in Figure 3.
Lock Handle
Handwheel
Figure 3. Lock handle and handwheel.
5.Plug the planishing hammer into the power supply.
6.With the workpiece between the hammer and anvil (Figure 4), depress the foot pedal to begin planishing.
Hammer
Anvil
Figure 4. Planishing hammer and anvil.
Maintenance
Before Every Use
•Check oil level in the lubricator; refill as need- ed with an SAE
•Check all mounting and component hardware and fasteners; adjust/tighten as necessary.
•Check all air connections; replace leaking or defective connections.
•Check for worn or shorted wiring; replace as necessary.
If you need help with your new planishing ham- mer, call our Tech Support at: (570)
