SECTION 5: ADJUSTMENTS
Keep clothing rolled up and out of the way of machinery and keep hair pulled back.
Disconnect power to the machine when perform- ing any maintenance or assembly. Failure to do this may result in serious personal injury.
Wear safety glasses dur- ing the entire adjustment process. Failure to com- ply may result in serious personal injury.
General
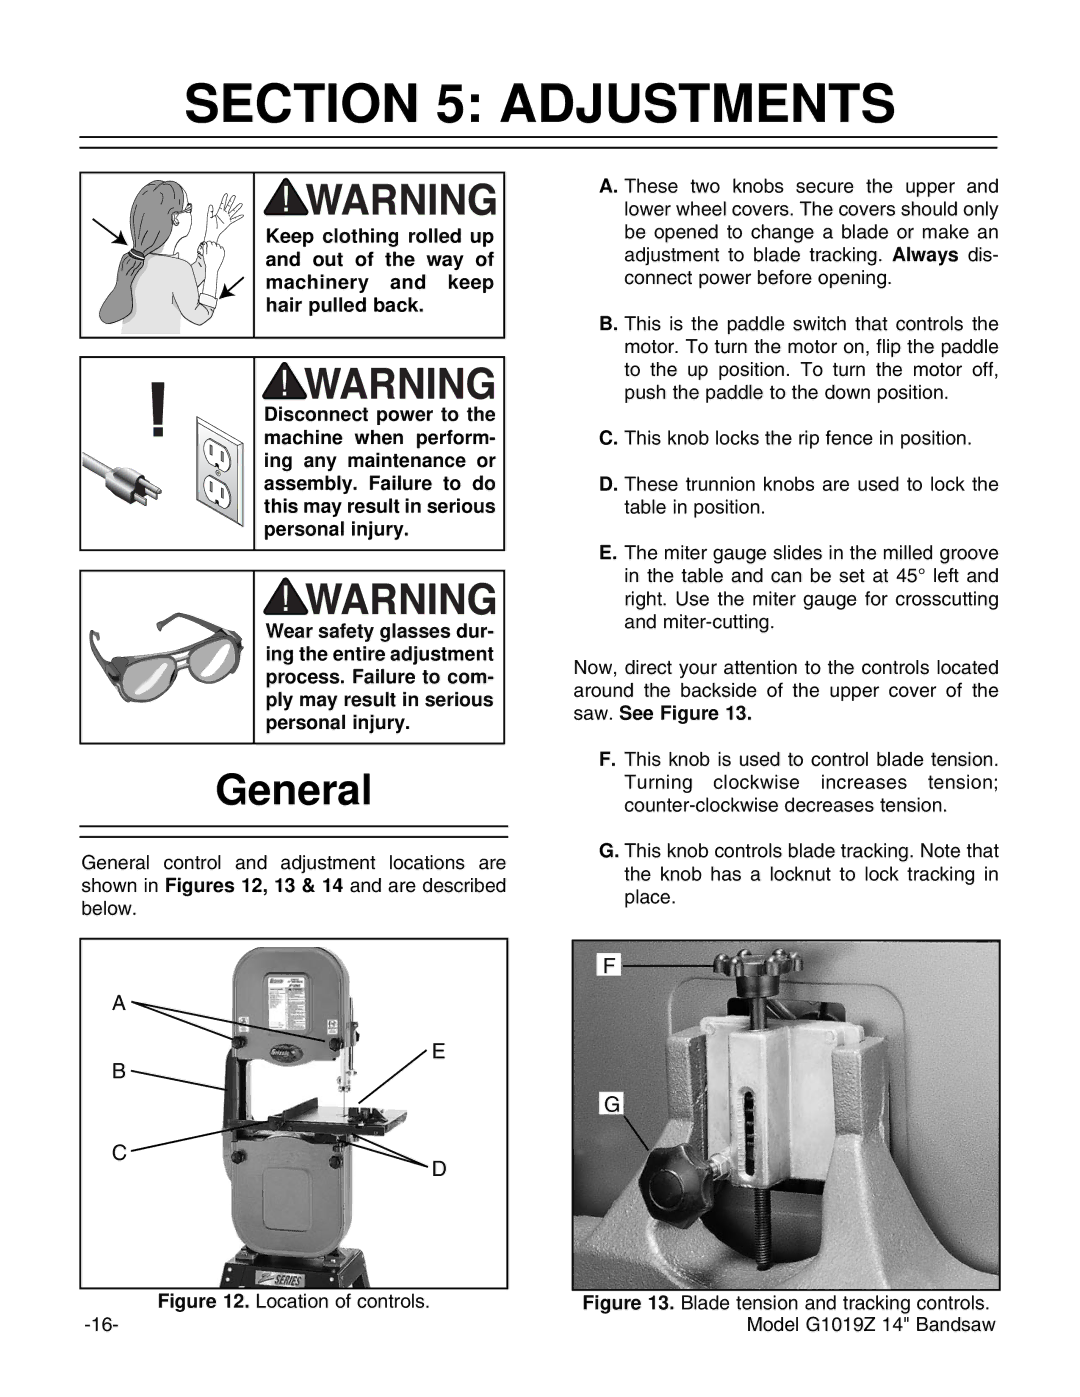
General control and adjustment locations are shown in Figures 12, 13 & 14 and are described below.
A ![]()
E
B
C
D
A. These two knobs secure the upper and lower wheel covers. The covers should only be opened to change a blade or make an adjustment to blade tracking. Always dis- connect power before opening.
B. This is the paddle switch that controls the motor. To turn the motor on, flip the paddle to the up position. To turn the motor off, push the paddle to the down position.
C. This knob locks the rip fence in position.
D. These trunnion knobs are used to lock the table in position.
E. The miter gauge slides in the milled groove in the table and can be set at 45° left and right. Use the miter gauge for crosscutting and
Now, direct your attention to the controls located around the backside of the upper cover of the saw. See Figure 13.
F. This knob is used to control blade tension. Turning clockwise increases tension;
G. This knob controls blade tracking. Note that the knob has a locknut to lock tracking in place.
F
G
Figure 12. Location of controls. | Figure 13. Blade tension and tracking controls. |
Model G1019Z 14" Bandsaw |