Assembly | Safety | |
1. | Layout the parts and use Figure 1 to inven- | • SAFE STORAGE. Keep away from children |
| tory them. | and animals. Close the lid when not using the |
|
| parts washer. |
2. | Using a #2 screwdriver and a 10mm wrench, | • PLUG MODIFICATION HAZARD. To avoid |
| secure the legs to the storage shelf with eight | |
| electrical shock, this machine must be | |
| grounded. Never modify the included plug to | |
|
| connect it to a two prong receptacle or exten- |
3. | With the help of an assistant, place the tub | sion cord. |
| onto the legs and secure it in place with the |
|
| remaining 16 | • PREVENTING ELECTRICAL SHOCK. |
| washers, and | Only connect this parts washer to a prop- |
|
| erly grounded GFCI (Ground Fault Circuit |
4. | Use a 19mm wrench to install the spout and | Interrupt) receptacle. Test the GFCI recep- |
| tube onto the pump outlet (Figure 1). | tacle operation according to switch manufac- |
|
| turer recommended intervals. |
5.Using a #2 screwdriver and a 7mm wrench,
loosely mount the switch box to the side of | • PREVENTING FIRE. Do not fill this parts |
the pump box with the two | washer with gasoline, kerosene, fuel, or flam- |
head screws, 4mm lock washers, and | mable solvents. Do not disconnect or modify |
hex nuts. | the lid support lever in any way. The lid lever |
| is specially designed to automatically close in |
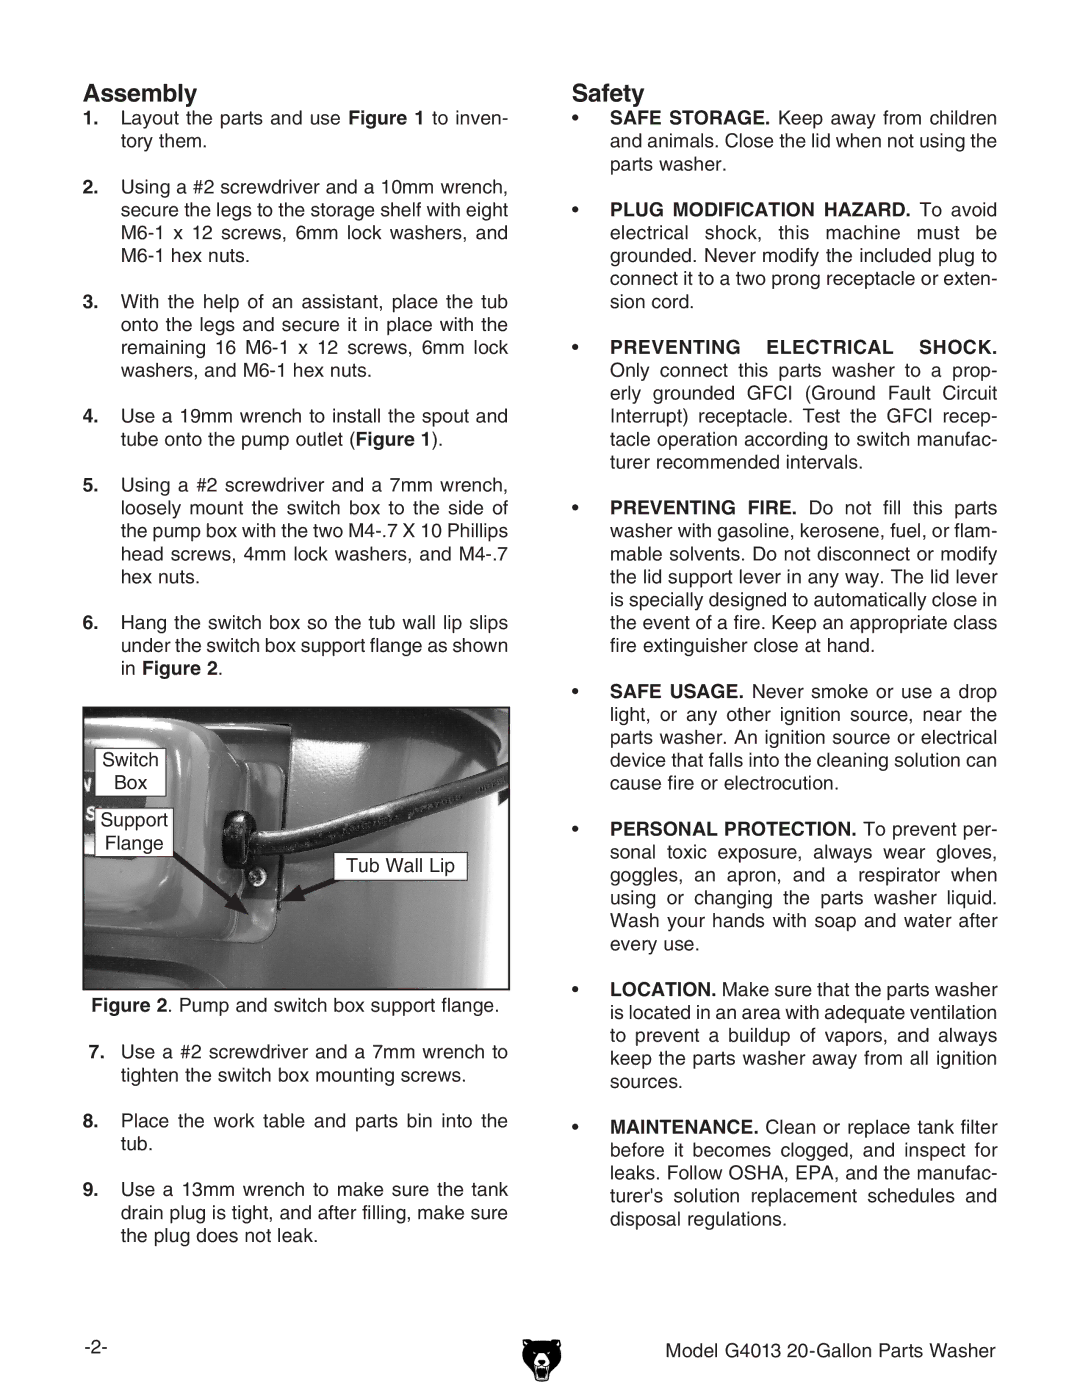
6. Hang the switch box so the tub wall lip slips | the event of a fire. Keep an appropriate class |
under the switch box support flange as shown | fire extinguisher close at hand. |
in Figure 2. |
|
| • SAFE USAGE. Never smoke or use a drop | ||
|
| light, or any other ignition source, near the | |
|
| parts washer. An ignition source or electrical | |
Switch |
| device that falls into the cleaning solution can | |
Box |
| cause fire or electrocution. | |
Support | • | PERSONAL PROTECTION. To prevent per- | |
Flange | |||
| sonal toxic exposure, always wear gloves, | ||
Tub Wall Lip |
| ||
| goggles, an apron, and a respirator when | ||
|
| ||
|
| using or changing the parts washer liquid. | |
|
| Wash your hands with soap and water after | |
|
| every use. | |
Figure 2. Pump and switch box support flange. | • LOCATION. Make sure that the parts washer | ||
| is located in an area with adequate ventilation | ||
|
| ||
7. Use a #2 screwdriver and a 7mm wrench to |
| to prevent a buildup of vapors, and always | |
| keep the parts washer away from all ignition | ||
tighten the switch box mounting screws. |
| ||
| sources. | ||
|
| ||
8. Place the work table and parts bin into the | • | MAINTENANCE. Clean or replace tank filter | |
tub. | |||
| before it becomes clogged, and inspect for | ||
|
| ||
9. Use a 13mm wrench to make sure the tank |
| leaks. Follow OSHA, EPA, and the manufac- | |
| turer's solution replacement schedules and | ||
drain plug is tight, and after filling, make sure |
| ||
| disposal regulations. | ||
the plug does not leak. |
| ||
|
|
Model G4013 |