BLADE INSTALLATION
Turn the switch off and unplug the Planer from power before attempting blade installation or any adjustments. Serious injury may occur if the unit should be accidentally started while installing the blade.
The Blade must be mounted to the Back Plate using the Blade Setting Jig. Using this jig controls how far the blade extends from the Cutterhead once it is installed.
1.Place the Blade onto the Setting Jig.
2.Lay the Back Plate onto the top of the Blade, pushing it up firmly against the edge of the Jig. See
4. Set the Blade/Back Plate Assembly onto the Cutterhead. Make sure the bottom edge of the Back Plate is positioned into the slot on the Cutterhead. See
Figure 5.
Make certain edge of back plate engages in slot in cutterhead
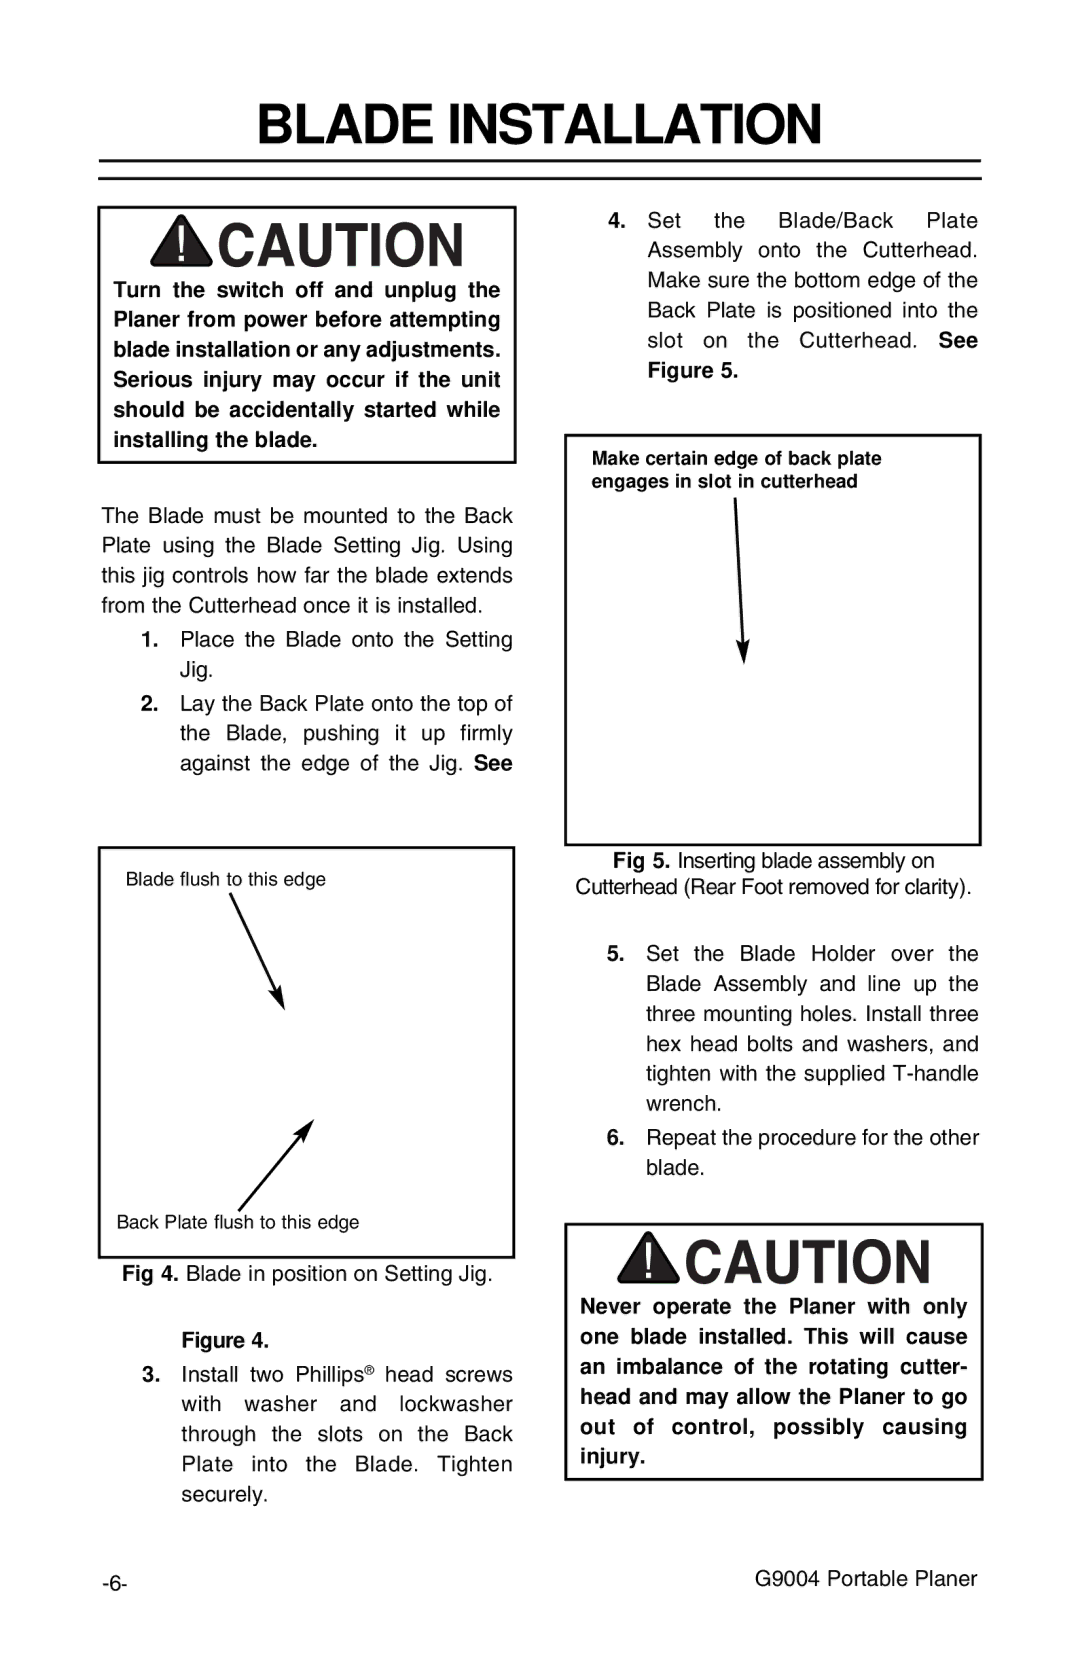
Blade flush to this edge
Back Plate flush to this edge
Fig 4. Blade in position on Setting Jig.
Figure 4.
3.Install two Phillips® head screws with washer and lockwasher through the slots on the Back Plate into the Blade. Tighten securely.
Fig 5. Inserting blade assembly on
Cutterhead (Rear Foot removed for clarity).
5.Set the Blade Holder over the Blade Assembly and line up the three mounting holes. Install three hex head bolts and washers, and tighten with the supplied
6.Repeat the procedure for the other blade.
Never operate the Planer with only one blade installed. This will cause an imbalance of the rotating cutter- head and may allow the Planer to go out of control, possibly causing injury.
G9004 Portable Planer |