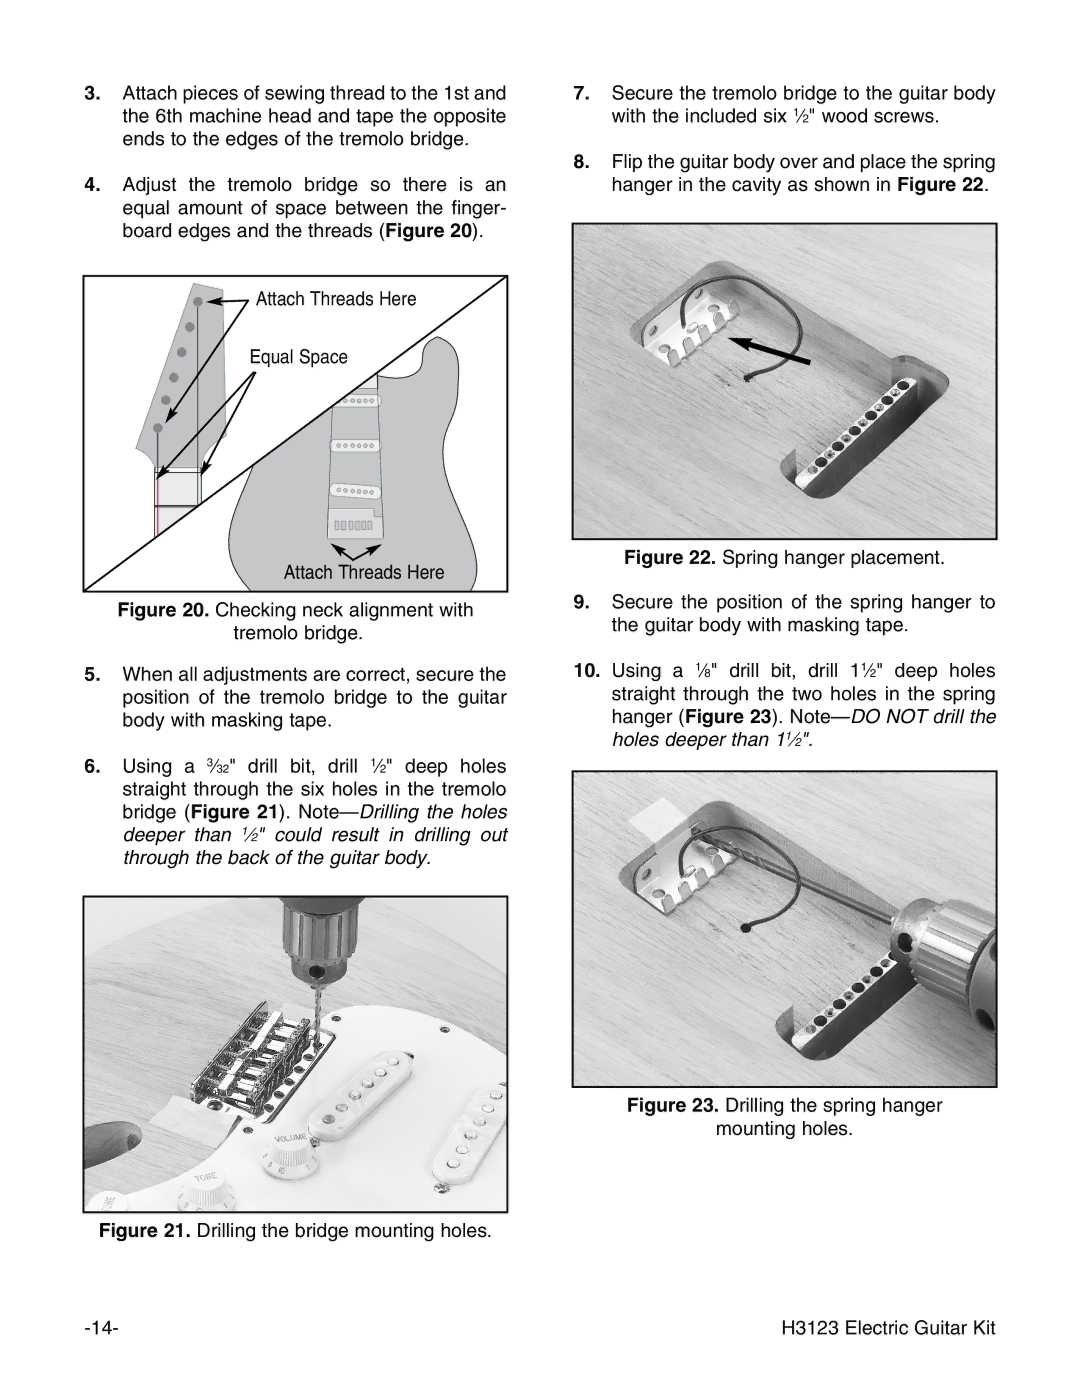
3.Attach pieces of sewing thread to the 1st and the 6th machine head and tape the opposite ends to the edges of the tremolo bridge.
4.Adjust the tremolo bridge so there is an equal amount of space between the finger- board edges and the threads (Figure 20).
![]()
![]() Attach Threads Here
Attach Threads Here
Equal Space
Attach Threads Here
Figure 20. Checking neck alignment with tremolo bridge.
5.When all adjustments are correct, secure the position of the tremolo bridge to the guitar body with masking tape.
6.Using a 3⁄32" drill bit, drill 1⁄2" deep holes straight through the six holes in the tremolo bridge (Figure 21). Note—Drilling the holes deeper than 1⁄2" could result in drilling out through the back of the guitar body.
7.Secure the tremolo bridge to the guitar body with the included six 1⁄2" wood screws.
8.Flip the guitar body over and place the spring hanger in the cavity as shown in Figure 22.
Figure 22. Spring hanger placement.
9.Secure the position of the spring hanger to the guitar body with masking tape.
10.Using a 1⁄8" drill bit, drill 11⁄2" deep holes straight through the two holes in the spring hanger (Figure 23). Note—DO NOT drill the holes deeper than 11⁄2".
Figure 23. Drilling the spring hanger
mounting holes.
Figure 21. Drilling the bridge mounting holes.
H3123 Electric Guitar Kit |