AssemblyControls
1.Insert the filter into the gun body (see
Figure 3).
Figure 3. Installing filter.
2.Screw the cup onto the top of the body.
3.Attach the air hose to the spray gun with a 1⁄4" NPS quick connect fitting (not included).
4.Attach the spray gun to an air hose regulated between 29 and 50 PSI.
Note: For the best results, use a hose that will be dedicated for spray use only. Do not use a hose that has been used with an
If you need additional help with this assem- bly, call our Technical Support at: (570)
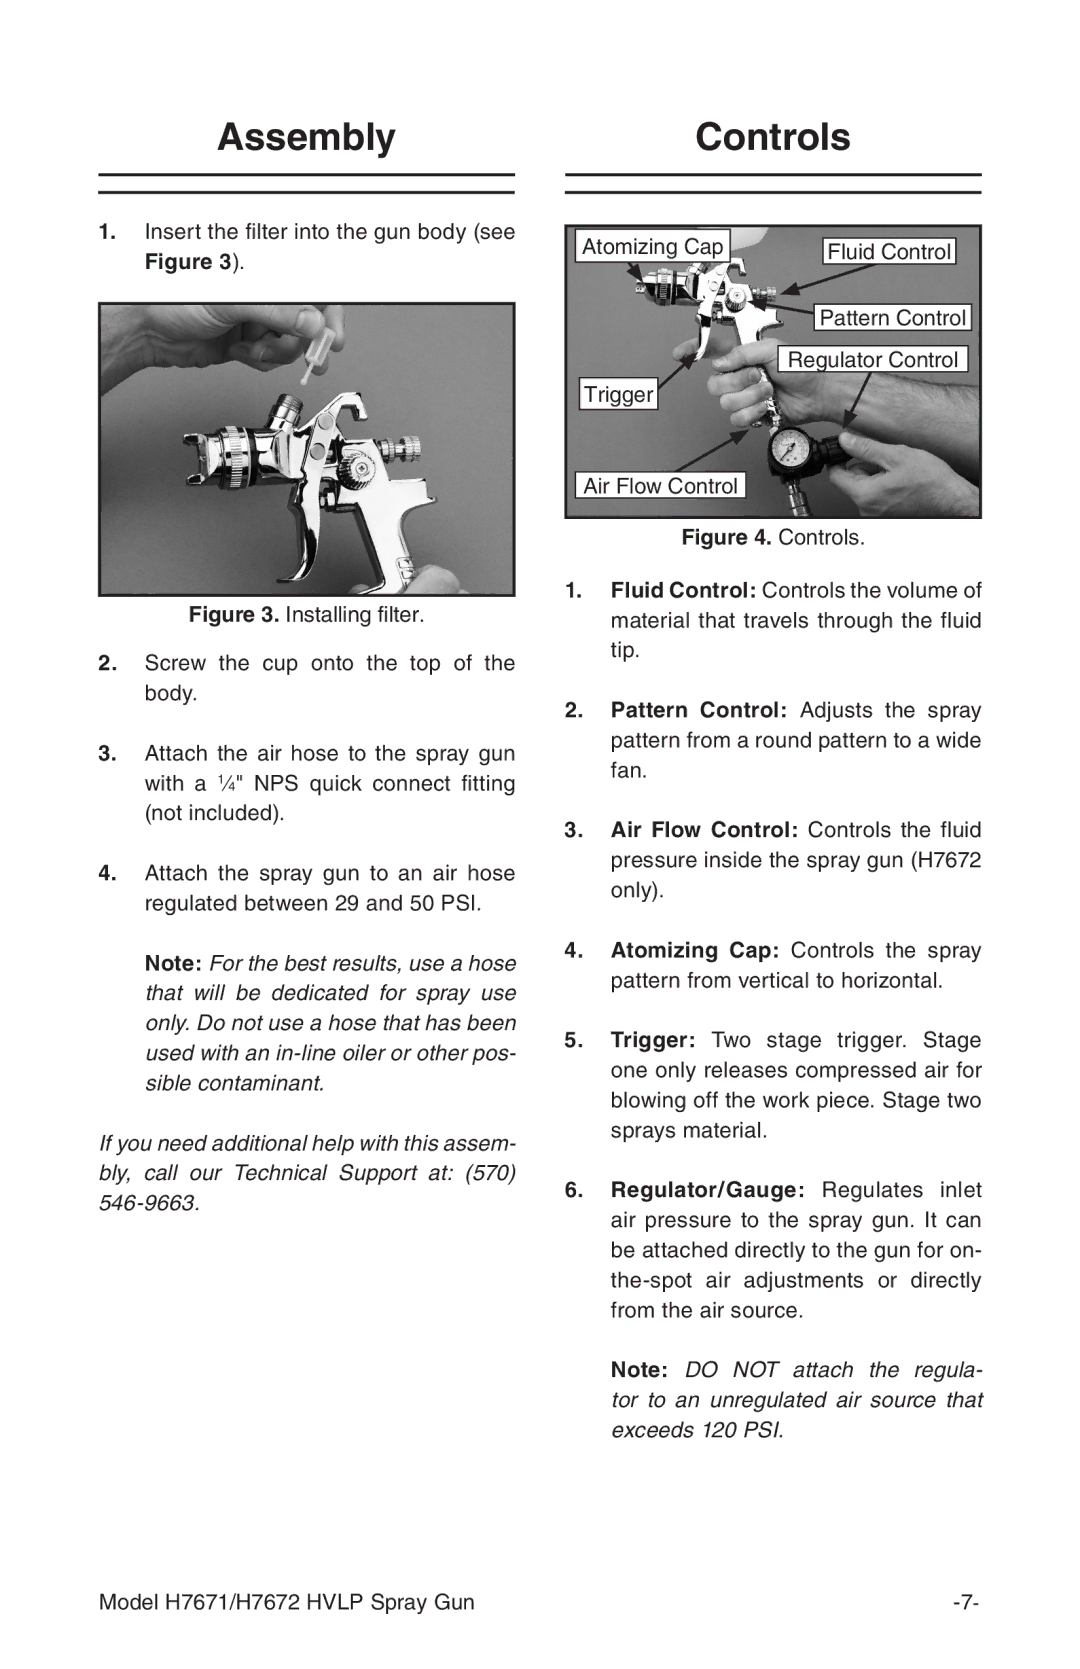
Atomizing Cap | Fluid Control |
| Pattern Control |
| Regulator Control |
Trigger |
|
Air Flow Control |
|
Figure 4. Controls.
1.Fluid Control: Controls the volume of material that travels through the fluid tip.
2.Pattern Control: Adjusts the spray pattern from a round pattern to a wide fan.
3.Air Flow Control: Controls the fluid pressure inside the spray gun (H7672 only).
4.Atomizing Cap: Controls the spray pattern from vertical to horizontal.
5.Trigger: Two stage trigger. Stage one only releases compressed air for blowing off the work piece. Stage two sprays material.
6.Regulator/Gauge: Regulates inlet air pressure to the spray gun. It can be attached directly to the gun for on-
Note: DO NOT attach the regula- tor to an unregulated air source that exceeds 120 PSI.
Model H7671/H7672 HVLP Spray Gun |