Air Supply
The glue gun MUST be regularly lubricated with
Figure 2. Manual Oiling.
For best results, we recommend using an in- line filter, lubricator, and regulator, as shown in Figure 3.
Quick | Quick | Lubricator | |
Connector | Connector | Regulator | |
Your |
|
| Air |
Tool |
|
| Compressor |
Quick |
|
|
|
Coupler |
| Quick |
|
| Air Hose | Filter | |
| Coupler | ||
|
| ||
Figure 3. Installing your tool.
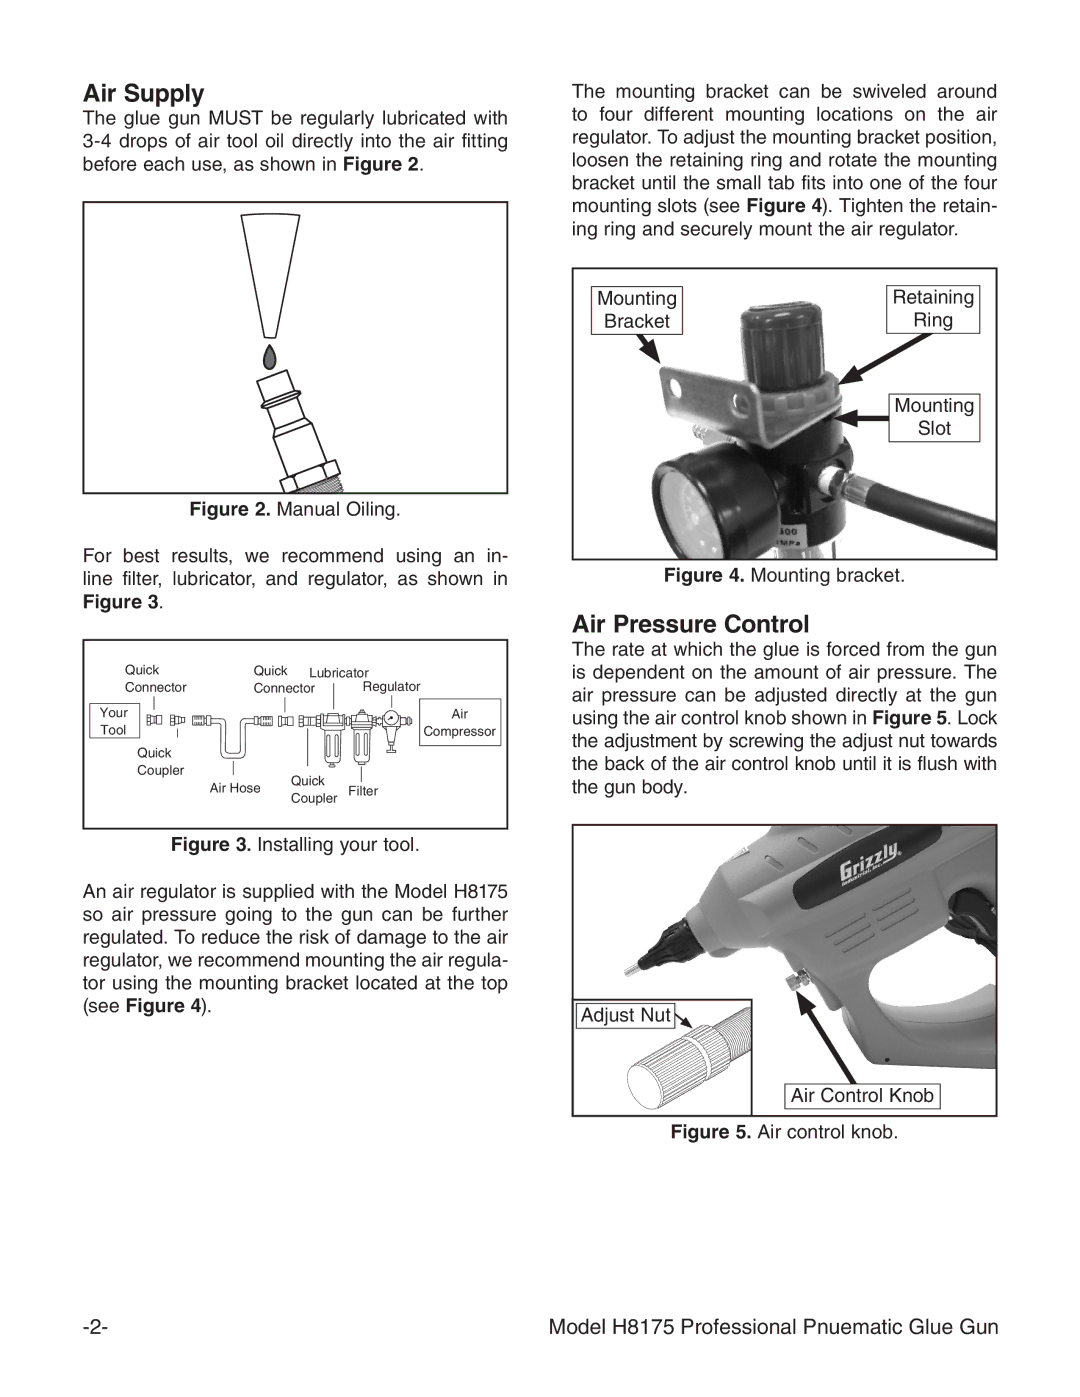
An air regulator is supplied with the Model H8175 so air pressure going to the gun can be further regulated. To reduce the risk of damage to the air regulator, we recommend mounting the air regula- tor using the mounting bracket located at the top (see Figure 4).
The mounting bracket can be swiveled around to four different mounting locations on the air regulator. To adjust the mounting bracket position, loosen the retaining ring and rotate the mounting bracket until the small tab fits into one of the four mounting slots (see Figure 4). Tighten the retain- ing ring and securely mount the air regulator.
Mounting |
| Retaining |
Bracket |
| Ring |
Mounting
Slot
Figure 4. Mounting bracket.
Air Pressure Control
The rate at which the glue is forced from the gun is dependent on the amount of air pressure. The air pressure can be adjusted directly at the gun using the air control knob shown in Figure 5. Lock the adjustment by screwing the adjust nut towards the back of the air control knob until it is flush with the gun body.
Adjust Nut |
Air Control Knob |
Figure 5. Air control knob.
Model H8175 Professional Pnuematic Glue Gun |
