Inventory
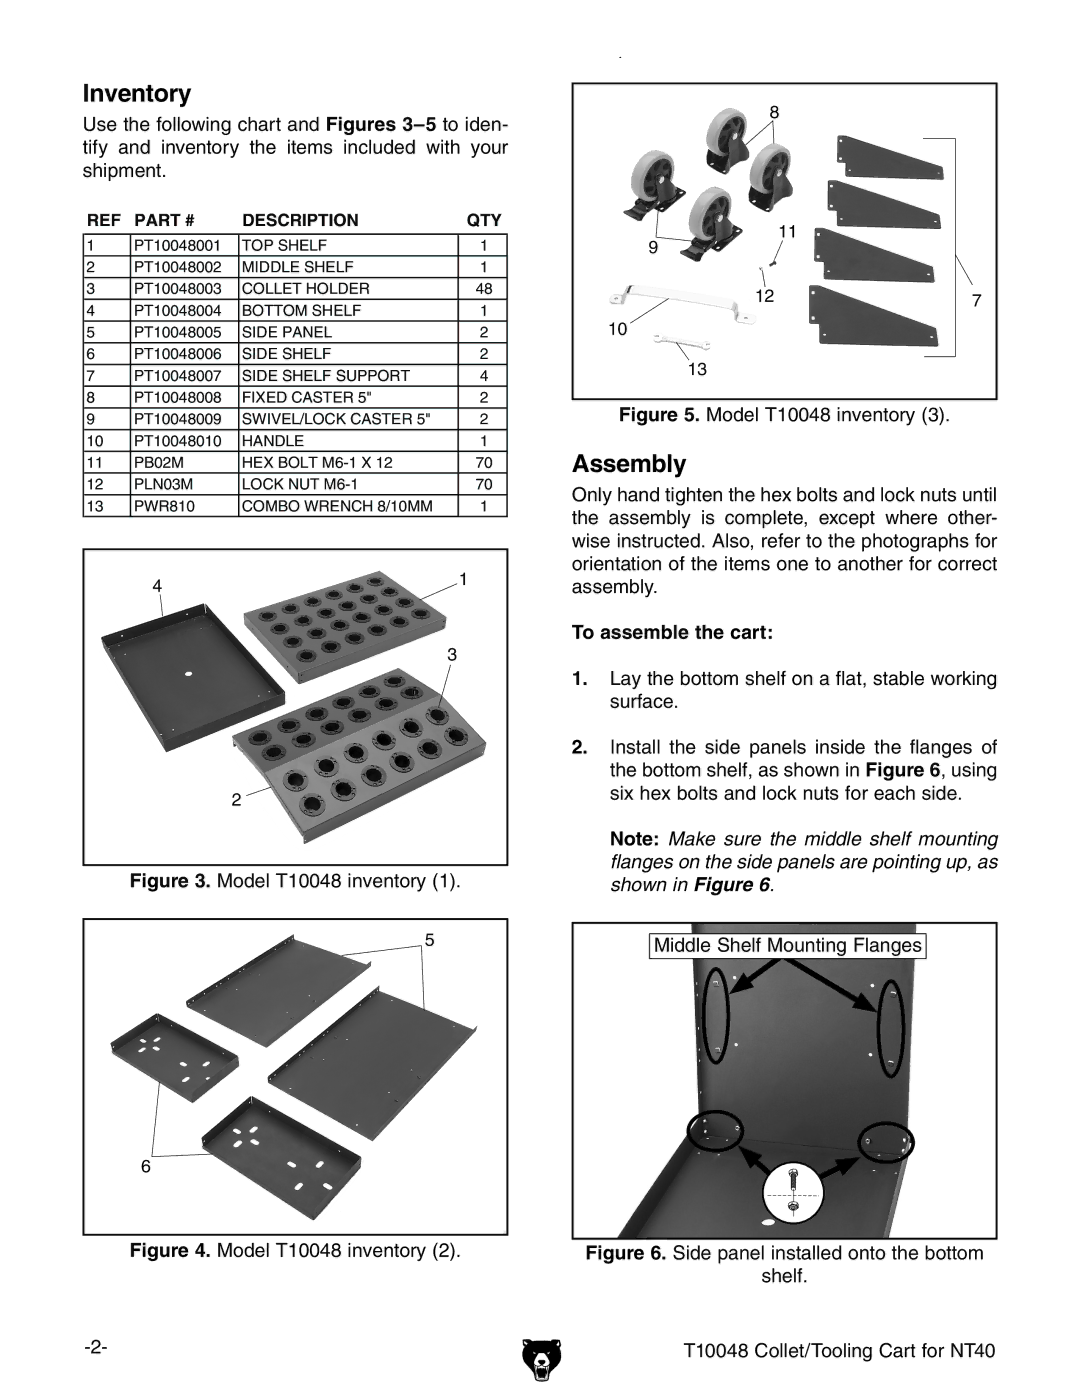
Use the following chart and Figures
)
-
REF | PART # | DESCRIPTION | QTY |
|
|
|
|
1 | PT10048001 | TOP SHELF | 1 |
2 | PT10048002 | MIDDLE SHELF | 1 |
.![]()
&&
3 | PT10048003 | COLLET HOLDER | 48 |
4 | PT10048004 | BOTTOM SHELF | 1 |
5 | PT10048005 | SIDE PANEL | 2 |
6 | PT10048006 | SIDE SHELF | 2 |
7 | PT10048007 | SIDE SHELF SUPPORT | 4 |
8 | PT10048008 | FIXED CASTER 5" | 2 |
9 | PT10048009 | SWIVEL/LOCK CASTER 5" | 2 |
10 | PT10048010 | HANDLE | 1 |
11 | PB02M | HEX BOLT | 70 |
12 | PLN03M | LOCK NUT | 70 |
13 | PWR810 | COMBO WRENCH 8/10MM | 1 |
) | & |
|
(
' ![]()
Figure 3. Model T10048 inventory (1).
*
+
Figure 4. Model T10048 inventory (2).
&' | , |
&%
&(
Figure 5. Model T10048 inventory (3).
Assembly
Only hand tighten the hex bolts and lock nuts until the assembly is complete, except where other- wise instructed. Also, refer to the photographs for orientation of the items one to another for correct assembly.
To assemble the cart:
1.Lay the bottom shelf on a flat, stable working surface.
2.Install the side panels inside the flanges of the bottom shelf, as shown in Figure 6, using six hex bolts and lock nuts for each side.
Note: Make sure the middle shelf mounting flanges on the side panels are pointing up, as shown in Figure 6.
Middle Shelf Mounting Flanges
