To attach the braces to the back:
1.Apply sufficient glue and center the braces on the back in their specified locations (see
Figure 10 on Page 8).
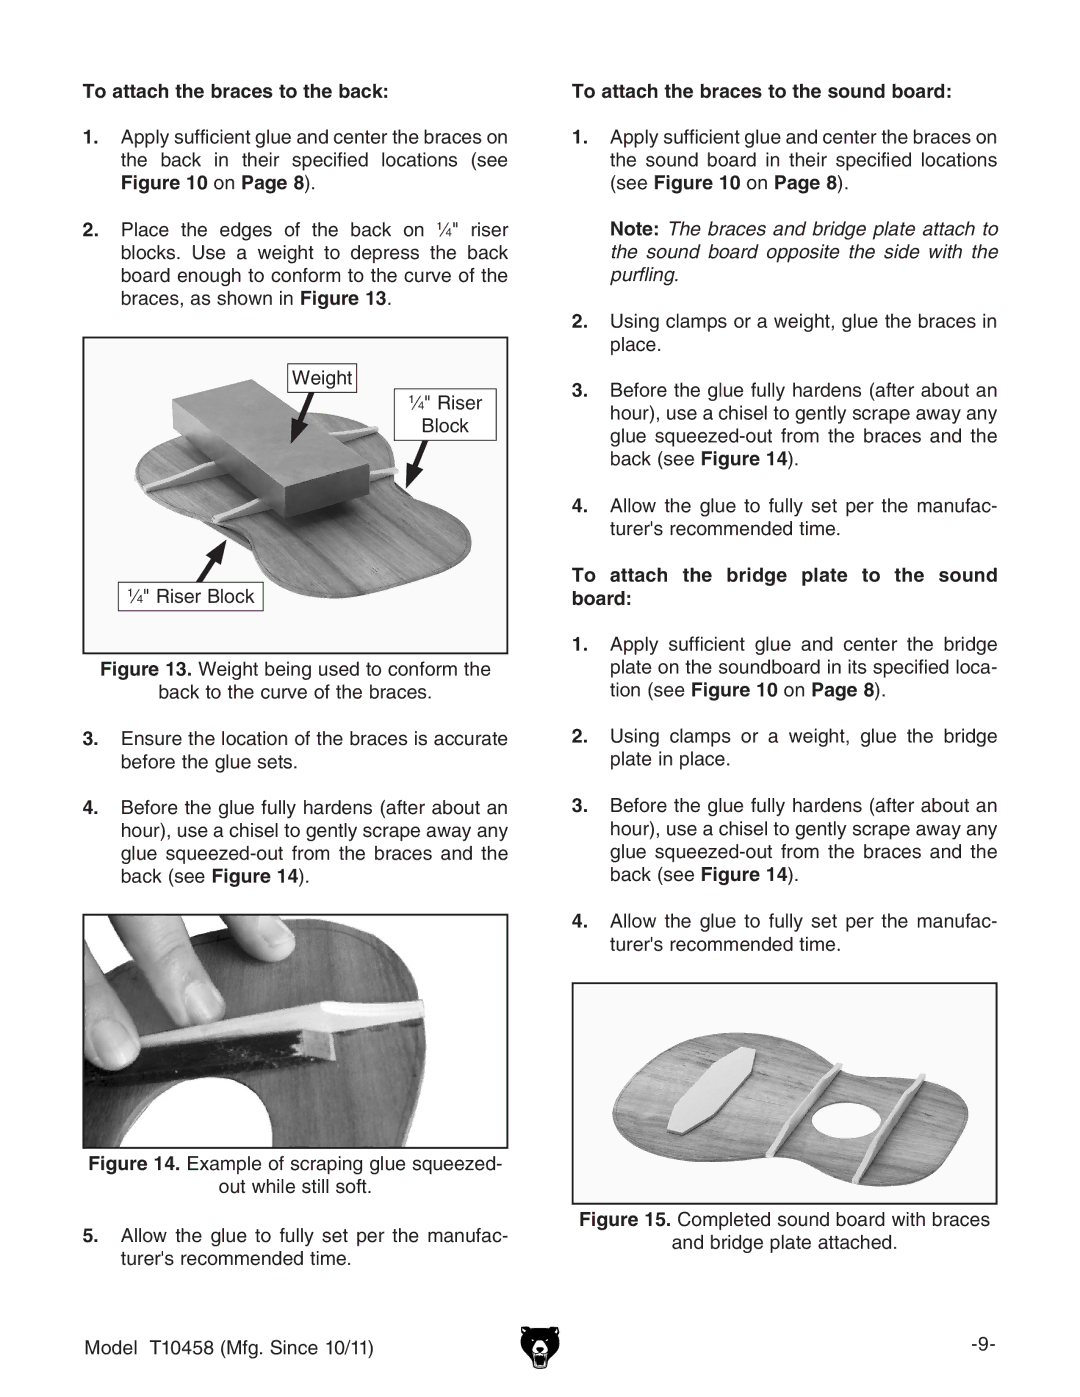
2.Place the edges of the back on 1⁄4" riser blocks. Use a weight to depress the back board enough to conform to the curve of the braces, as shown in Figure 13.
Weight
1⁄4" Riser
Block
1⁄4" Riser Block
Figure 13. Weight being used to conform the
back to the curve of the braces.
3.Ensure the location of the braces is accurate before the glue sets.
4.Before the glue fully hardens (after about an hour), use a chisel to gently scrape away any glue squeezed-out from the braces and the back (see Figure 14).
To attach the braces to the sound board:
1.Apply sufficient glue and center the braces on the sound board in their specified locations (see Figure 10 on Page 8).
Note: The braces and bridge plate attach to the sound board opposite the side with the purfling.
2.Using clamps or a weight, glue the braces in place.
3.Before the glue fully hardens (after about an hour), use a chisel to gently scrape away any glue
4.Allow the glue to fully set per the manufac- turer's recommended time.
To attach the bridge plate to the sound board:
1.Apply sufficient glue and center the bridge plate on the soundboard in its specified loca- tion (see Figure 10 on Page 8).
2.Using clamps or a weight, glue the bridge plate in place.
3.Before the glue fully hardens (after about an hour), use a chisel to gently scrape away any glue
4.Allow the glue to fully set per the manufac- turer's recommended time.
