Attaching Braces
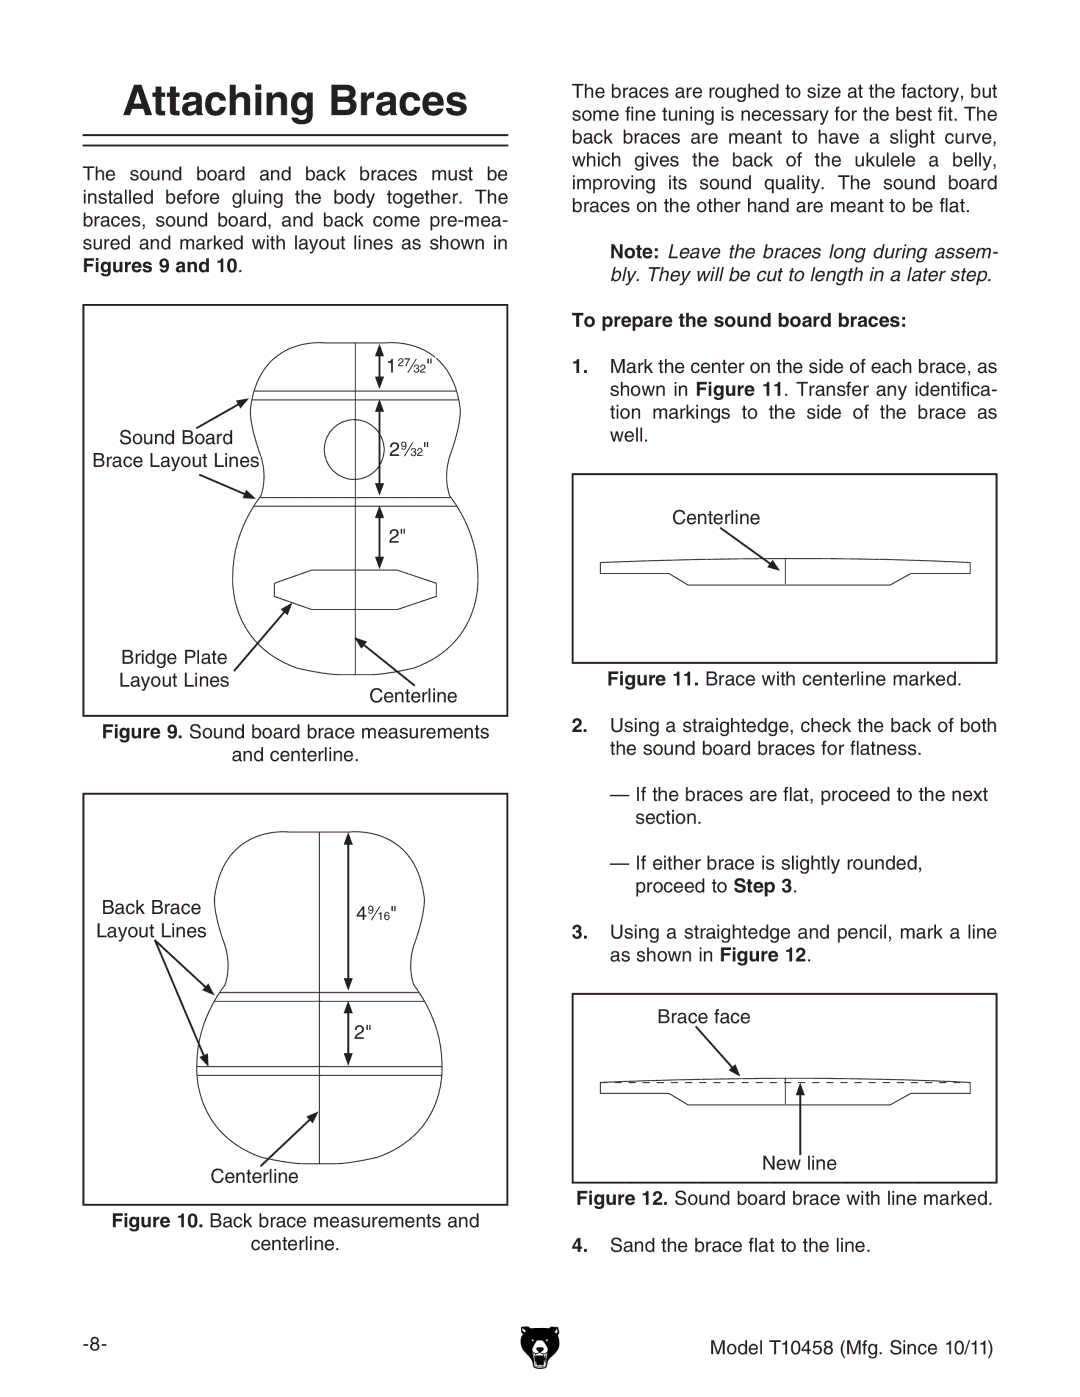
The sound board and back braces must be installed before gluing the body together. The braces, sound board, and back come
| 1 27⁄32" | |
Sound Board | 2 9⁄32" | |
Brace Layout Lines | ||
| ||
| 2" | |
Bridge Plate |
| |
Layout Lines | Centerline | |
|
Figure 9. Sound board brace measurements
and centerline.
Back Brace | 9 |
Layout Lines | 4 ⁄16" |
| |
| 2" |
| Centerline |
Figure 10. Back brace measurements and
centerline.
The braces are roughed to size at the factory, but some fine tuning is necessary for the best fit. The back braces are meant to have a slight curve, which gives the back of the ukulele a belly, improving its sound quality. The sound board braces on the other hand are meant to be flat.
Note: Leave the braces long during assem- bly. They will be cut to length in a later step.
To prepare the sound board braces:
1.Mark the center on the side of each brace, as shown in Figure 11. Transfer any identifica- tion markings to the side of the brace as well.
Centerline |
Figure 11. Brace with centerline marked.
2.Using a straightedge, check the back of both the sound board braces for flatness.
—If the braces are flat, proceed to the next section.
—If either brace is slightly rounded, proceed to Step 3.
3.Using a straightedge and pencil, mark a line as shown in Figure 12.
Brace face |
New line |
Figure 12. Sound board brace with line marked.
4.Sand the brace flat to the line.
Model T10458 (Mfg. Since 10/11) |
