USING SHORTWAVE continued
AUTOSCAN TUNING WHILE IN SHORTWAVE
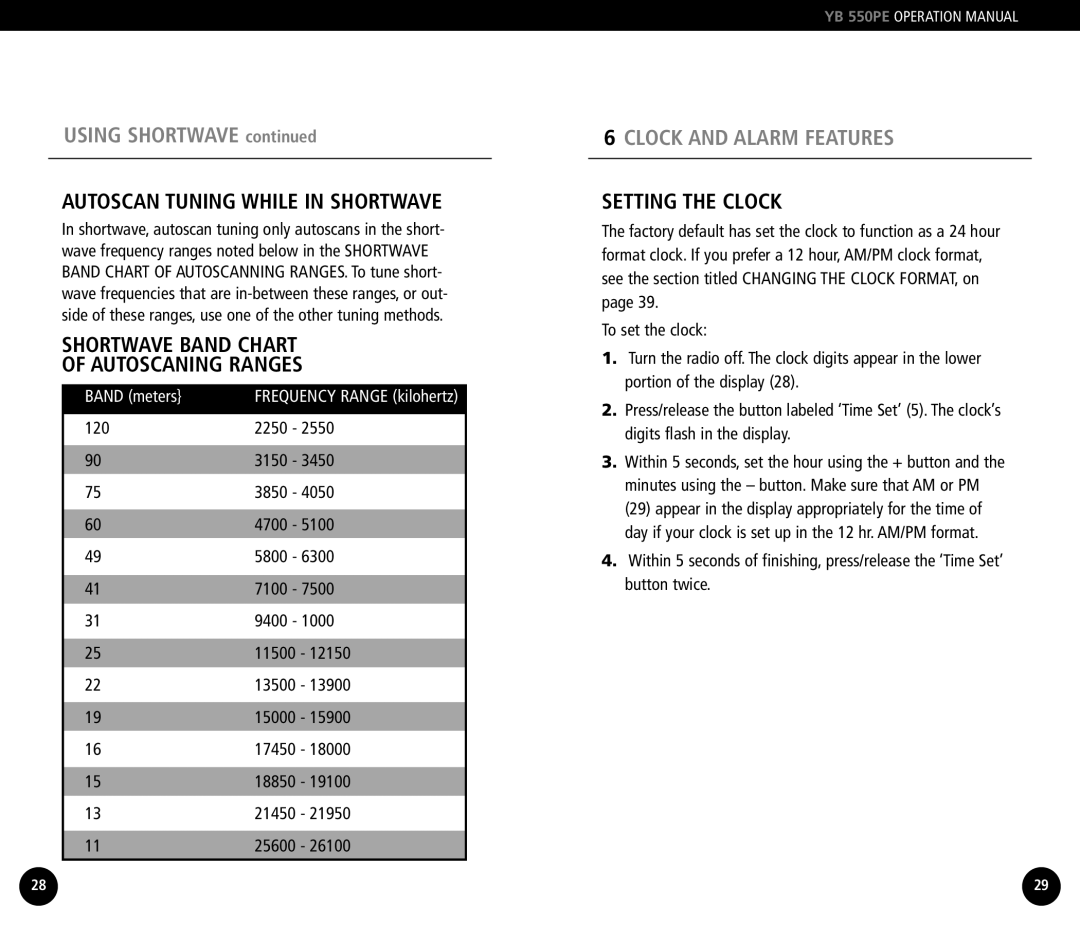
In shortwave, autoscan tuning only autoscans in the short- wave frequency ranges noted below in the SHORTWAVE BAND CHART OF AUTOSCANNING RANGES. To tune short- wave frequencies that are
SHORTWAVE BAND CHART
OF AUTOSCANING RANGES
BAND (meters} | FREQUENCY RANGE (kilohertz) |
120 | 2250 - 2550 |
|
|
90 | 3150 - 3450 |
75 | 3850 - 4050 |
|
|
60 | 4700 - 5100 |
49 | 5800 - 6300 |
|
|
41 | 7100 - 7500 |
31 | 9400 - 1000 |
|
|
25 | 11500 - 12150 |
22 | 13500 - 13900 |
|
|
19 | 15000 - 15900 |
16 | 17450 - 18000 |
|
|
15 | 18850 - 19100 |
13 | 21450 - 21950 |
|
|
11 | 25600 - 26100 |
|
|
YB 550PE OPERATION MANUAL
6CLOCK AND ALARM FEATURES
SETTING THE CLOCK
The factory default has set the clock to function as a 24 hour format clock. If you prefer a 12 hour, AM/PM clock format, see the section titled CHANGING THE CLOCK FORMAT, on page 39.
To set the clock:
1.Turn the radio off. The clock digits appear in the lower portion of the display (28).
2.Press/release the button labeled ‘Time Set’ (5). The clock’s digits flash in the display.
3.Within 5 seconds, set the hour using the + button and the minutes using the – button. Make sure that AM or PM (29) appear in the display appropriately for the time of day if your clock is set up in the 12 hr. AM/PM format.
4.Within 5 seconds of finishing, press/release the ‘Time Set’ button twice.
28 | 29 |
