Measurement (cont)
Viewing Stored Measurements
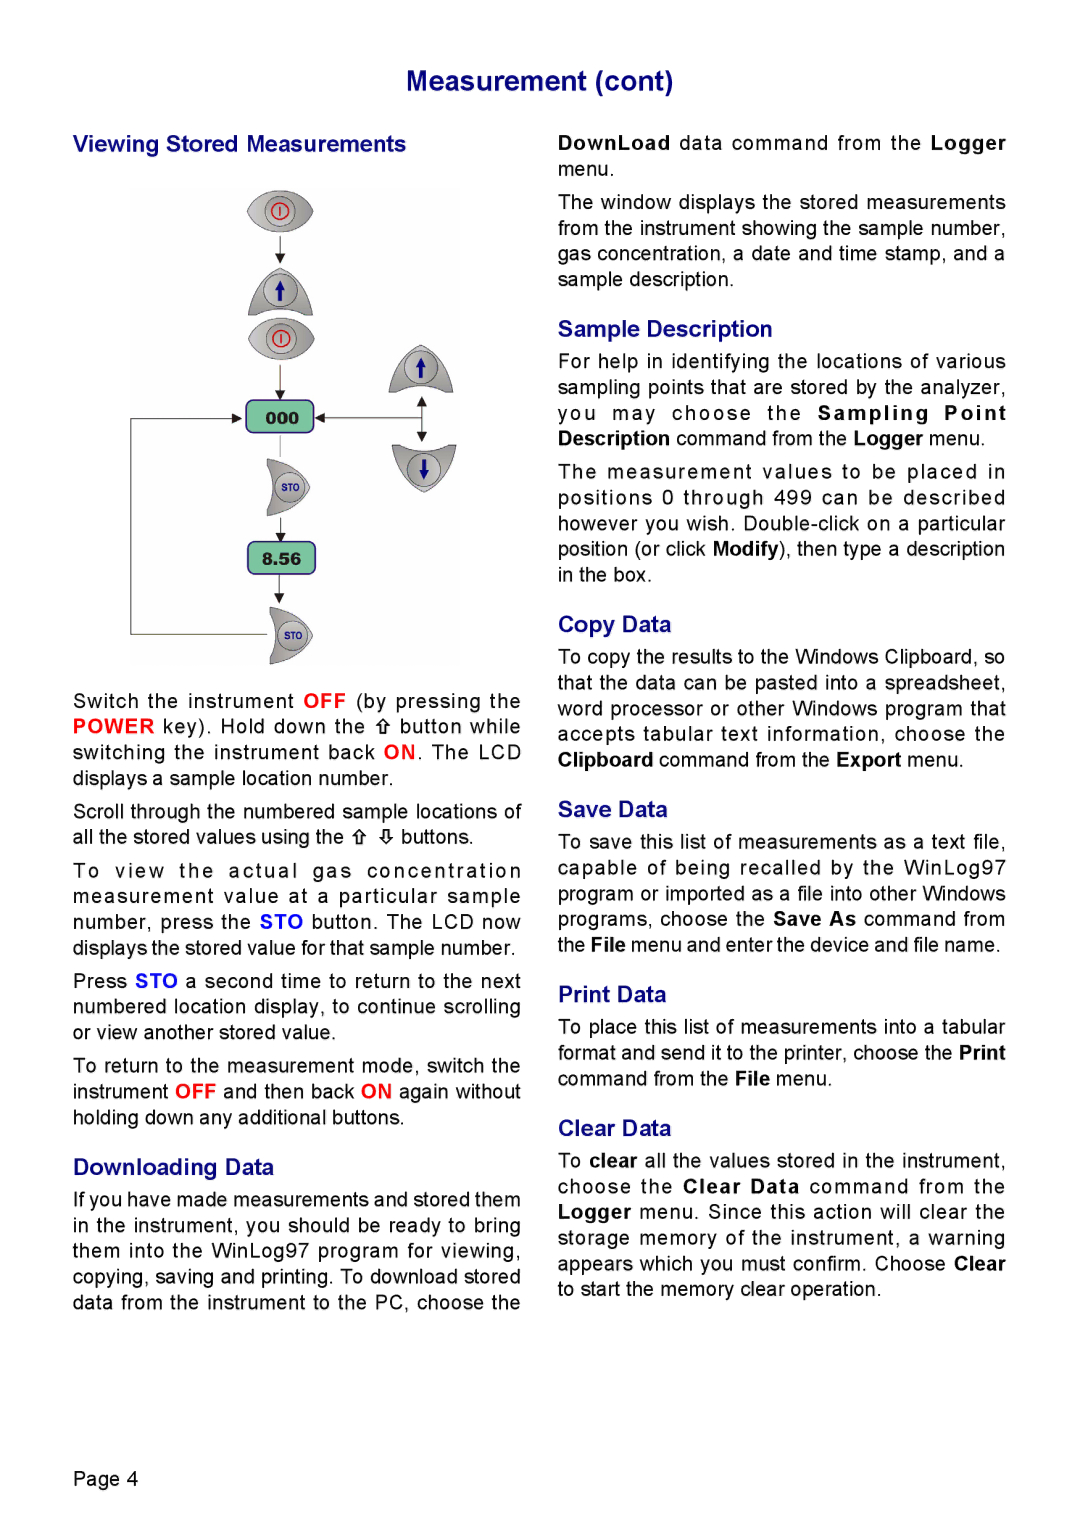
Switch the instrument OFF (by pressing the POWER key). Hold down the × button while switching the instrument back ON. The LCD displays a sample location number.
Scroll through the numbered sample locations of all the stored values using the × Ø buttons.
To view the actual gas concentration measurement value at a particular sample number, press the STO button. The LCD now displays the stored value for that sample number.
Press STO a second time to return to the next numbered location display, to continue scrolling or view another stored value.
To return to the measurement mode, switch the instrument OFF and then back ON again without holding down any additional buttons.
Downloading Data
If you have made measurements and stored them in the instrument, you should be ready to bring them into the WinLog97 program for viewing, copying, saving and printing. To download stored data from the instrument to the PC, choose the
DownLoad data command from the Logger menu.
The window displays the stored measurements from the instrument showing the sample number, gas concentration, a date and time stamp, and a sample description.
Sample Description
For help in identifying the locations of various sampling points that are stored by the analyzer, you may choose the Sampling Point Description command from the Logger menu.
The measurement values to be placed in positions 0 through 499 can be described however you wish.
Copy Data
To copy the results to the Windows Clipboard, so that the data can be pasted into a spreadsheet, word processor or other Windows program that accepts tabular text information, choose the Clipboard command from the Export menu.
Save Data
To save this list of measurements as a text file, capable of being recalled by the WinLog97 program or imported as a file into other Windows programs, choose the Save As command from the File menu and enter the device and file name.
Print Data
To place this list of measurements into a tabular format and send it to the printer, choose the Print command from the File menu.
Clear Data
To clear all the values stored in the instrument, choose the Clear Data command from the Logger menu. Since this action will clear the storage memory of the instrument, a warning appears which you must confirm. Choose Clear to start the memory clear operation.
Page 4
