AU84NATEAA, AD842AHEAA specifications
The Haier AD842AHEAA and AU84NATEAA are two innovative air conditioning models designed to enhance indoor comfort while optimizing energy efficiency. These units are well-regarded for their advanced technologies and user-friendly features, making them ideal choices for both residential and light commercial applications.One of the standout features of the Haier AD842AHEAA is its Inverter Technology. This technology allows the compressor to adjust its speed according to the cooling demand, resulting in significant energy savings compared to traditional air conditioning systems. It ensures a more stable temperature and reduces noise levels, providing a peaceful environment.
The AU84NATEAA, on the other hand, showcases Haier's commitment to smart comfort solutions with its integrated Wi-Fi capabilities. Users can control the unit remotely via a smartphone app, enabling them to adjust settings, monitor energy usage, and receive maintenance alerts, contributing to a smarter and more convenient lifestyle.
Both models come equipped with an intelligent air flow system. This technology helps in distributing cool air evenly throughout the room, ensuring that no spot is left untouched. The air distribution design minimizes hot or cold pockets, promoting overall comfort and satisfaction for users.
Additionally, both units feature an energy-efficient design that is compliant with international energy standards. They utilize eco-friendly refrigerants, which not only help in reducing the carbon footprint but also provide reliable cooling performance without compromising environmental safety.
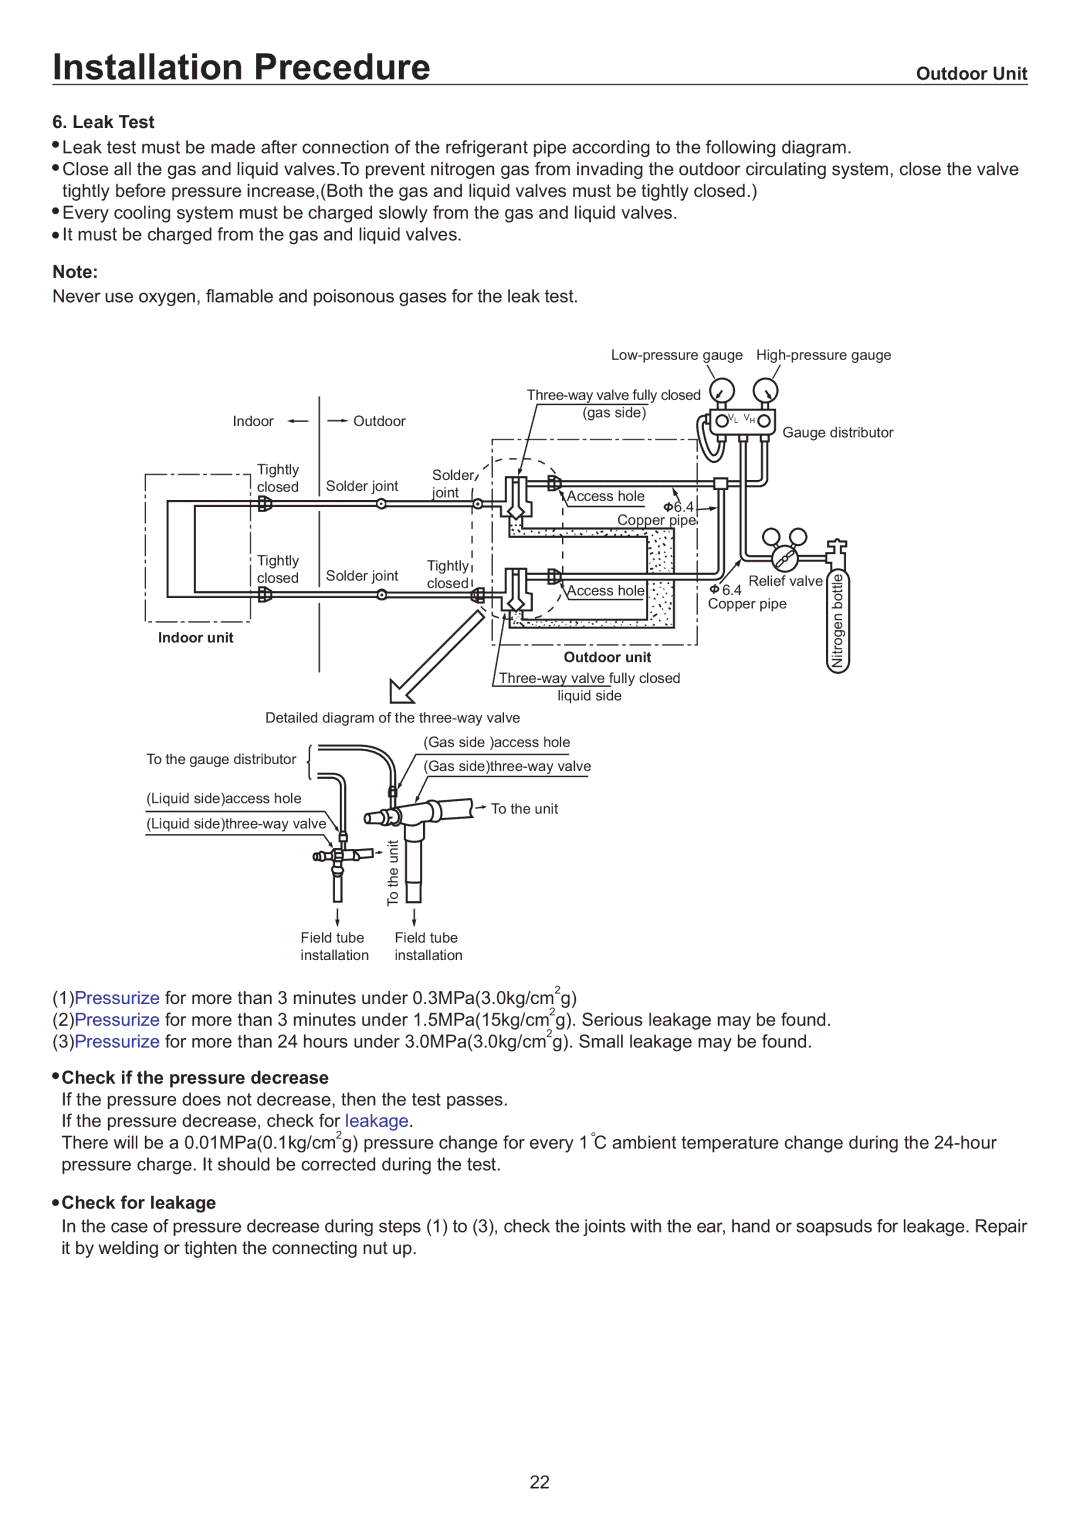
The Haier AD842AHEAA and AU84NATEAA are designed for easy installation and maintenance, boasting a streamlined user interface and accessible components for service. This focus on practicality and ease of use extends to their sleek and modern aesthetic, allowing them to blend seamlessly into any interior décor while functioning efficiently.
In summary, the Haier AD842AHEAA and AU84NATEAA air conditioning units represent a harmonious blend of advanced technology, comfort, and energy efficiency. With features like Inverter Technology, smart home integration, intelligent airflow, and eco-friendly refrigerants, these models stand out in the competitive air conditioning market, offering consumers modern solutions to their cooling needs. Whether for home use or in small business environments, these units provide a reliable and effective way to maintain ideal indoor conditions.

