Operation
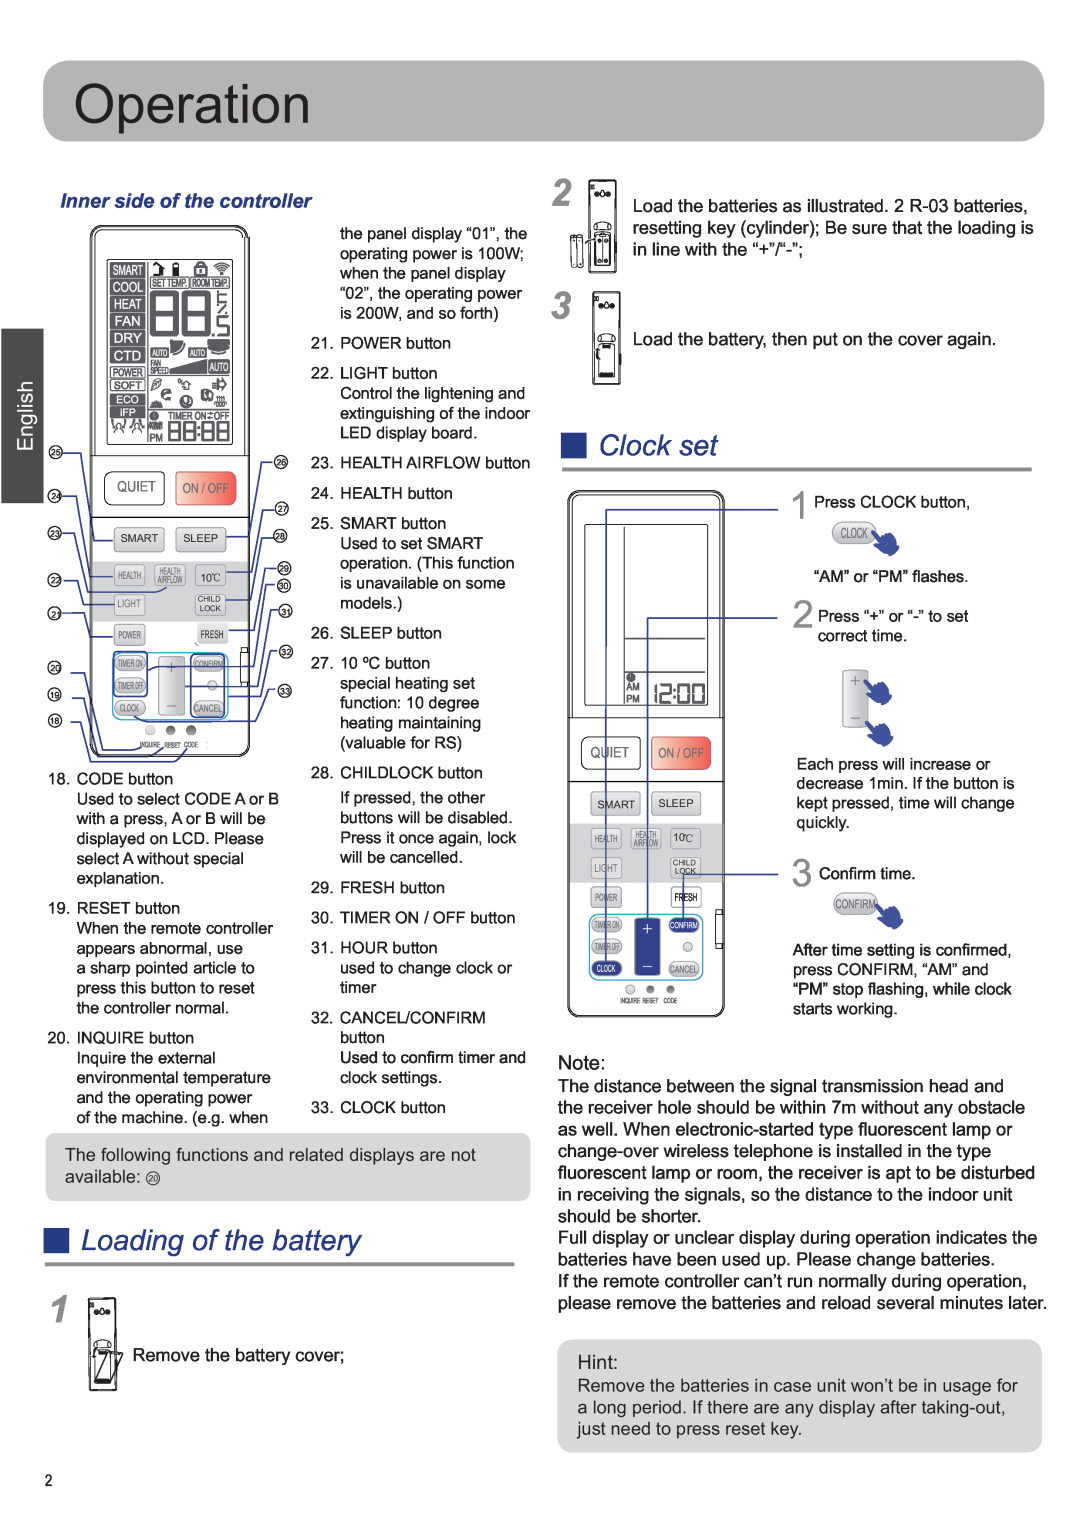
| Inner side of the controller |
| |||||
|
|
|
|
|
|
| the panel display “01”, the |
|
| SMART |
|
|
|
| operating power is 100W; |
|
| SET TEMP. ROOM TEMP. |
| when the panel display | |||
|
| COOL |
| “02”, the operating power | |||
|
| HEAT |
|
|
|
| is 200W, and so forth) |
|
| FAN |
|
|
|
| |
|
|
|
|
|
|
| |
|
| DRY |
|
|
|
| 21. POWER button |
|
| CTD | AUTO | AUTO | AUTO |
|
|
|
| POWER | FAN |
|
| 22. LIGHT button | |
English |
| SPEED |
|
| |||
| SOFT |
|
|
|
| Control the lightening and | |
| ECO |
|
|
|
| ||
| iFP | AM | TIMER ON | OFF |
| extinguishing of the indoor | |
|
|
|
|
| LED display board. | ||
|
| PM |
|
|
| ||
25 |
|
|
|
| 26 | 23. HEALTH AIRFLOW button | |
|
|
|
|
| |||
|
|
|
|
|
| ||
| 24 | QUIET |
|
|
| 24. HEALTH button | |
|
|
|
|
| 27 | ||
|
|
|
|
|
| 25. SMART button | |
| 23 | SMART | SLEEP | 28 | |||
| Used to set SMART | ||||||
|
| ||||||
|
|
|
|
|
|
| |
|
|
|
| 10 | 29 | operation. (This function | |
| 22 |
|
| 30 | is unavailable on some | ||
|
|
|
| CHILD |
|
| |
2Load the batteries as illustrated. 2
resetting key (cylinder); Be sure that the loading is in line with the
3![]()
![]()
![]()
![]()
![]()
![]()
![]()
![]()
![]()
![]() Load the battery, then put on the cover again.
Load the battery, then put on the cover again.
 Clock set
1Press CLOCK button,
LIGHT | LOCK | models.) | ||
21 |
|
|
| 31 |
|
| FRESH | 26. SLEEP button | |
|
|
|
| 32 |
20 |
|
|
| 27. 10 ºC button |
|
|
|
| special heating set |
|
|
|
| |
19 |
|
|
| 33 |
|
|
| function: 10 degree | |
|
|
|
| |
18 |
|
|
| heating maintaining |
|
|
|
| |
|
|
|
| (valuable for RS) |
AM |
PM |
QUIET |
2Press “+” or
18. | CODE button |
| Used to select CODE A or B |
| with a press, A or B will be |
| displayed on LCD. Please |
| select A without special |
| explanation. |
19. | RESET button |
| When the remote controller |
| appears abnormal, use |
28. | CHILDLOCK button |
| If pressed, the other |
| buttons will be disabled. |
| Press it once again, lock |
| will be cancelled. |
29. | FRESH button |
30. | TIMER ON / OFF button |
31. | HOUR button |
SMART | SLEEP |
| ||
|
|
|
|
|
| 10 |
| ||
LIGHT | CHILD |
| ||
LOCK |
| |||
|
|
|
|
|
| FRESH |
| ||
|
|
|
|
|
|
|
|
|
|
Each press will increase or decrease 1min. If the button is kept pressed, time will change quickly.
3![]()
a sharp pointed article to |
press this button to reset |
the controller normal. |
20. INQUIRE button |
Inquire the external |
environmental temperature |
and the operating power |
of the machine. (e.g. when |
| used to change clock or |
| timer |
32. | CANCEL/CONFIRM |
| button |
| clock settings. |
33. | CLOCK button |
press CONFIRM, “AM” and
starts working.
Note:
The distance between the signal transmission head and the receiver hole should be within 7m without any obstacle
The following functions and related displays are not available: 20
 Loading of the battery
1![]()
![]()
![]()
![]()
![]()
![]()
![]() Remove the battery cover;
Remove the battery cover;
in receiving the signals, so the distance to the indoor unit should be shorter.
Full display or unclear display during operation indicates the batteries have been used up. Please change batteries.
If the remote controller can’t run normally during operation, please remove the batteries and reload several minutes later.
Hint:
Remove the batteries in case unit won’t be in usage for a long period. If there are any display after
2