Installation Procedure
Refrigerant piping
(2) Piping size
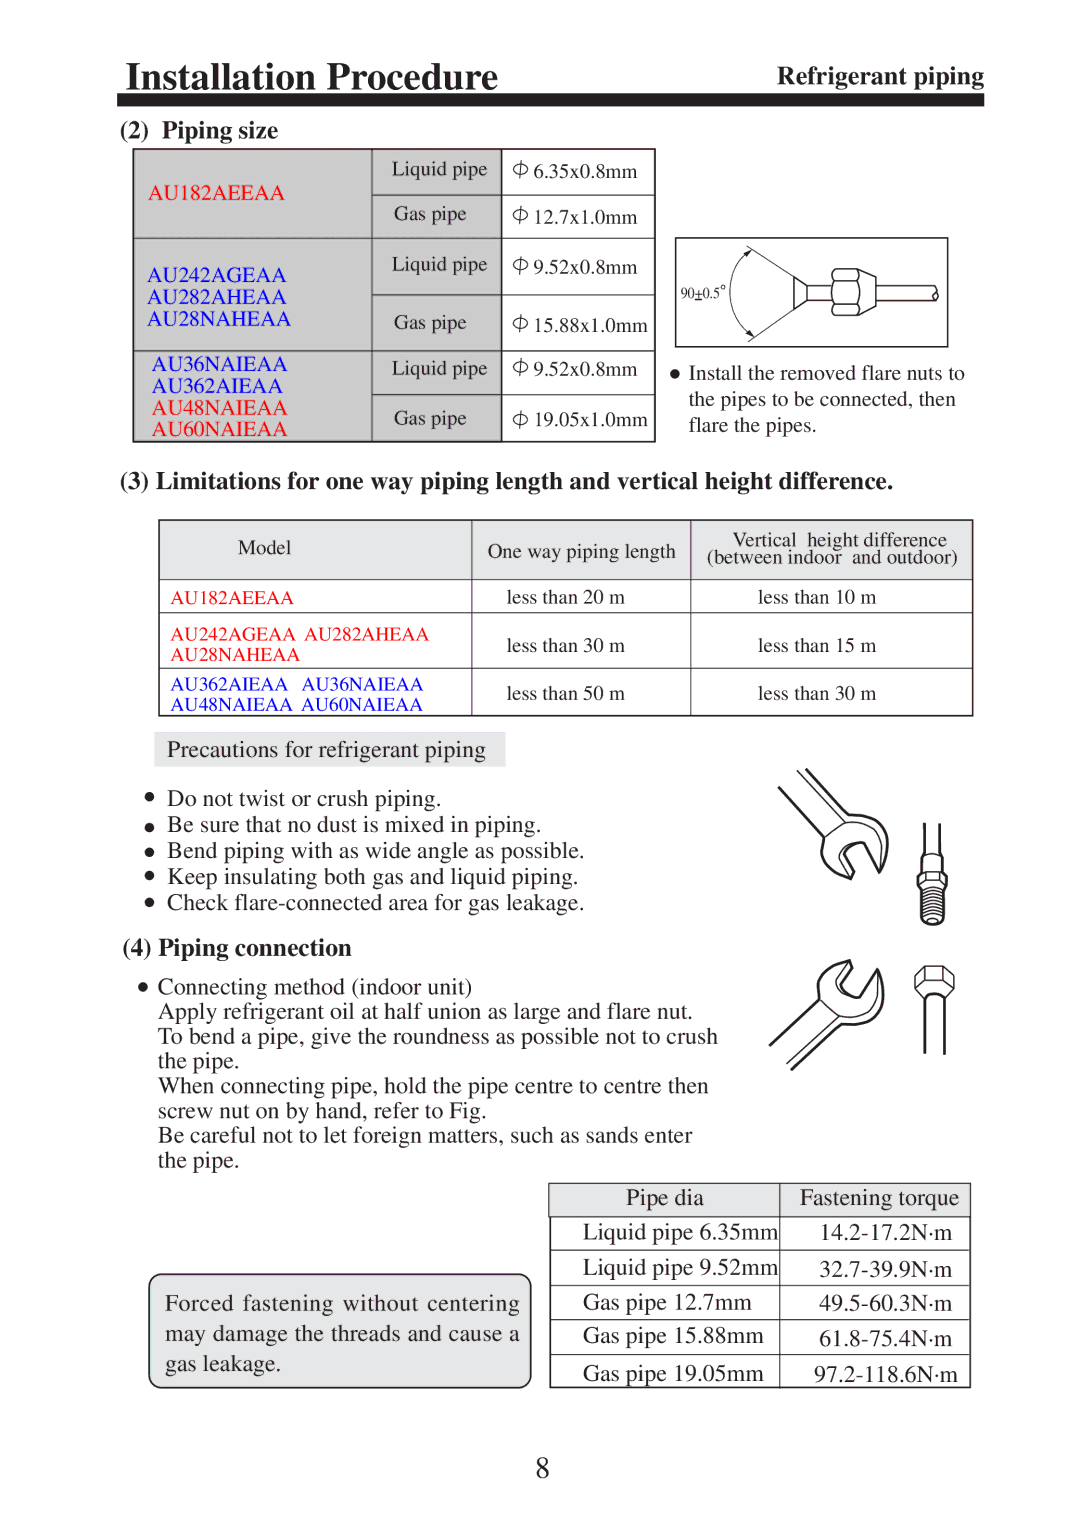
AU182AEEAA | Liquid pipe | 6.35x0.8mm | |
Gas pipe | 12.7x1.0mm | ||
| |||
AU242AGEAA | Liquid pipe | 9.52x0.8mm | |
|
| ||
AU282AHEAA |
|
| |
AU28NAHEAA | Gas pipe | 15.88x1.0mm | |
AU36NAIEAA | Liquid pipe | 9.52x0.8mm | |
AU362AIEAA |
|
| |
AU48NAIEAA | Gas pipe | 19.05x1.0mm | |
AU60NAIEAA | |||
|
|
90+0.5![]()
![]() Install the removed flare nuts to the pipes to be connected, then flare the pipes.
Install the removed flare nuts to the pipes to be connected, then flare the pipes.
(3) Limitations for one way piping length and vertical height difference.
Model | One way piping length | Vertical height difference | |
(between indoor and outdoor) | |||
|
|
| |
AU182AEEAA | less than 20 m | less than 10 m | |
|
|
| |
AU242AGEAA AU282AHEAA | less than 30 m | less than 15 m | |
AU28NAHEAA | |||
|
| ||
AU362AIEAA AU36NAIEAA | less than 50 m | less than 30 m | |
AU48NAIEAA AU60NAIEAA | |||
|
|
Precautions for refrigerant piping
Do not twist or crush piping.
Be sure that no dust is mixed in piping.
Bend piping with as wide angle as possible.
Keep insulating both gas and liquid piping.
Check
(4) Piping connection
![]() Connecting method (indoor unit)
Connecting method (indoor unit)
Apply refrigerant oil at half union as large and flare nut. To bend a pipe, give the roundness as possible not to crush the pipe.
When connecting pipe, hold the pipe centre to centre then screw nut on by hand, refer to Fig.
Be careful not to let foreign matters, such as sands enter the pipe.
Forced fastening without centering may damage the threads and cause a gas leakage.
Pipe dia | Fastening torque |
Liquid pipe 6.35mm | |
Liquid pipe 9.52mm | |
Gas pipe 12.7mm | |
Gas pipe 15.88mm | |
Gas pipe 19.05mm |
8
