 INTRODUCTION TO SPARE PARTS
Operation
AUTO
COOL
DRY
SLEEP
SWING
FAN SPEED
LO MID
HI AUTO
AUTO
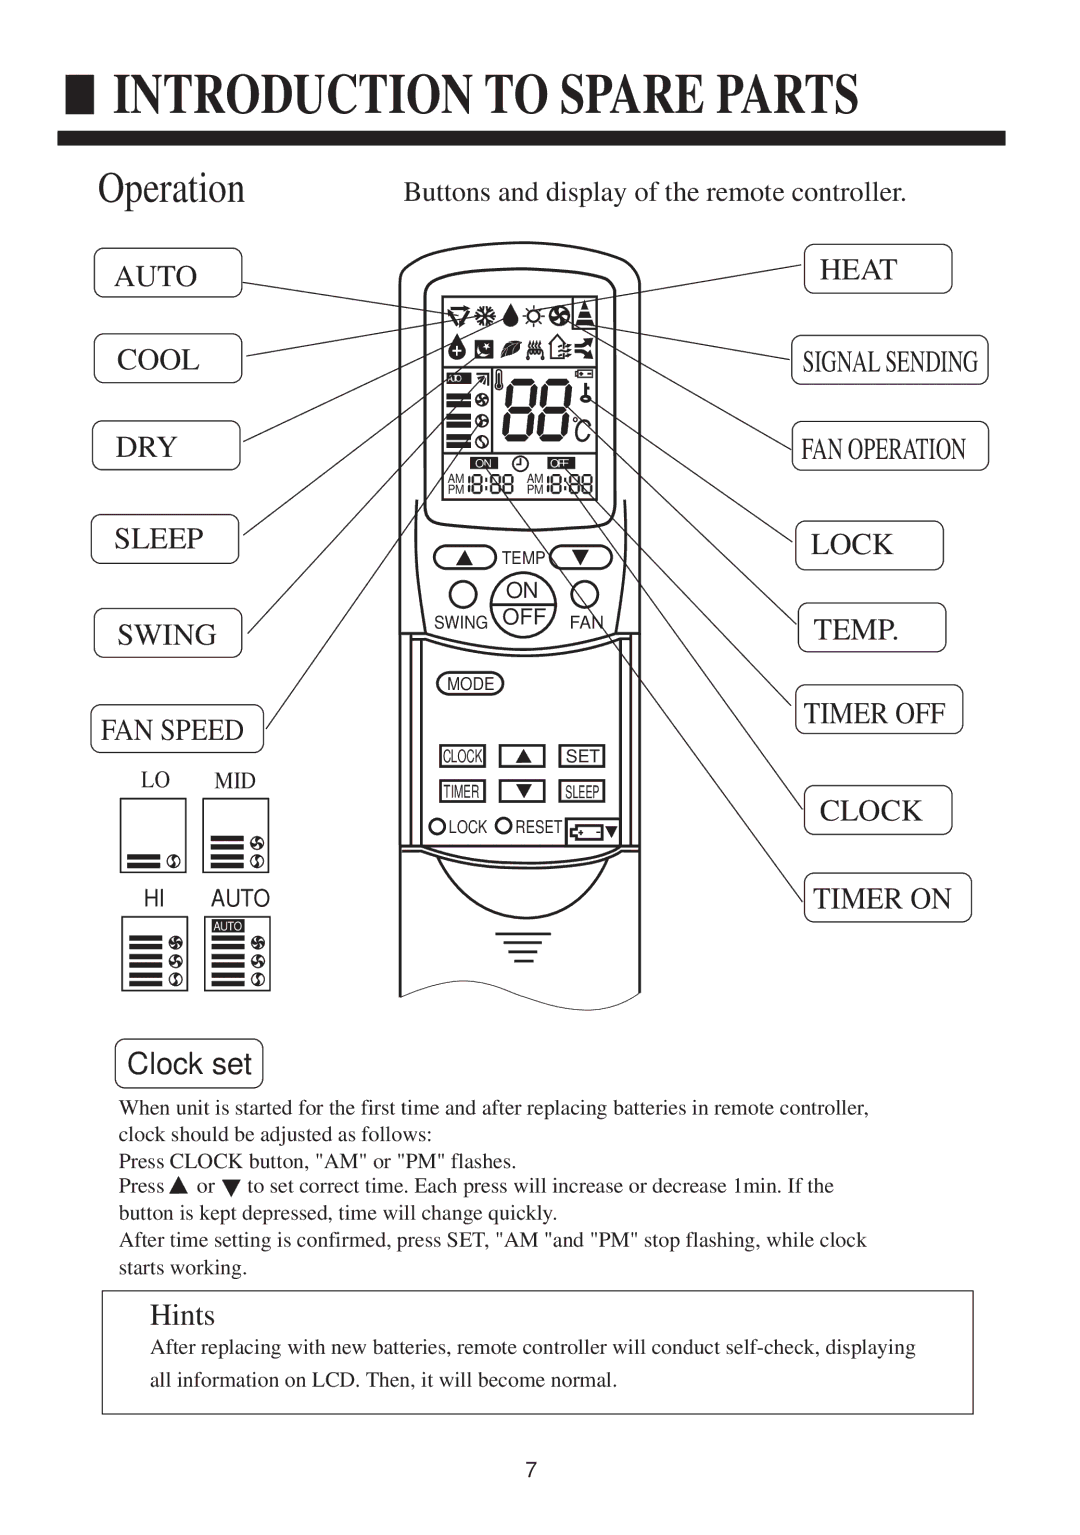
Buttons and display of the remote controller.
|
|
| HEAT |
AUTO |
|
| SIGNAL SENDING |
|
|
| |
ON | OFF |
| FAN OPERATION |
AM | AM |
|
|
PM | PM |
|
|
| TEMP |
| LOCK |
|
|
| |
| ON |
|
|
SWING | OFF | FAN | TEMP. |
|
|
| |
MODE |
|
| TIMER OFF |
|
|
| |
CLOCK |
| SET |
|
TIMER |
| SLEEP | CLOCK |
LOCK | RESET |
| |
|
| ||
|
|
| TIMER ON |
Clock set
When unit is started for the first time and after replacing batteries in remote controller, clock should be adjusted as follows:
Press CLOCK button, "AM" or "PM" flashes.
Press ![]() or
or ![]() to set correct time. Each press will increase or decrease 1min. If the button is kept depressed, time will change quickly.
to set correct time. Each press will increase or decrease 1min. If the button is kept depressed, time will change quickly.
After time setting is confirmed, press SET, "AM "and "PM" stop flashing, while clock starts working.
Hints
After replacing with new batteries, remote controller will conduct
7
