English
Refrigerator Interior Shelves | Fig. # 4 |
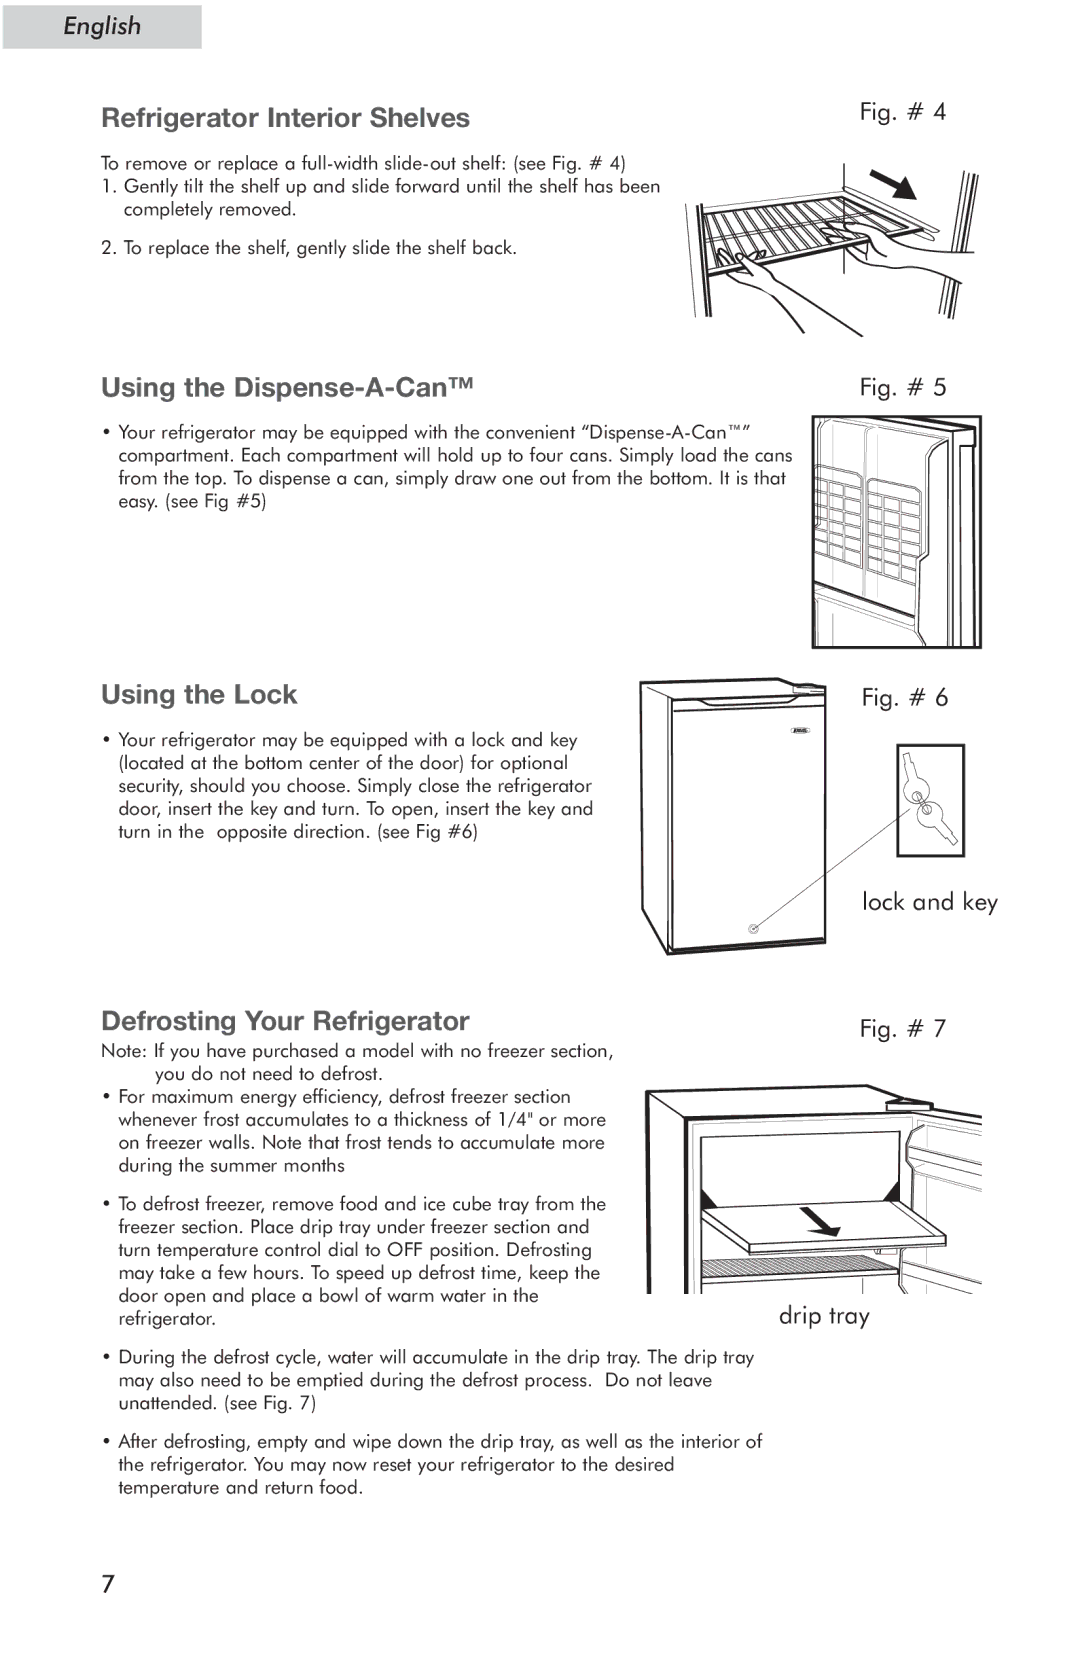
To remove or replace a
1. Gently tilt the shelf up and slide forward until the shelf has been completely removed.
2. To replace the shelf, gently slide the shelf back.
Using the Dispense-A-Can™
•Your refrigerator may be equipped with the convenient
Using the Lock
•Your refrigerator may be equipped with a lock and key (located at the bottom center of the door) for optional security, should you choose. Simply close the refrigerator door, insert the key and turn. To open, insert the key and turn in the opposite direction. (see Fig #6)
Fig. # 5 |
Fig. # 6 |
lock and key
Defrosting Your Refrigerator | Fig. # 7 |
Note: If you have purchased a model with no freezer section, |
|
you do not need to defrost. |
|
• For maximum energy efficiency, defrost freezer section |
|
whenever frost accumulates to a thickness of 1/4" or more |
|
on freezer walls. Note that frost tends to accumulate more |
|
during the summer months |
|
• To defrost freezer, remove food and ice cube tray from the |
|
freezer section. Place drip tray under freezer section and |
|
turn temperature control dial to OFF position. Defrosting |
|
may take a few hours. To speed up defrost time, keep the |
|
door open and place a bowl of warm water in the | drip tray |
refrigerator. |
•During the defrost cycle, water will accumulate in the drip tray. The drip tray may also need to be emptied during the defrost process. Do not leave unattended. (see Fig. 7)
•After defrosting, empty and wipe down the drip tray, as well as the interior of the refrigerator. You may now reset your refrigerator to the desired temperature and return food.
7
