How to change the direction of the drain hoses
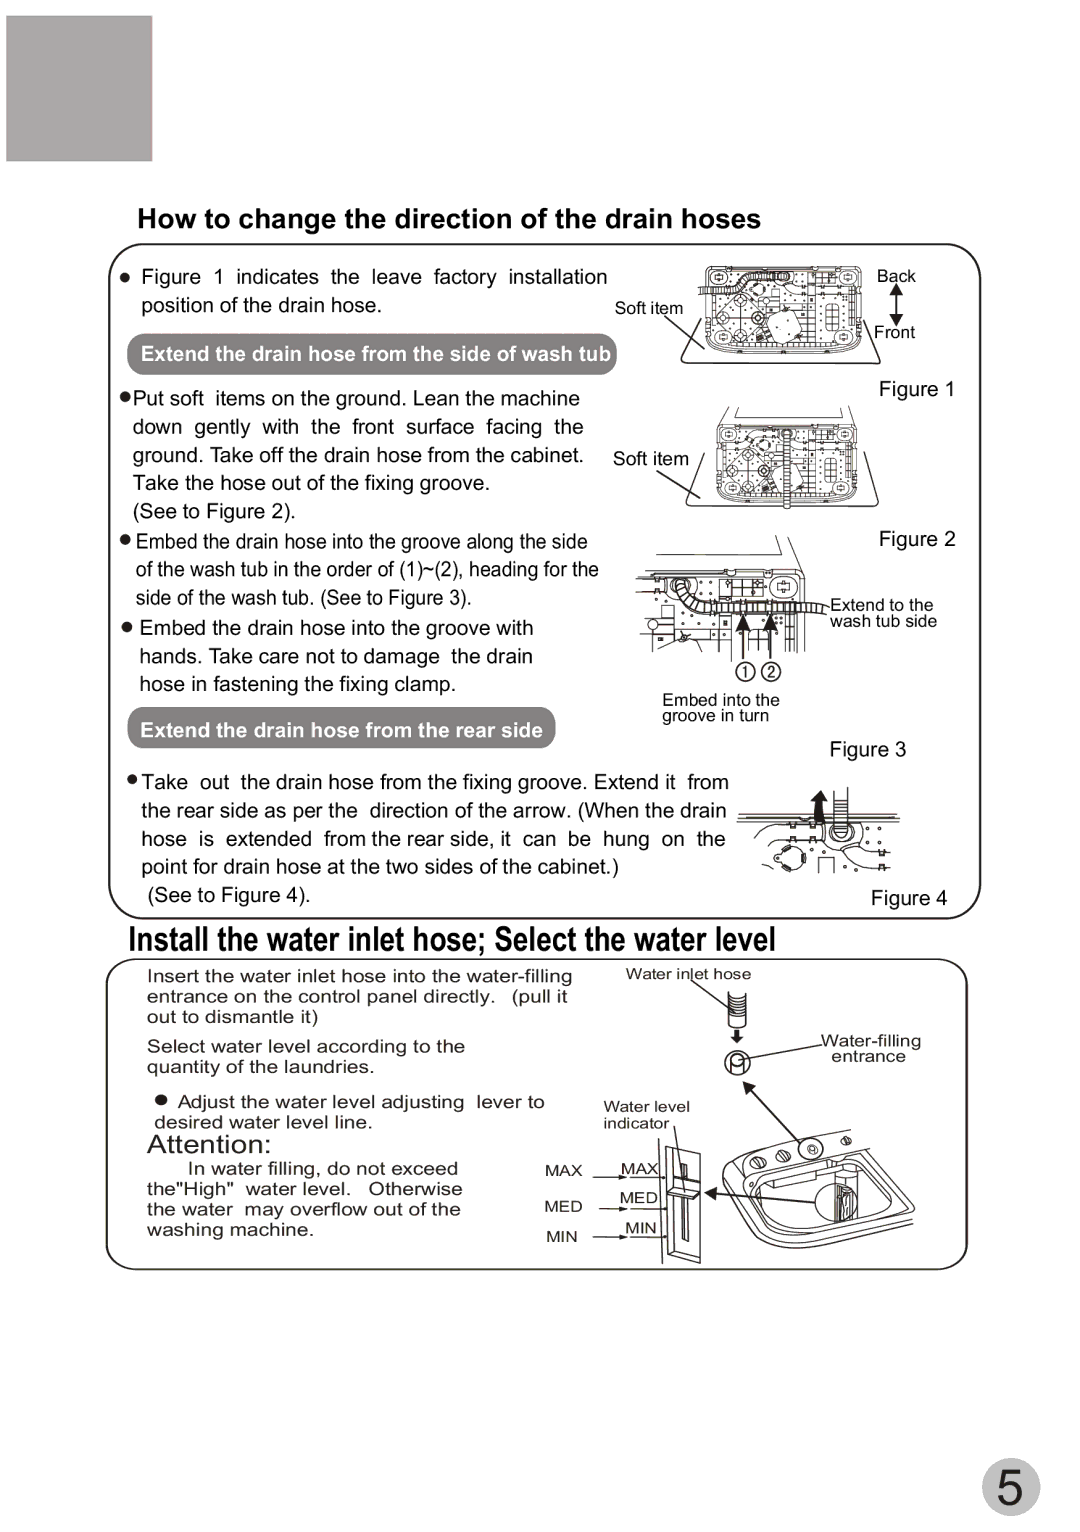
Figure 1 indicates the leave factory installation | Back | |
position of the drain hose. |
| |
Soft item |
| |
| Front | |
Extend the drain hose from the side of wash tub |
|
|
![]() Put soft items on the ground. Lean the machine down gently with the front surface facing the ground. Take off the drain hose from the cabinet. Take the hose out of the fixing groove.
Put soft items on the ground. Lean the machine down gently with the front surface facing the ground. Take off the drain hose from the cabinet. Take the hose out of the fixing groove.
(See to Figure 2).
![]() Embed the drain hose into the groove along the side of the wash tub in the order of (1)~(2), heading for the side of the wash tub. (See to Figure 3).
Embed the drain hose into the groove along the side of the wash tub in the order of (1)~(2), heading for the side of the wash tub. (See to Figure 3).
![]() Embed the drain hose into the groove with hands. Take care not to damage the drain hose in fastening the fixing clamp.
Embed the drain hose into the groove with hands. Take care not to damage the drain hose in fastening the fixing clamp.
Extend the drain hose from the rear side
Figure 1
Soft item
Figure 2
![]()
![]()
![]()
![]()
![]()
![]()
![]()
![]()
![]()
![]()
![]()
![]()
![]()
![]()
![]()
![]()
![]()
![]()
![]()
![]()
![]()
![]() Extend to the
Extend to the ![]()
![]()
![]()
![]()
![]()
![]()
![]()
![]()
![]()
![]() wash tub side
wash tub side
Embed into the groove in turn
Figure 3
Take out the drain hose from the fixing groove. Extend it | from |
|
|
| |||||
the rear side as per the direction of the arrow. (When the drain |
|
|
|
|
|
|
| ||
|
|
|
| ||||||
|
|
|
|
|
|
| |||
|
|
|
|
|
|
| |||
|
|
|
|
|
|
|
|
|
|
|
|
|
|
|
|
|
| ||
hose is extended from the rear side, it can be hung on the |
|
|
|
| |||||
point for drain hose at the two sides of the cabinet.) |
|
|
|
|
|
|
|
|
|
(See to Figure 4). |
|
|
|
|
|
| Figure 4 | ||
Install the water inlet hose; Select the water level
Insert the water inlet hose into the
Select water level according to the quantity of the laundries.
![]() Adjust the water level adjusting lever to desired water level line.
Adjust the water level adjusting lever to desired water level line.
Attention:
In water filling, do not exceed | MAX | |
the"High" | water level. Otherwise |
|
the water | may overflow out of the | MED |
washing machine. | MIN | |
|
| |
Water inlet hose
Water level indicator
MAX
MED
MIN
5
