Usage
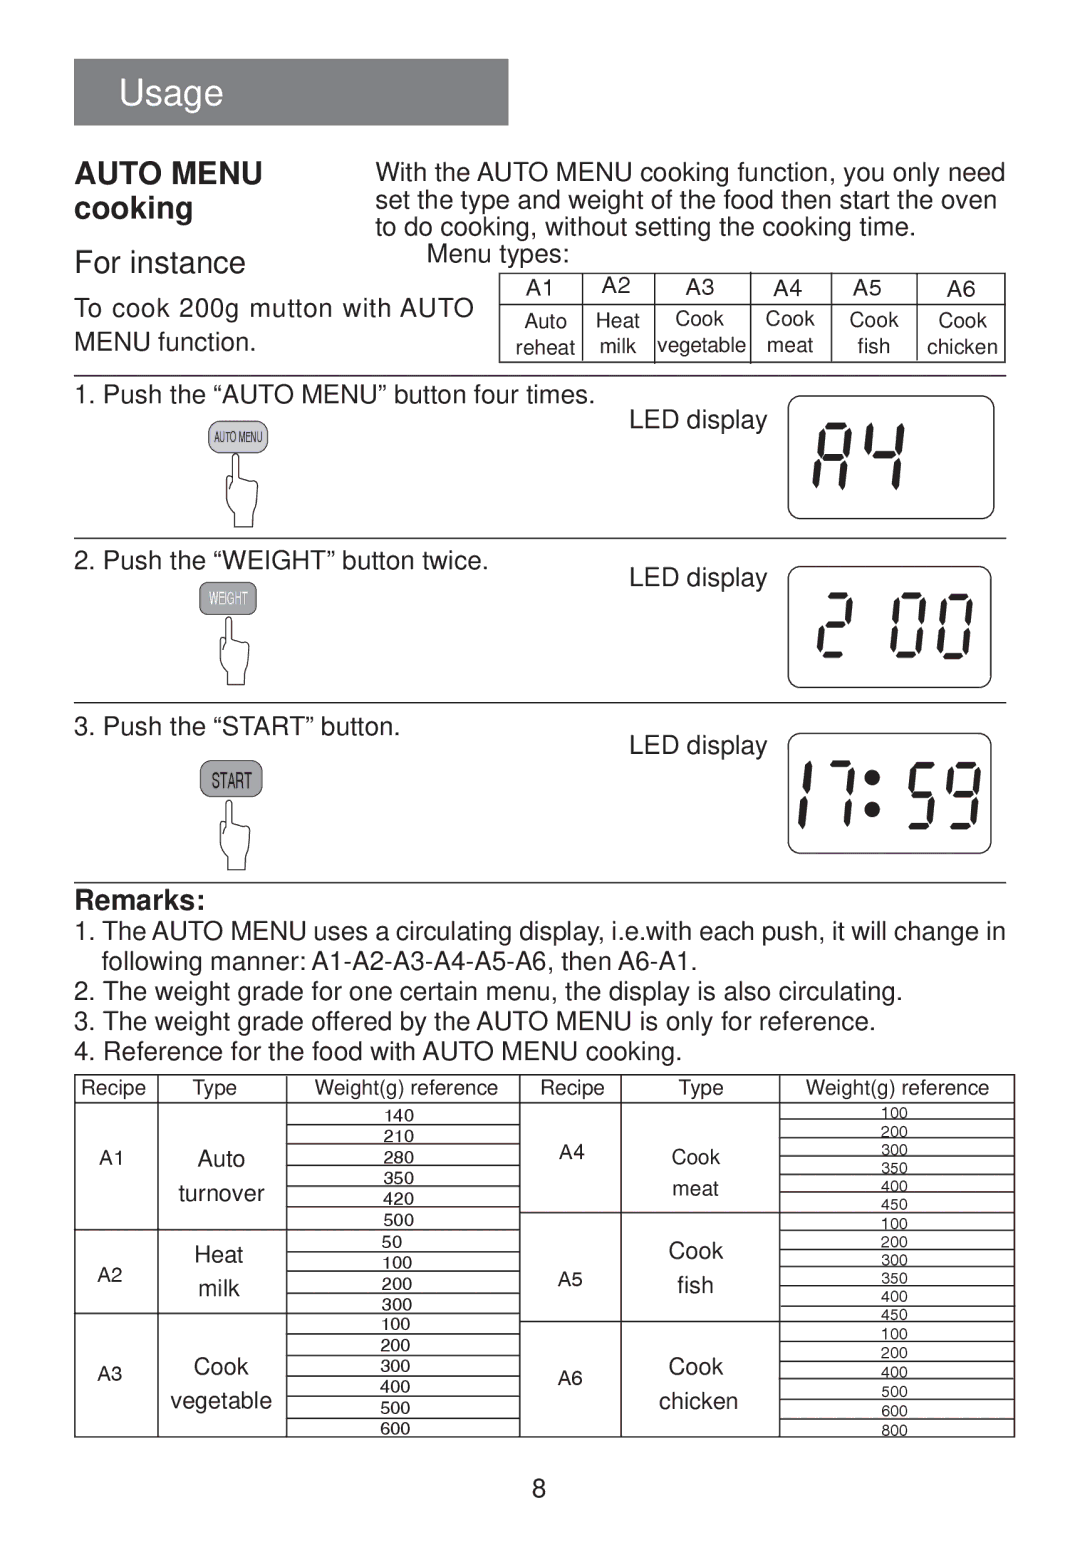
AUTO MENU | With the AUTO MENU cooking function, you only need | |||||||
cooking | set the type and weight of the food then start the oven | |||||||
| to do cooking, without setting the cooking time. |
| ||||||
For instance | Menu types: |
|
|
|
|
| ||
To cook 200g mutton with AUTO | A1 | A2 | A3 | A4 | A5 | A6 | ||
|
|
|
|
|
| |||
Auto | Heat | Cook | Cook | Cook | Cook | |||
MENU function. |
| |||||||
| reheat | milk | vegetable | meat | fish | chicken | ||
|
|
|
|
|
|
|
| |
1. | Push the “AUTO MENU” button four times. | LED display |
| AUTO MENU | |
|
| |
2. | Push the “WEIGHT” button twice. | LED display |
|
|
WEIGHT
3. Push the “START” button.
LED display
START | ● |
![]() ●
●
Remarks:
1.The AUTO MENU uses a circulating display, i.e.with each push, it will change in following manner:
2.The weight grade for one certain menu, the display is also circulating.
3.The weight grade offered by the AUTO MENU is only for reference.
4.Reference for the food with AUTO MENU cooking.
Recipe | Type | Weight(g) reference | Recipe | Type | Weight(g) reference | ||
|
| 140 |
|
|
| 100 | |
|
|
|
|
| 200 | ||
|
| 210 | A4 |
|
| ||
A1 | Auto | Cook | 300 | ||||
280 | |||||||
350 | |||||||
| |||||||
350 |
| ||||||
| turnover |
| meat | 400 | |||
| 420 |
| |||||
|
| 450 | |||||
|
| 500 |
|
|
| ||
|
|
|
|
| 100 | ||
| Heat | 50 |
| Cook | 200 | ||
A2 | 100 | A5 | 300 | ||||
|
| fish | 350 | ||||
milk | 200 | ||||||
| 400 | ||||||
| 300 |
| |||||
|
|
|
|
| 450 | ||
|
| 100 |
|
|
| ||
|
|
|
|
| 100 | ||
|
| 200 |
|
|
| ||
| Cook |
| Cook |
| 200 | ||
A3 | 300 |
| |||||
A6 | 400 | ||||||
vegetable | 400 | chicken | 500 | ||||
|
| ||||||
| 500 |
| |||||
|
| 600 | |||||
|
| 600 |
|
|
| 800 | |
8
