Washing sequence
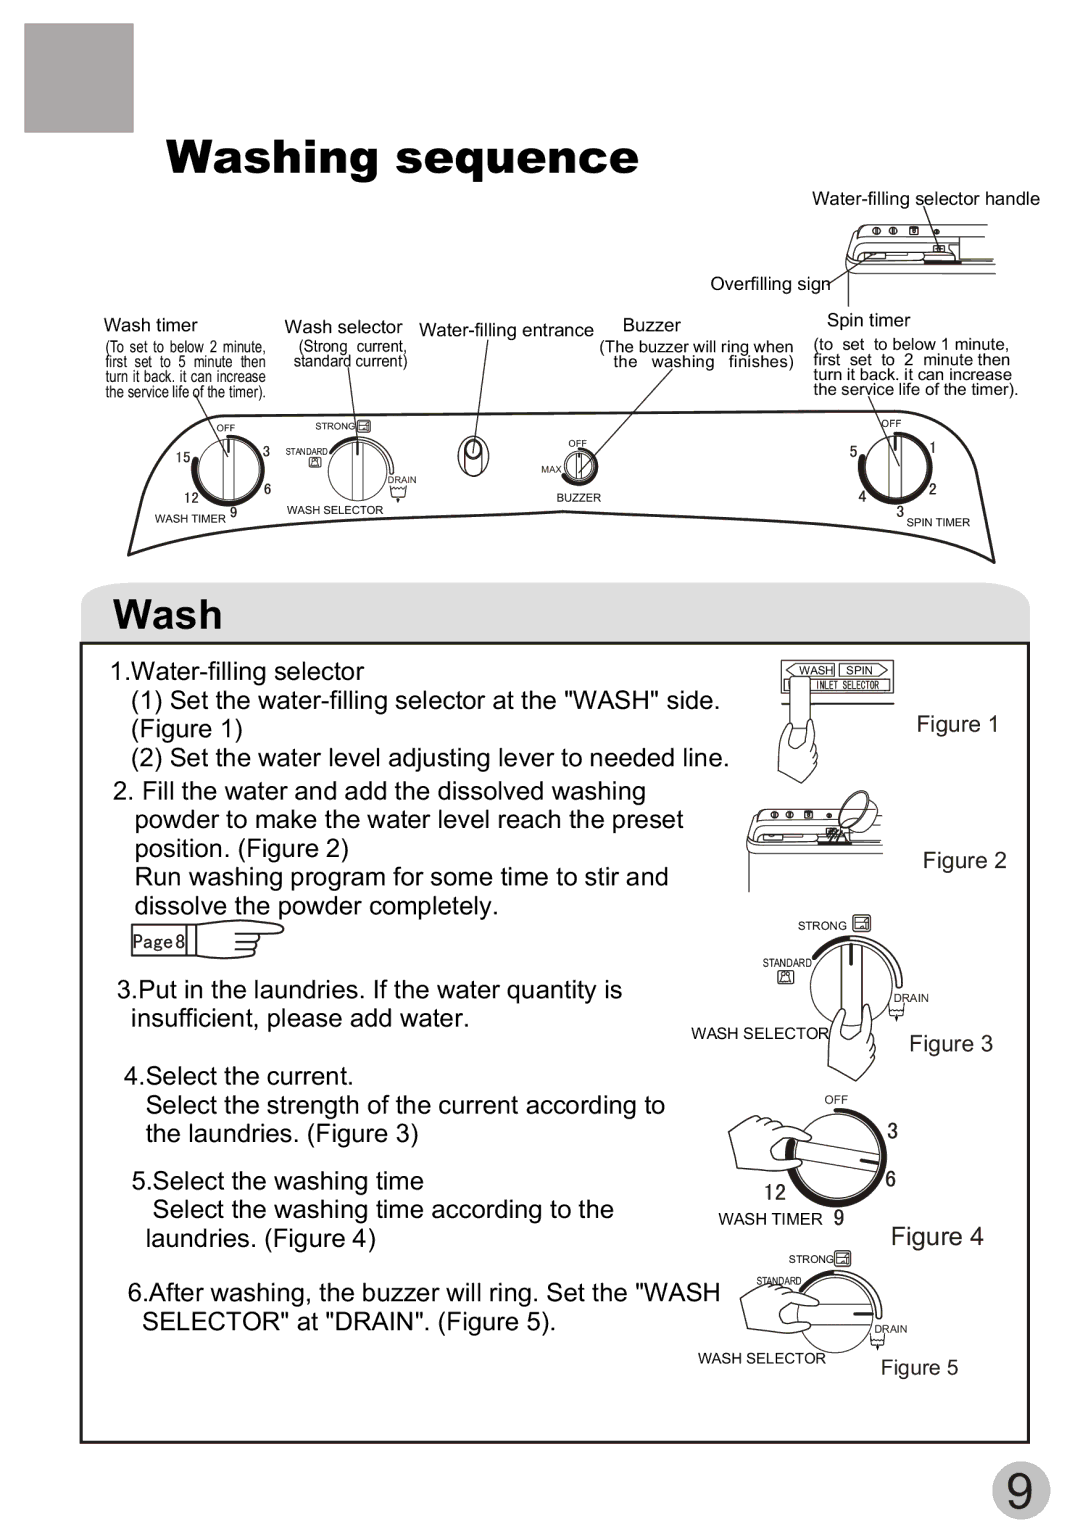
Wash timer
(To set to below 2 minute, first set to 5 minute then turn it back. it can increase the service life of the timer).
OFF
WASH TIMER
|
| |||||||
|
|
|
|
|
| |||
| Overfilling sign |
|
|
|
|
| ||
|
|
|
|
|
| |||
|
|
|
|
|
| |||
|
|
|
|
|
| |||
|
|
|
|
|
|
|
| |
Wash selector |
| Spin timer | ||||||
(to set to below 1 minute, | ||||||||
(Strong current, | (The buzzer will ring when | |||||||
standard current) | the washing finishes) | first set to 2 minute then | ||||||
|
| turn it back. it can increase | ||||||
the service life of the timer).
STRONG | OFF |
STANDARD | OFF |
| |
| MAX |
| DRAIN |
| BUZZER |
WASH SELECTOR |
|
| SPIN TIMER |
Wash
(1)Set the
(2)Set the water level adjusting lever to needed line.
2.Fill the water and add the dissolved washing powder to make the water level reach the preset position. (Figure 2)
Run washing program for some time to stir and dissolve the powder completely.
![]() WASH
WASH![]()
![]() SPIN
SPIN ![]()
STRONG ![]()
![]()
![]()
STANDARD
Figure 1
Figure 2
3.Put in the laundries. If the water quantity is insufficient, please add water.
WASH SELECTOR
DRAIN
Figure 3
4.Select the current.
Select the strength of the current according to the laundries. (Figure 3)
5.Select the washing time
Select the washing time according to the laundries. (Figure 4)
OFF
WASH TIMER
Figure 4
6.After washing, the buzzer will ring. Set the "WASH SELECTOR" at "DRAIN". (Figure 5).
STRONG![]()
![]()
![]()
![]()
STANDARD
![]() DRAIN
DRAIN
WASH SELECTOR
Figure 5
9
