
64695N specifications
The Hamilton Beach 64695N is a versatile stand mixer that epitomizes convenience and efficiency for both amateur bakers and seasoned chefs. This stylish kitchen appliance combines a powerful motor with a range of features designed to make mixing, whipping, and kneading a breeze.One of the standout characteristics of the Hamilton Beach 64695N is its robust 300-watt motor, which provides the necessary strength to handle a variety of tasks, from mixing cake batter to kneading dough for bread. The mixer offers a total of 7 speeds, allowing users to customize their mixing process for different recipes. The low-speed options are ideal for gradual mixing and reducing splatter, while the higher speeds are perfect for whipping egg whites or cream efficiently.
A significant feature of this stand mixer is its unique tilt-up head, which provides easy access to the mixing bowl. This design not only enhances convenience but also facilitates the effortless addition of ingredients during the mixing process. The included stainless steel mixing bowl has a generous capacity of 4 quarts, making it suitable for both small and large batches.
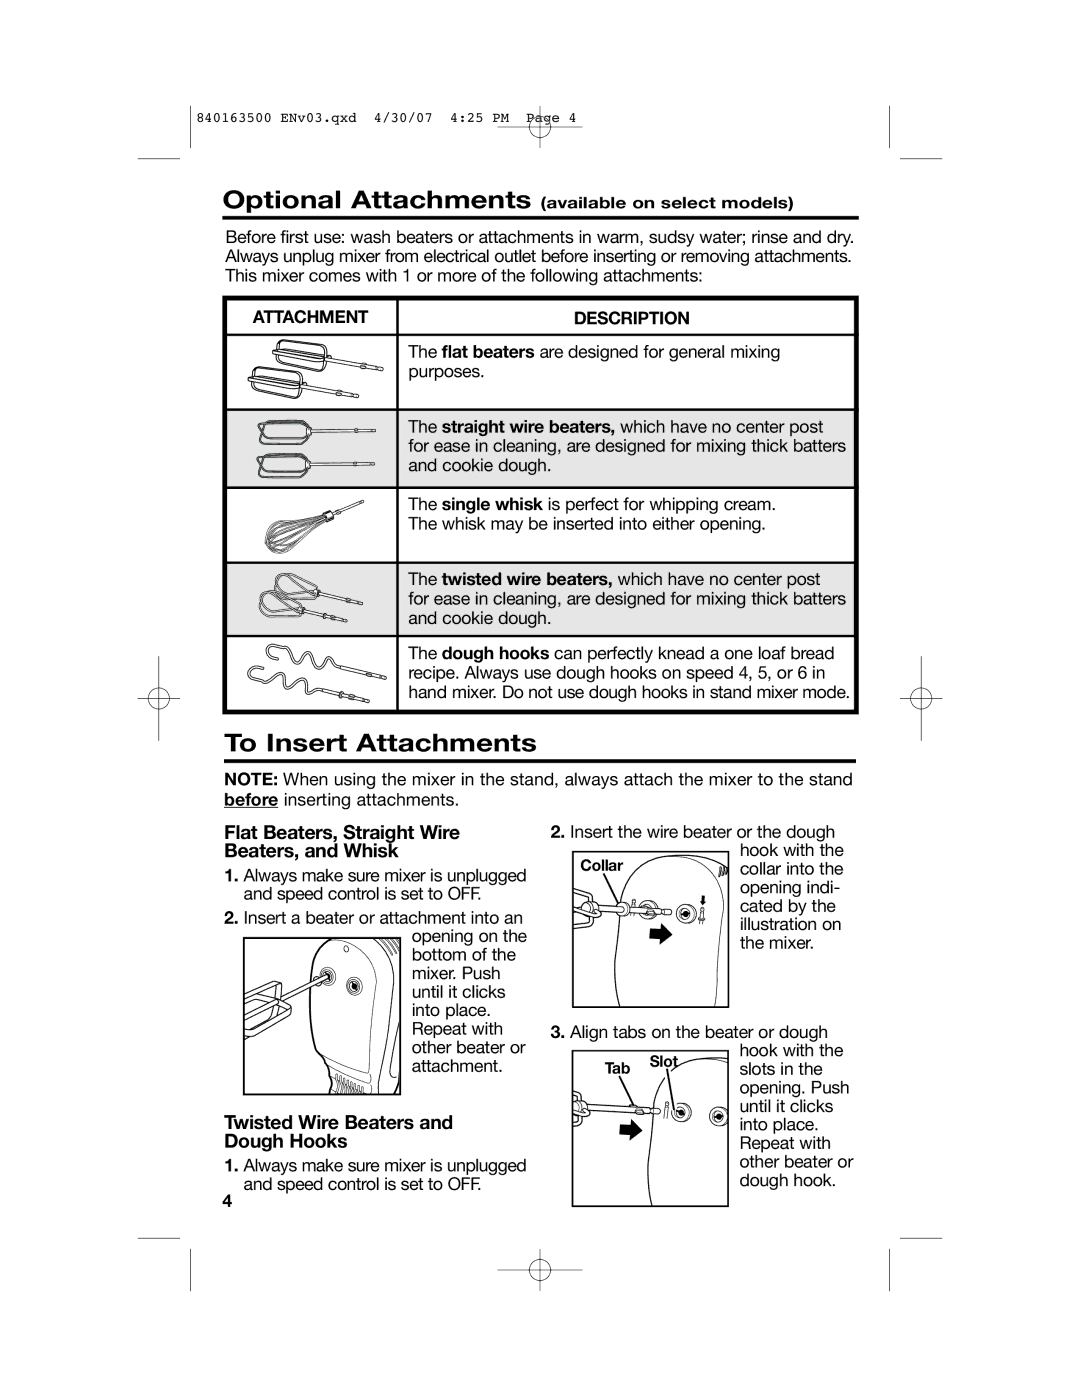
The Hamilton Beach 64695N also comes equipped with multiple mixing attachments to tackle various culinary tasks. These include traditional beaters, dough hooks, and a whisk. Each attachment is designed to perform specific functions, ensuring that users can achieve the desired consistency for their mixtures.
In terms of design, this stand mixer is as aesthetically pleasing as it is functional. It features a sleek and modern look, available in several color options to complement any kitchen décor. Additionally, the mixer’s base is designed for stability, preventing it from moving around during operation.
The Hamilton Beach 64695N incorporates advanced safety features, such as a safety locking mechanism that ensures the mixer does not operate unless the bowl is securely locked in place. This thoughtful design enhances user safety and confidence while cooking.
In summary, the Hamilton Beach 64695N stand mixer offers an impressive combination of power, versatility, and user-friendly features. With its powerful motor, multiple speed settings, and a variety of attachments, it is an excellent addition to any kitchen, simplifying the baking process and allowing users to explore their culinary creativity. Whether you are making cookies, bread, or cakes, this mixer delivers reliable performance every time.