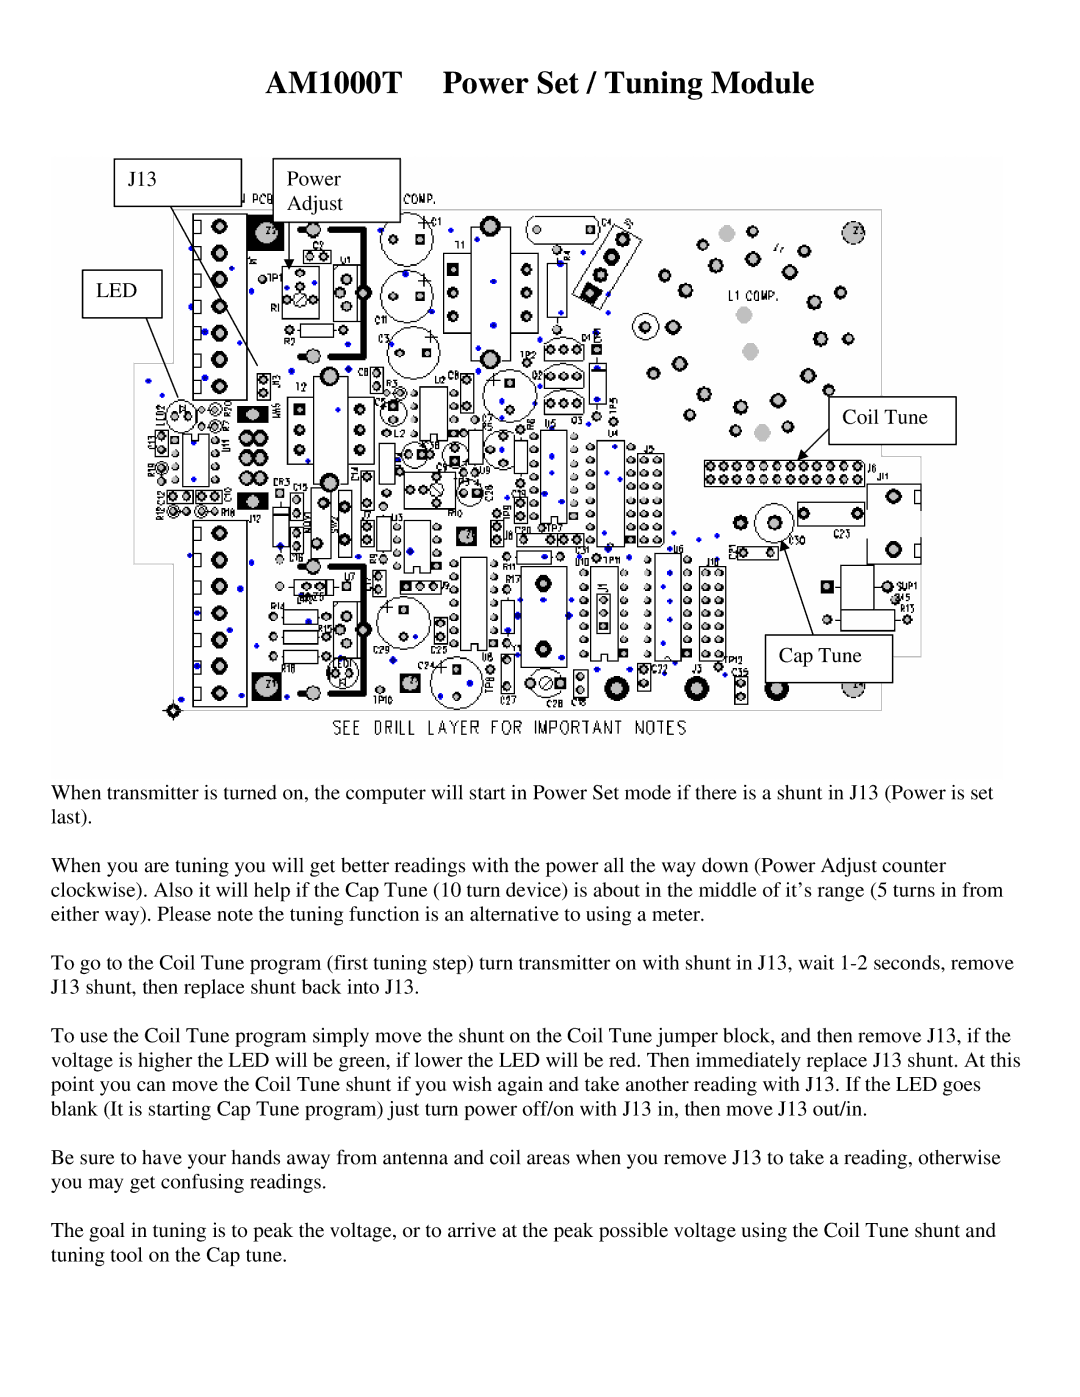
AM1000T Power Set / Tuning Module
J13
LED
Power
Adjust
Coil Tune
Cap Tune
When transmitter is turned on, the computer will start in Power Set mode if there is a shunt in J13 (Power is set last).
When you are tuning you will get better readings with the power all the way down (Power Adjust counter clockwise). Also it will help if the Cap Tune (10 turn device) is about in the middle of it’s range (5 turns in from either way). Please note the tuning function is an alternative to using a meter.
To go to the Coil Tune program (first tuning step) turn transmitter on with shunt in J13, wait
To use the Coil Tune program simply move the shunt on the Coil Tune jumper block, and then remove J13, if the voltage is higher the LED will be green, if lower the LED will be red. Then immediately replace J13 shunt. At this point you can move the Coil Tune shunt if you wish again and take another reading with J13. If the LED goes blank (It is starting Cap Tune program) just turn power off/on with J13 in, then move J13 out/in.
Be sure to have your hands away from antenna and coil areas when you remove J13 to take a reading, otherwise you may get confusing readings.
The goal in tuning is to peak the voltage, or to arrive at the peak possible voltage using the Coil Tune shunt and tuning tool on the Cap tune.