Attaching the
Fan Blades
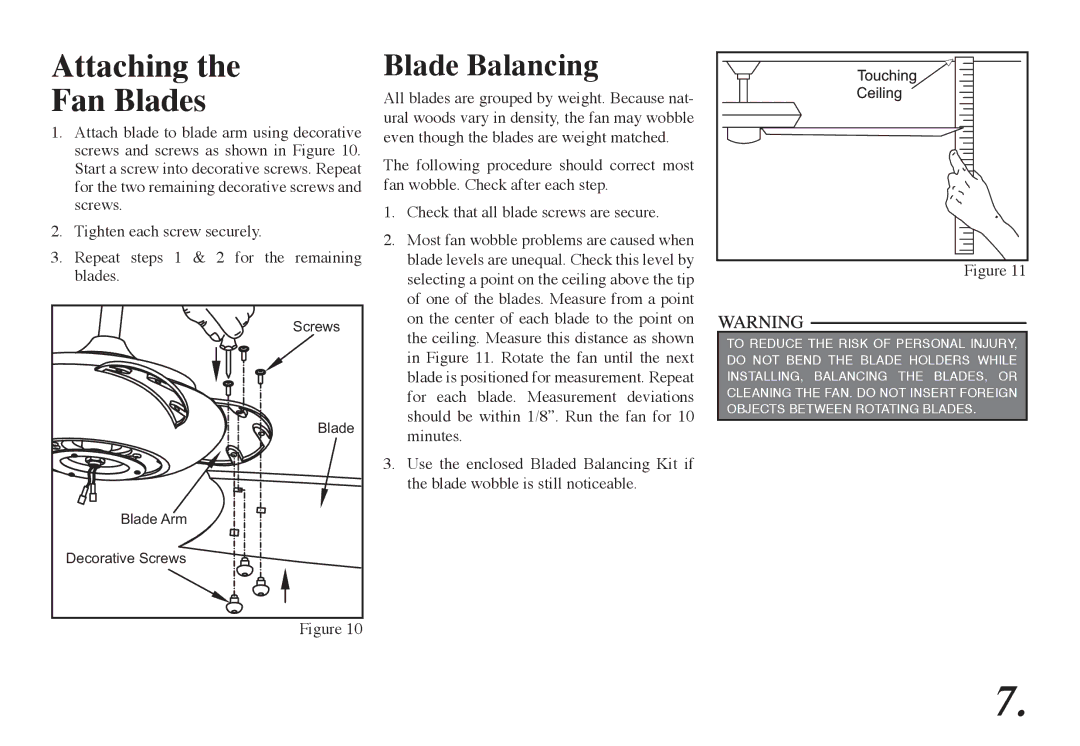
1.Attach blade to blade arm using decorative screws and screws as shown in Figure 10. Start a screw into decorative screws. Repeat for the two remaining decorative screws and screws.
2.Tighten each screw securely.
3.Repeat steps 1 & 2 for the remaining blades.
Screws |
Blade |
Blade Arm |
Decorative Screws |
Figure 10 |
Blade Balancing
All blades are grouped by weight. Because nat- ural woods vary in density, the fan may wobble even though the blades are weight matched.
The following procedure should correct most fan wobble. Check after each step.
1.Check that all blade screws are secure.
2.Most fan wobble problems are caused when blade levels are unequal. Check this level by selecting a point on the ceiling above the tip of one of the blades. Measure from a point on the center of each blade to the point on the ceiling. Measure this distance as shown in Figure 11. Rotate the fan until the next blade is positioned for measurement. Repeat for each blade. Measurement deviations should be within 1/8”. Run the fan for 10 minutes.
3.Use the enclosed Bladed Balancing Kit if the blade wobble is still noticeable.
Figure 11 |
TO REDUCE THE RISK OF PERSONAL INJURY, DO NOT BEND THE BLADE HOLDERS WHILE INSTALLING, BALANCING THE BLADES, OR CLEANING THE FAN. DO NOT INSERT FOREIGN OBJECTS BETWEEN ROTATING BLADES.
7.
