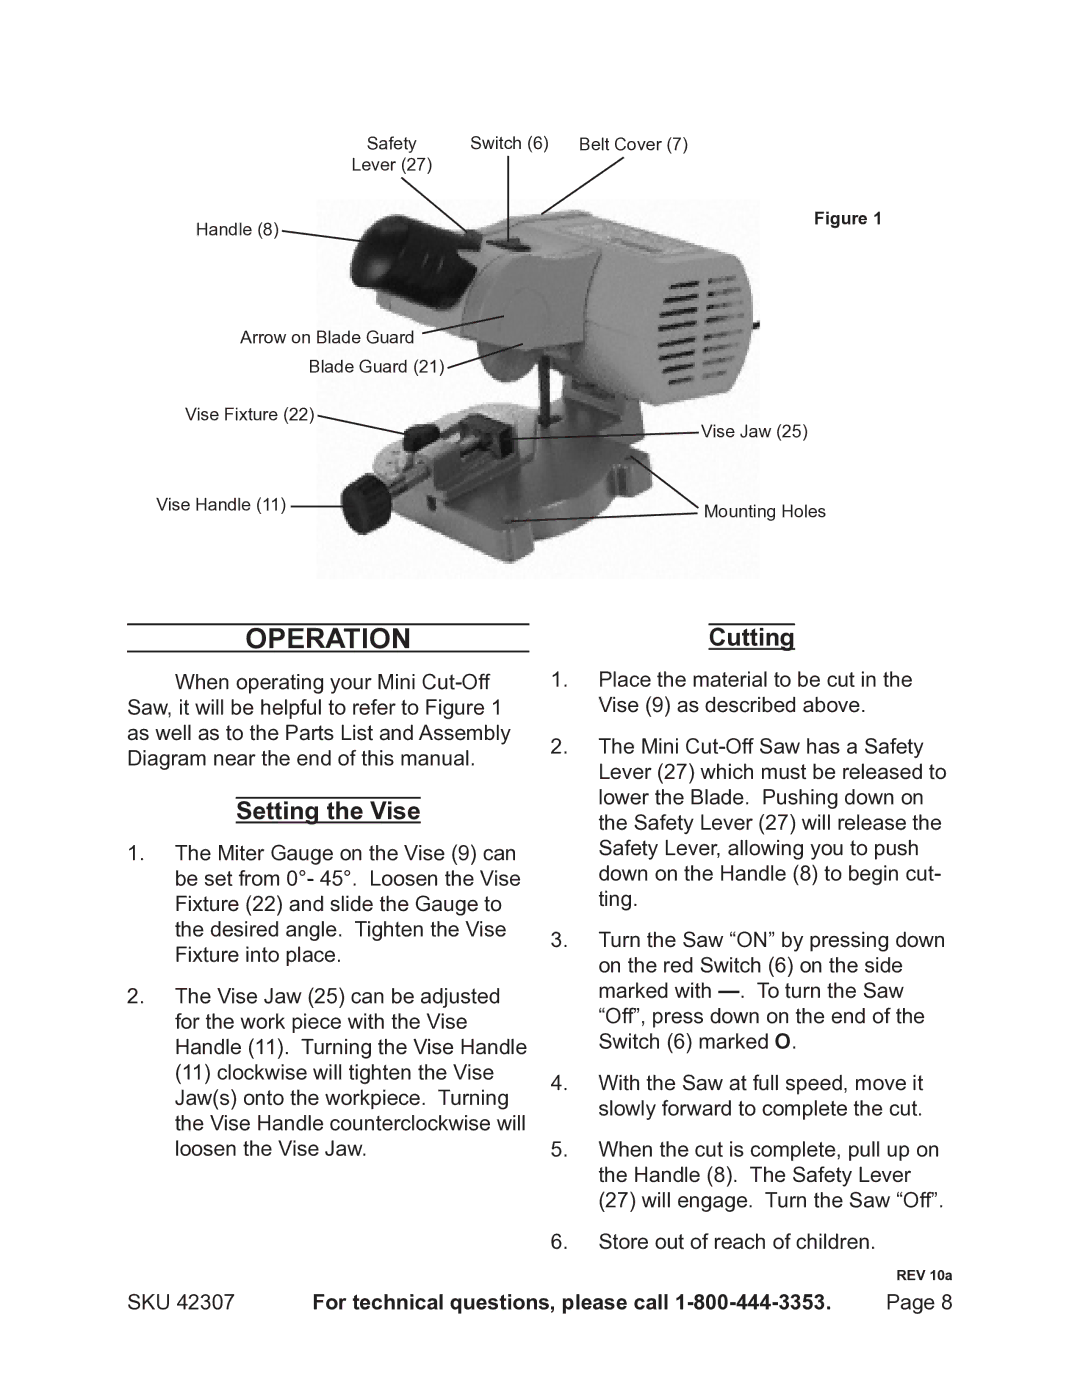
Safety | Switch (6) | Belt Cover (7) | |
Lever (27) |
|
| Figure 1 |
Handle (8) |
|
| |
|
|
| |
Arrow on Blade Guard
Blade Guard (21)
Vise Fixture (22) | Vise Jaw (25) | |
|
| |
Vise Handle (11) |
| Mounting Holes |
| ||
|
| |
OperationCutting
When operating your Mini
Setting the Vise
1.The Miter Gauge on the Vise (9) can be set from 0°- 45°. Loosen the Vise Fixture (22) and slide the Gauge to the desired angle. Tighten the Vise Fixture into place.
2.The Vise Jaw (25) can be adjusted for the work piece with the Vise Handle (11). Turning the Vise Handle (11) clockwise will tighten the Vise Jaw(s) onto the workpiece. Turning the Vise Handle counterclockwise will loosen the Vise Jaw.
1.Place the material to be cut in the Vise (9) as described above.
2.The Mini
3.Turn the Saw “ON” by pressing down on the red Switch (6) on the side marked with
4.With the Saw at full speed, move it slowly forward to complete the cut.
5.When the cut is complete, pull up on the Handle (8). The Safety Lever
(27)will engage. Turn the Saw “Off”.
6.Store out of reach of children.
REV 10a
SKU 42307 | For technical questions, please call | Page 8 |