4.Pull the carriage all the way forward with the Handle (65).
5.Turn on the saw by pressing down on the
6.When the Saw Blade comes to full speed, bring the Saw Blade down and begin cutting slowly down through the stock until the Saw Blade is completely lowered. Then begin pushing the Handle back toward the fence.
Caution: Whenever performing a slide cut, the cut must be done from front to back. Otherwise, the workpiece may be forced out of the clamps and kick back. Kick back of the workpiece could cause injury.
7.When the cut is finished, release the Switch (70) trigger button.
Wait for the Saw Blade to stop turning before reaching for the cut stock.
Replacing the Saw Blade
1.Unplug the Power Cord Plug from the electrical outlet.
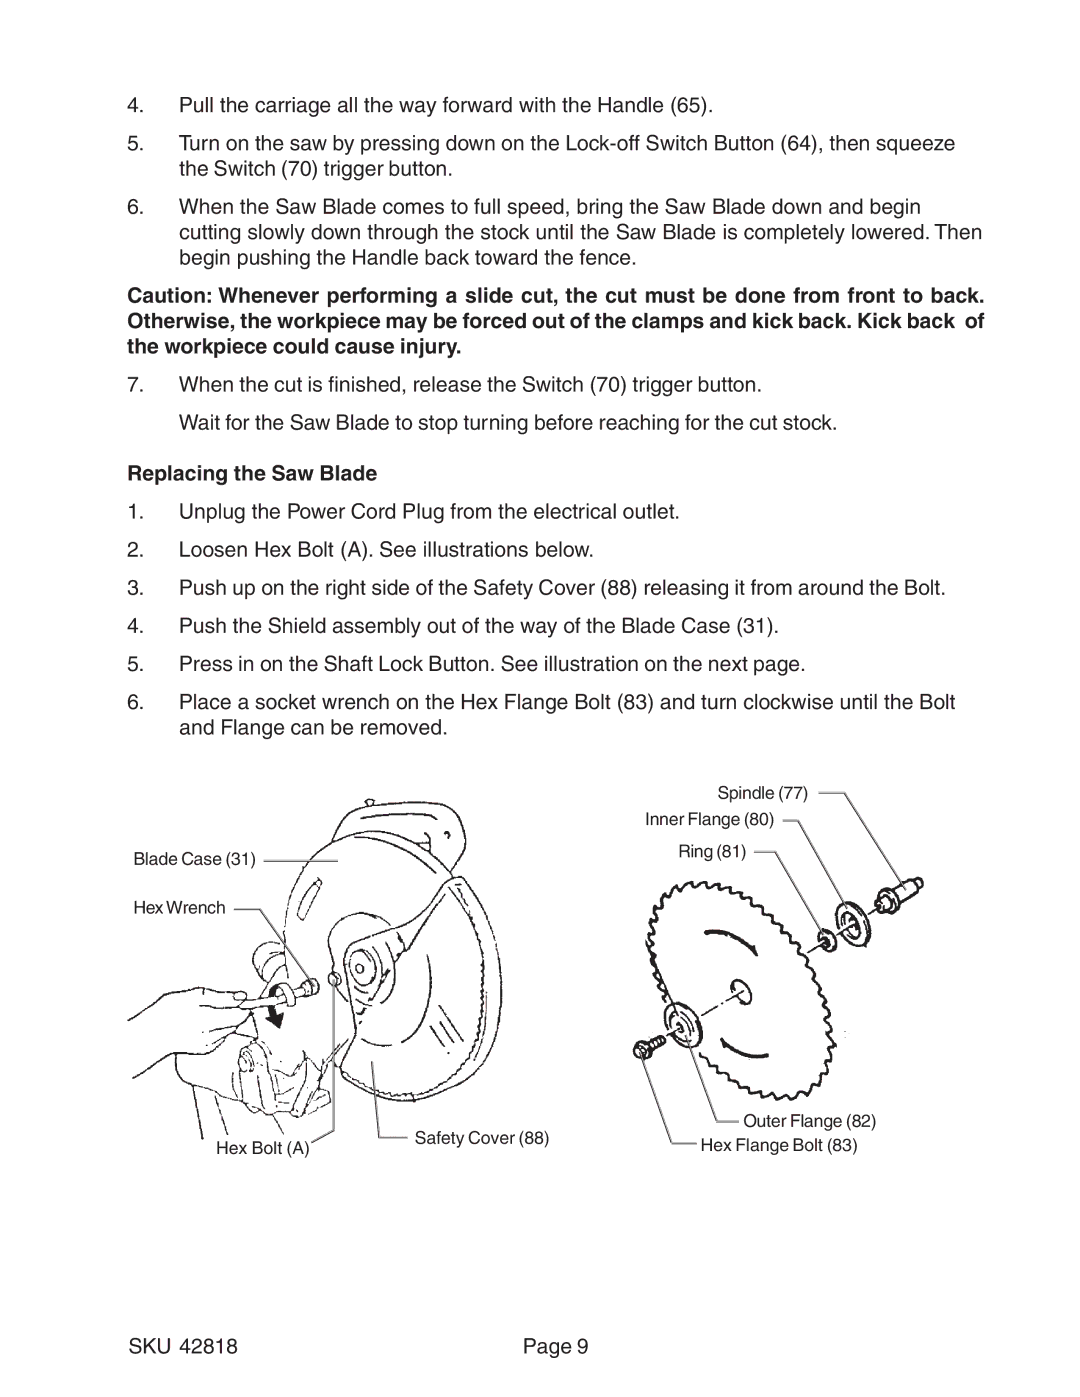
2.Loosen Hex Bolt (A). See illustrations below.
3.Push up on the right side of the Safety Cover (88) releasing it from around the Bolt.
4.Push the Shield assembly out of the way of the Blade Case (31).
5.Press in on the Shaft Lock Button. See illustration on the next page.
6.Place a socket wrench on the Hex Flange Bolt (83) and turn clockwise until the Bolt and Flange can be removed.
Spindle (77)
Inner Flange (80)
Blade Case (31) |
| Ring (81) | ||
|
| |||
Hex Wrench |
|
|
|
|
|
|
|
| |
|
|
| Safety Cover (88) |
|
|
| Outer Flange (82) |
|
|
|
|
|
| ||
Hex Bolt (A) |
|
|
| Hex Flange Bolt (83) | |||
|
|
| |||||
|
|
|
| ||||
SKU 42818 | Page 9 |