Adjusting the Feed Wheel Return Tension Spring
CAUTION! Wear an
1.Move the Chuck to its uppermost position.
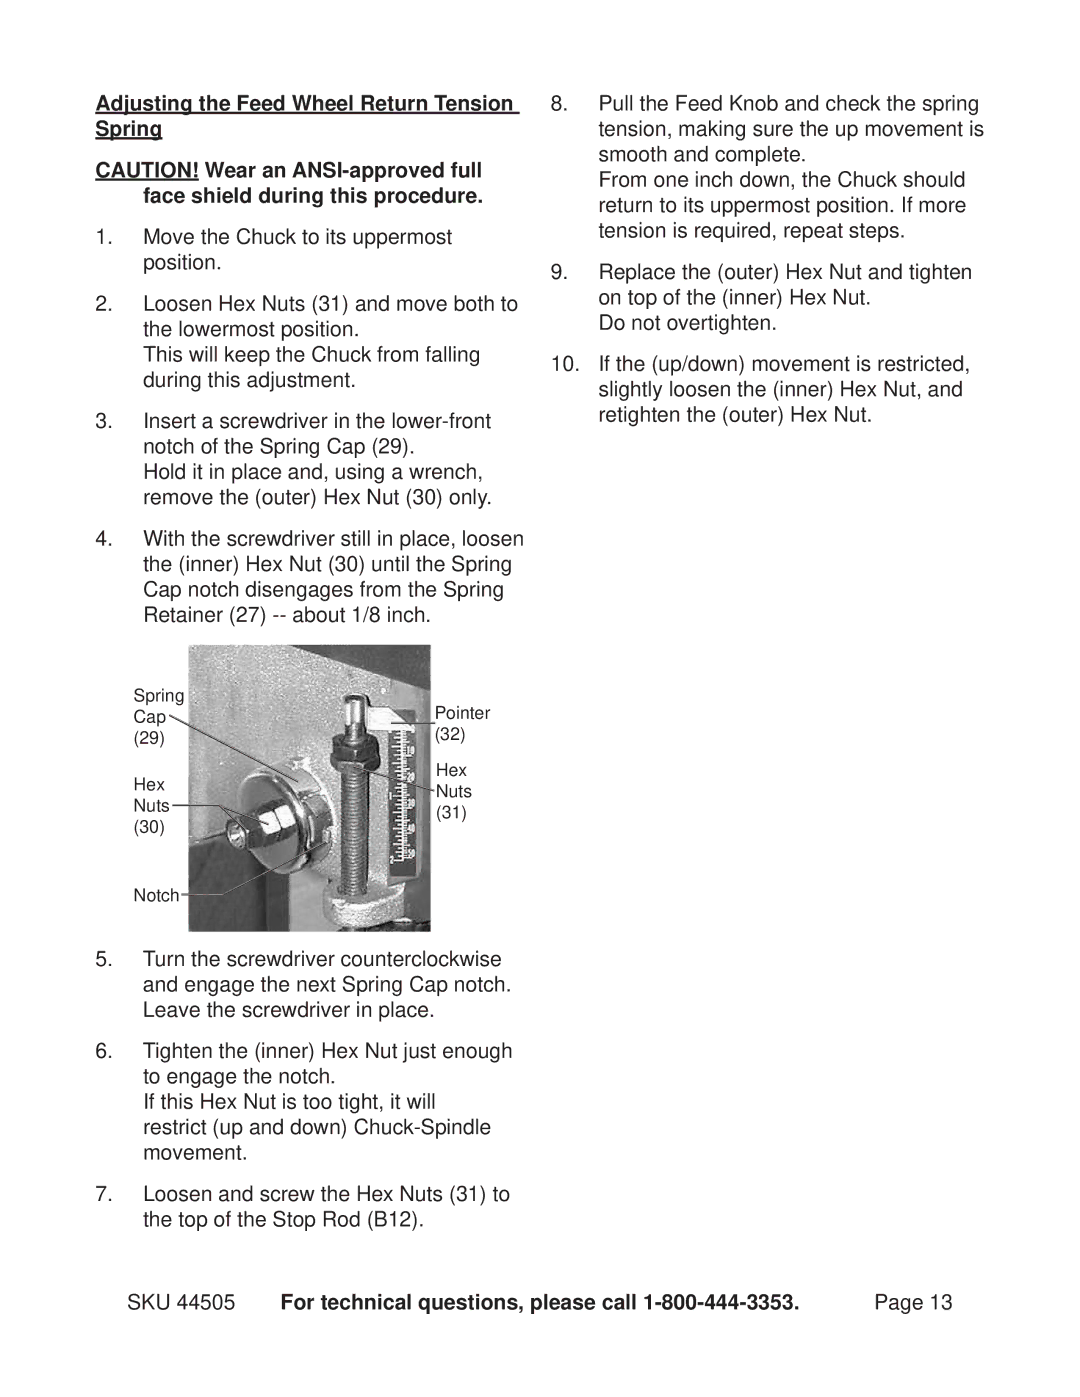
2.Loosen Hex Nuts (31) and move both to the lowermost position.
This will keep the Chuck from falling during this adjustment.
3.Insert a screwdriver in the
Hold it in place and, using a wrench, remove the (outer) Hex Nut (30) only.
4.With the screwdriver still in place, loosen the (inner) Hex Nut (30) until the Spring Cap notch disengages from the Spring Retainer (27)
8.Pull the Feed Knob and check the spring tension, making sure the up movement is smooth and complete.
From one inch down, the Chuck should return to its uppermost position. If more tension is required, repeat steps.
9.Replace the (outer) Hex Nut and tighten on top of the (inner) Hex Nut.
Do not overtighten.
10.If the (up/down) movement is restricted, slightly loosen the (inner) Hex Nut, and retighten the (outer) Hex Nut.
Spring |
| Pointer | |
Cap |
| ||
(29) |
| (32) | |
Hex |
| Hex | |
| Nuts | ||
Nuts |
| ||
(31) | |||
(30) | |||
|
| ||
Notch |
|
| |
5.Turn the screwdriver counterclockwise and engage the next Spring Cap notch. Leave the screwdriver in place.
6.Tighten the (inner) Hex Nut just enough to engage the notch.
If this Hex Nut is too tight, it will restrict (up and down)
7.Loosen and screw the Hex Nuts (31) to the top of the Stop Rod (B12).
SKU 44505 | For technical questions, please call | Page 13 |
