Operation
Installing a Chisel. | Figure 1 |
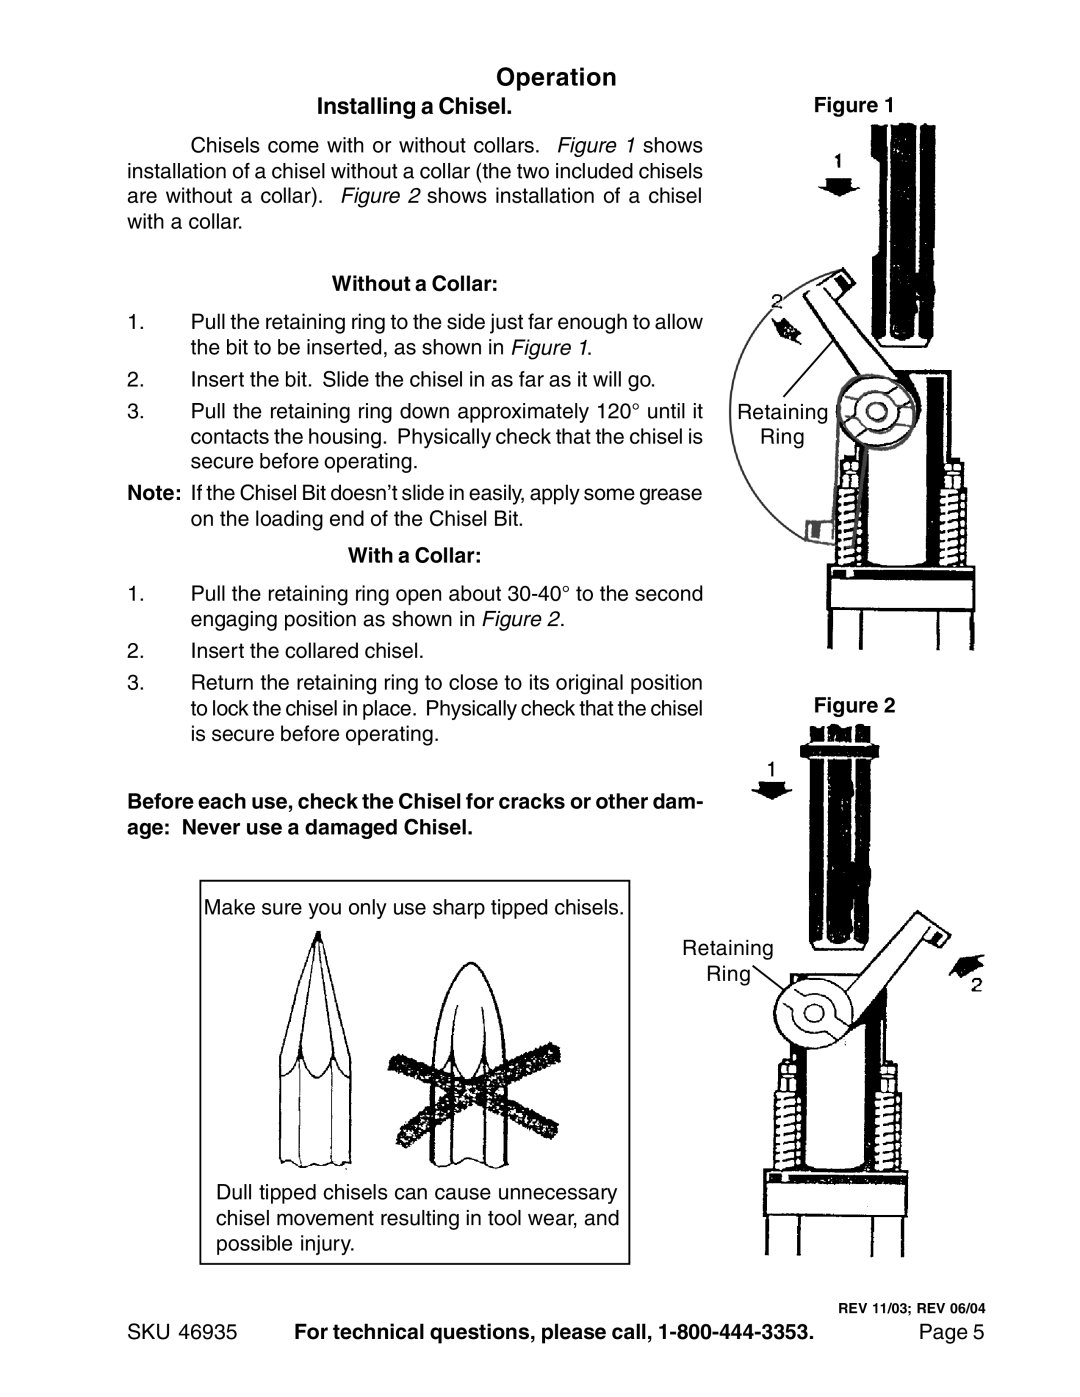
Chisels come with or without collars. Figure 1 shows installation of a chisel without a collar (the two included chisels are without a collar). Figure 2 shows installation of a chisel with a collar.
Without a Collar:
1.Pull the retaining ring to the side just far enough to allow the bit to be inserted, as shown in Figure 1.
2.Insert the bit. Slide the chisel in as far as it will go.
3.Pull the retaining ring down approximately 120° until it contacts the housing. Physically check that the chisel is secure before operating.
Note: If the Chisel Bit doesn’t slide in easily, apply some grease on the loading end of the Chisel Bit.
With a Collar:
1.Pull the retaining ring open about
2.Insert the collared chisel.
3.Return the retaining ring to close to its original position to lock the chisel in place. Physically check that the chisel is secure before operating.
Before each use, check the Chisel for cracks or other dam- age: Never use a damaged Chisel.
Retaining
Ring
Figure 2
Make sure you only use sharp tipped chisels.
Retaining
Ring![]()
Dull tipped chisels can cause unnecessary chisel movement resulting in tool wear, and possible injury.
REV 11/03; REV 06/04
SKU 46935 | For technical questions, please call, | Page 5 |
